Archive for the ‘wayne yoshida’ Tag

A cubicle neighbor – brainwashed
Mind Share, Customer Awareness, Top of Mind Whatever You Call It – Who Knows You?
Like a lot of folks, I work in a cubicle office space. One of my cubicle neighbors has an irritating habit of humming, whistling or singing jingles and quoting commercials about athletic shoes, junk food restaurants and car dealerships. This guy is completely brainwashed with these messages, and consciously or unconsciously, spreads his junk knowledge to others around him. I usually tune this audible garbage out by focusing on my work, or putting my USB headset on.
By the way, sometimes I have music on, sometimes I am on a conference call or net meeting, but often I just have the headset on without listening to anything, so people won’t bother me. If you are in a similar noisy situation, you may want to try this “do not disturb” technique. The “commercial guy” is a little less irritating than “the nose whistler,” but that is another story . . . .
In any case, as I tried to ignore this audio pollution and tried to focus on editing a CAD model, I thought about this from a job search point of view. Companies and advertising agencies love people like my office space neighbor: Their messages are always at the top their minds, and their brand images and marketing messages are getting through – and are broadcast to potential customers.
If you are new to the idea of personal branding, consider how long and how much money it took Nike, McDonald’s, Burger King, Toyota, BMW and other companies to establish and achieve their brand recognition. Corporations have money, agencies and time to create, maintain and protect their branding. For the rest of us, our resource is time. And we can leverage the power of LinkedIn to broadcast our personal brand.
Putting this in the form of a question from a hiring manager, recruiter or company headhunter, their thoughts could go like this:
“Who is the best person in my network that can become our new (fill in the blank with a job function or title)?”
The interesting part about this question is that the person selected may or may not be the best qualified or best experienced person in their network. It is more likely to be the very first person they can think of.
And this is where we want to be: All of us should do everything possible to earn that same place in everyone’s head. We want to be the first person people think of when they are seeking advice or trying to fill an opportunity.
While you don’t necessarily need to make up a jingle about yourself, your personal brand must communicate who you are, what you do and why you do what you do in simple, easily-understandable language. As you craft this message, always think about this from the viewer’s point of view – your “elevator speech” is not for you, it is for someone looking for your skills and expertise.
The next step is to edit your personal branding message into language your grandma can understand. You must be able to answer the famous questions, “Why should I hire you?” and “What is it you do here?”
Creating and maintaining your personal brand takes time, and the messages must be consistent and positive. Why not start today and optimize your LinkedIn profile summary with a simple, powerful and memorable personal branding message?
For more posts like this, visit my LinkedIn Publish page – and connect with me on LinkedIn – just remember to personalize your request so I know how you found me.
Celebrating 10 Consecutive Years of Winning
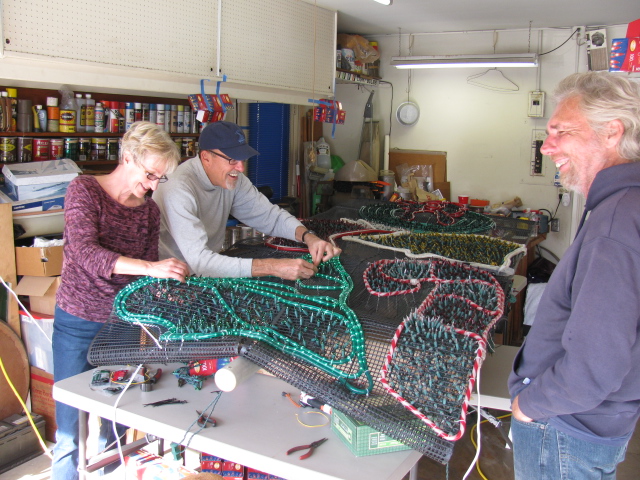
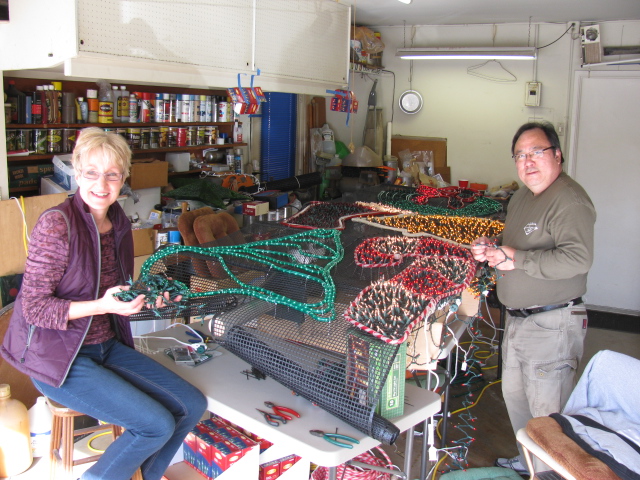
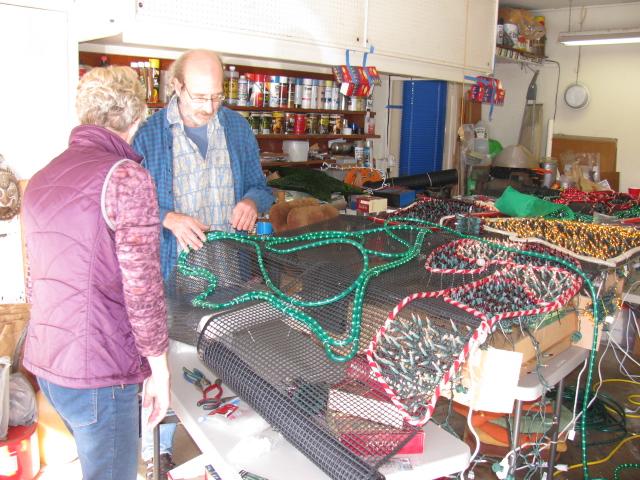
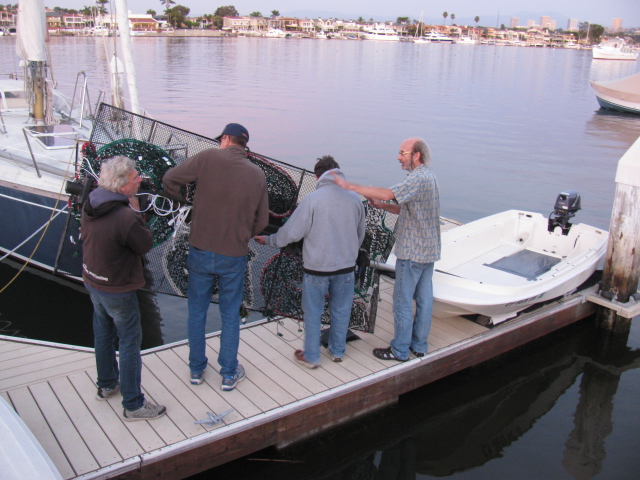
Peter Barbour, a fellow ham radio operator and volunteer of the Huntington Beach Fire Department RACES group, has been sharing his holiday cheer and enthusiasm of the Christmas season by decorating his sailboat and entering the Newport Beach (CA) Christmas Boat Parade. As this is being written, winners for 2014 have not been announced, so stay tuned and cheer for D25!
Peter combines his computer programming and hardware-hacking skills with his knowledge of sailing that result in a series of award-winning and crowd-pleasing displays.
I am proud to be one of Peter’s helpers in constructing some of his award-winning entries.
2014 marks Peter’s tenth entry and it continues the D25 tradition of “more is better.”
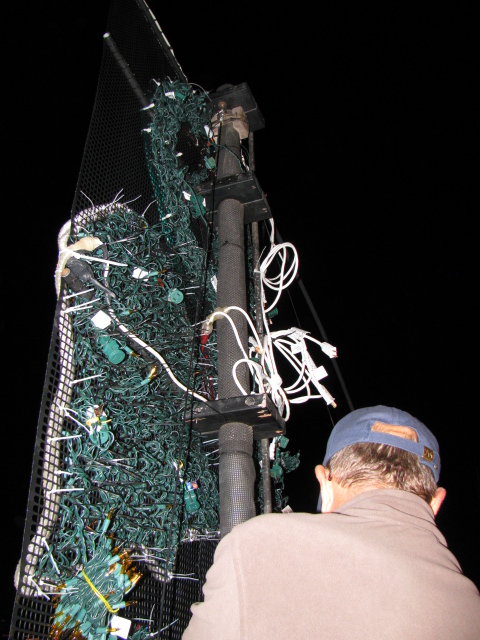
Here are some pictures of D25 under construction:


Where is D25 Right Now?
D25 is equipped with an Amateur Radio tracking system called APRS. Click here to see D25’s real-time location and map.
For more information on ham radio APRS, the Automatic Packet Reporting System, click here.
D25’s Records
D25 2004: 2nd Place Best Use of Lights and Animation
Theme: Santa’s Sailing Sled
D25’s debut design was inspired by the idea of Santa’s sailing sled being borrowed by a mischievous elf.
D25 2005: 1st Place Best Humor & Originality
Theme: Classic Christmas
D25’s second design was inspired by a classic Christmas living room scene. A large decorated Christmas tree with presents stacked below the bows and a star atop, red brick fireplace with a roaring fire and stockings hung below a mantle.
D25 2006: Best Boat Under 30 Feet
Theme: North Pole Holiday Magic
In the middle of November, Original Productions, Inc. asked Peter to appear on a documentary on intense holiday decorations for TLC: The Learning Channel. The episode “More Crazy Christmas Lights” premiered on December 8, 2007.
D25 2007: 1st Place Best Humor & Originality
Theme: Surf’s Up – Light Wave
Surf’s Up on D25 features over 5,025 lights brilliantly illuminating a holiday surfer’s dream wave. D25’s strobe light marks the lip of the wave and a hot-doggin’ holiday penguin is in the cave catching some gnarly tubular action.
D25 2008: 1st Place Best Humor & Originality
Theme: Tropical Island Cheer – Lanterns to Lights
D25 for 2008 was inspired by the origins of the Newport Beach Christmas Boat Parade on July 4, 1908. John Scarpa, an obscure Italian gondolier, led a parade with eight fellow small boat operators. The boats were illuminated by Japanese lanterns.
D25 2009: 1st Place Best Animation & Special Effects
Theme: Joys of Christmas Toys
In 2009, D25 demonstrated one of the most complex designs in the series. The entry included a matrix of colored ornaments, made with hundreds of individual bulbs. The matrix enabled the computer controller to make an amazing array of “bouncing ball” images that danced across a black background.
D25 2010: Best Boat Under 30 Feet
D25 2011: 1st Place Best Humor & Originality
D25 2012: Best Sailboat
D25 2013: 1st Place Animation & Special Effects
Some facts and figures of the Christmas vessel D25
The boat: 11-foot dinghy with a Nissan 4-stroke, 5HP engine. Oars for backup
Typical number of lights: Over 10,000 (Peter counted them once, but now simply adds lights up to the generator capacity)
Current consumption: Approx. 33 amps at 120 VAC
Power source: Two Honda EU2000i generators providing a total of 4,000 watts at 120 VAC
Wiring: Over 625 feet of custom extension cords
Safety items: GFCIs (ground fault circuit interrupters) on all circuits and an automatic bilge pump
Communications: A 5 Watt VHF ham radio is interfaced to a GPS for reporting location, and is available for emergency
Sound system: 150W audio power with wireless mike for music and personal greetings
Computer controllers: Four Light-O-Rama (LOR) controllers
Other items:
A masthead rotating strobe
An automobile classic “AH-OO-GA” horn
Fog Machine
Simulated flames & coals in fireplace
Chasing rope lights
I did some measuring today and discovered the adjustable seat rails raise the seat too high for mounting in the enclosed cockpit – on a Roadster, an open car – this would not be a problem, and may help shorter drivers (under 6-foot) like me.
Stay tuned for an update as I re-modify the mounts by installing the rails on the side of the seat – as mentioned in the earlier post. Scroll to the entry by ChazC5ZX.
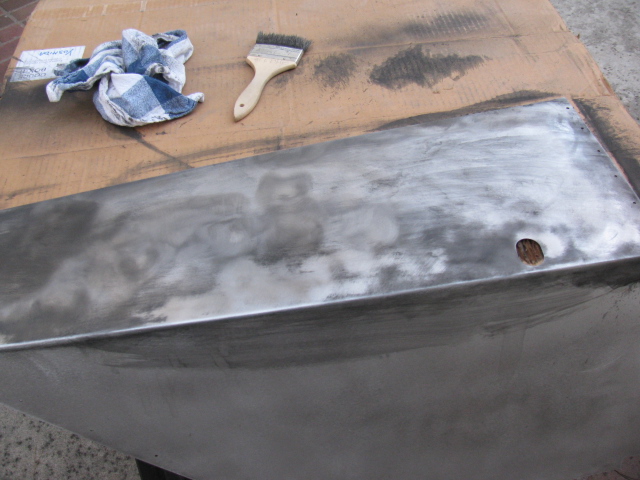
Last weekend, I decided to get back to work on the Coupe. I have to focus on getting everything ready for the engine installation. So, I started to mount the previously painted foot box aluminum.
But I ran into a problem – the oily under body paint was not adhering well in some places, and the paint surface quality varied greatly. Here is a picture of what I mean…

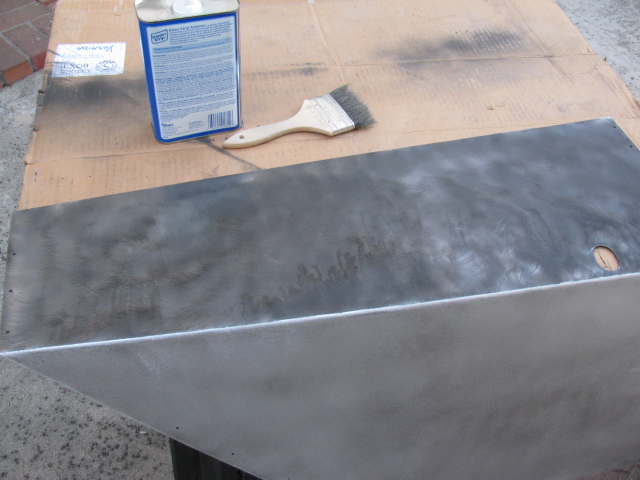
Rather than just leaving it alone, I decided to remove all undercoated parts and re-finish them with truck bed liner paint. The truck bed liner paint is more consistent, is very hard and seems to adhere better than the under body paint.
Taking off the greasy under coating was difficult, because the gooey paint clogged up the abrasive pads on my random orbit sander. So, I had to first use a wire brush on my drill to “scrape” off the greasy stuff, and then wash it down with acetone, like this:


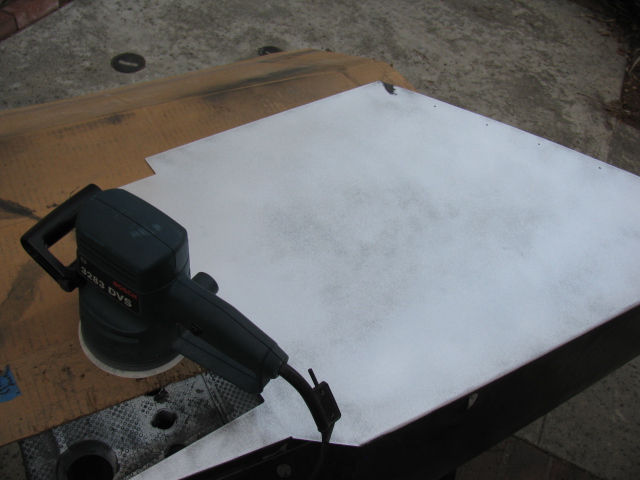
… and then sanded to bare metal with a 60 grit disc on my random orbit sander.

I washed the panels with dish washing liquid in my kitchen sink, and applied two coats of truck bed liner paint. Now the panels look much better. The truck bed paint has a slight wrinkle finish so I am not sure how hard this will be to keep clean. It is, however, better than that greasy under coating stuff. Here is a picture of the bottom surface of the transmission tunnel cover.

I will cover all interior surfaces with heat and sound barrier (Cool-It) and then put carpet over everything later.
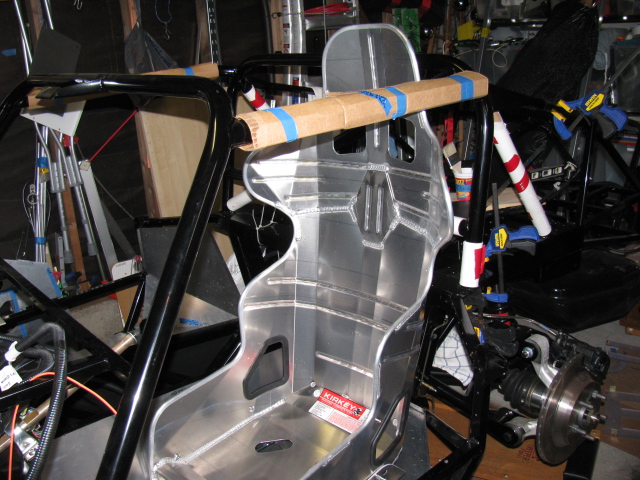
Since I am working on cockpit “fitment,” I wanted to dry-fit the Kirkey high back racing seats so I can adjust the position for pedal actuation.
The Factory Five Racing Complete Kit provides two options for seats, low-backs for the more traditional look, and a high back option that provides more back support. I went with the high backs. However, the seats come with nuts and bolts, and the instructions say to drill the seats and use the bolts to attach them to the floor.
I checked the forums and found a better solution. Thanks to posts by Rich A and rick8928, I copied what they did with their seat mounts. Their solution adds an adjustment feature to the seat mounts. The part numbers from Summit are still valid, although the prices have gone up a little. I bought two sets so the passenger seat will be adjustable, too. Thanks guys for helping me to not re-invent the wheel on this one!
Here are some pictures of my version…


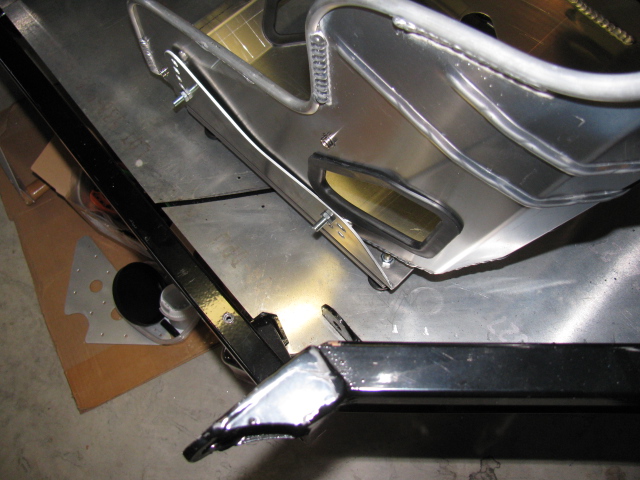
The last two images above show the seat belt mounting points.
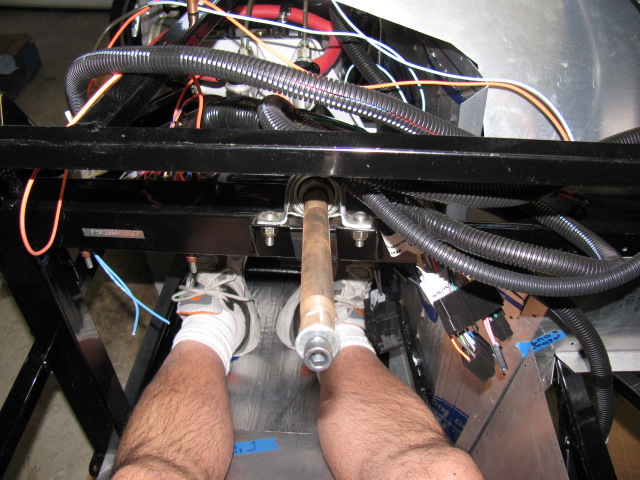
Here is a cockpit view of the pedal box.

I am glad I have the seat adjusters, it should make getting in and out of the car easier. It looks like I will have to adjust the seat forward in order to reach the pedals comfortably, and then I can push the seat back to get out (and in) the car.
Heel-toe should be okay, I will have to bolt the seats into the car and move the seat forward to make sure.

Sharp-eyed viewers noticed the left side of the driver foot box is missing. Indeed it is. I made a small modification to this part – I cut the tabs off of the mating panel, and added small angle aluminum to the front piece, so I can rivet (maybe screw in) this panel later.

I should probably do the same thing to the right side of the pedal box, so I can access the gas pedal mounts for adjustment, although the engine might be in the way.
Stay tuned, more to come on the Factory Five Racing Type 65 Coupe Project.
Not much to report on the Type 65 Coupe Project. I have been doing a lot of other things over the last few weeks. The heat has been making me lazy.
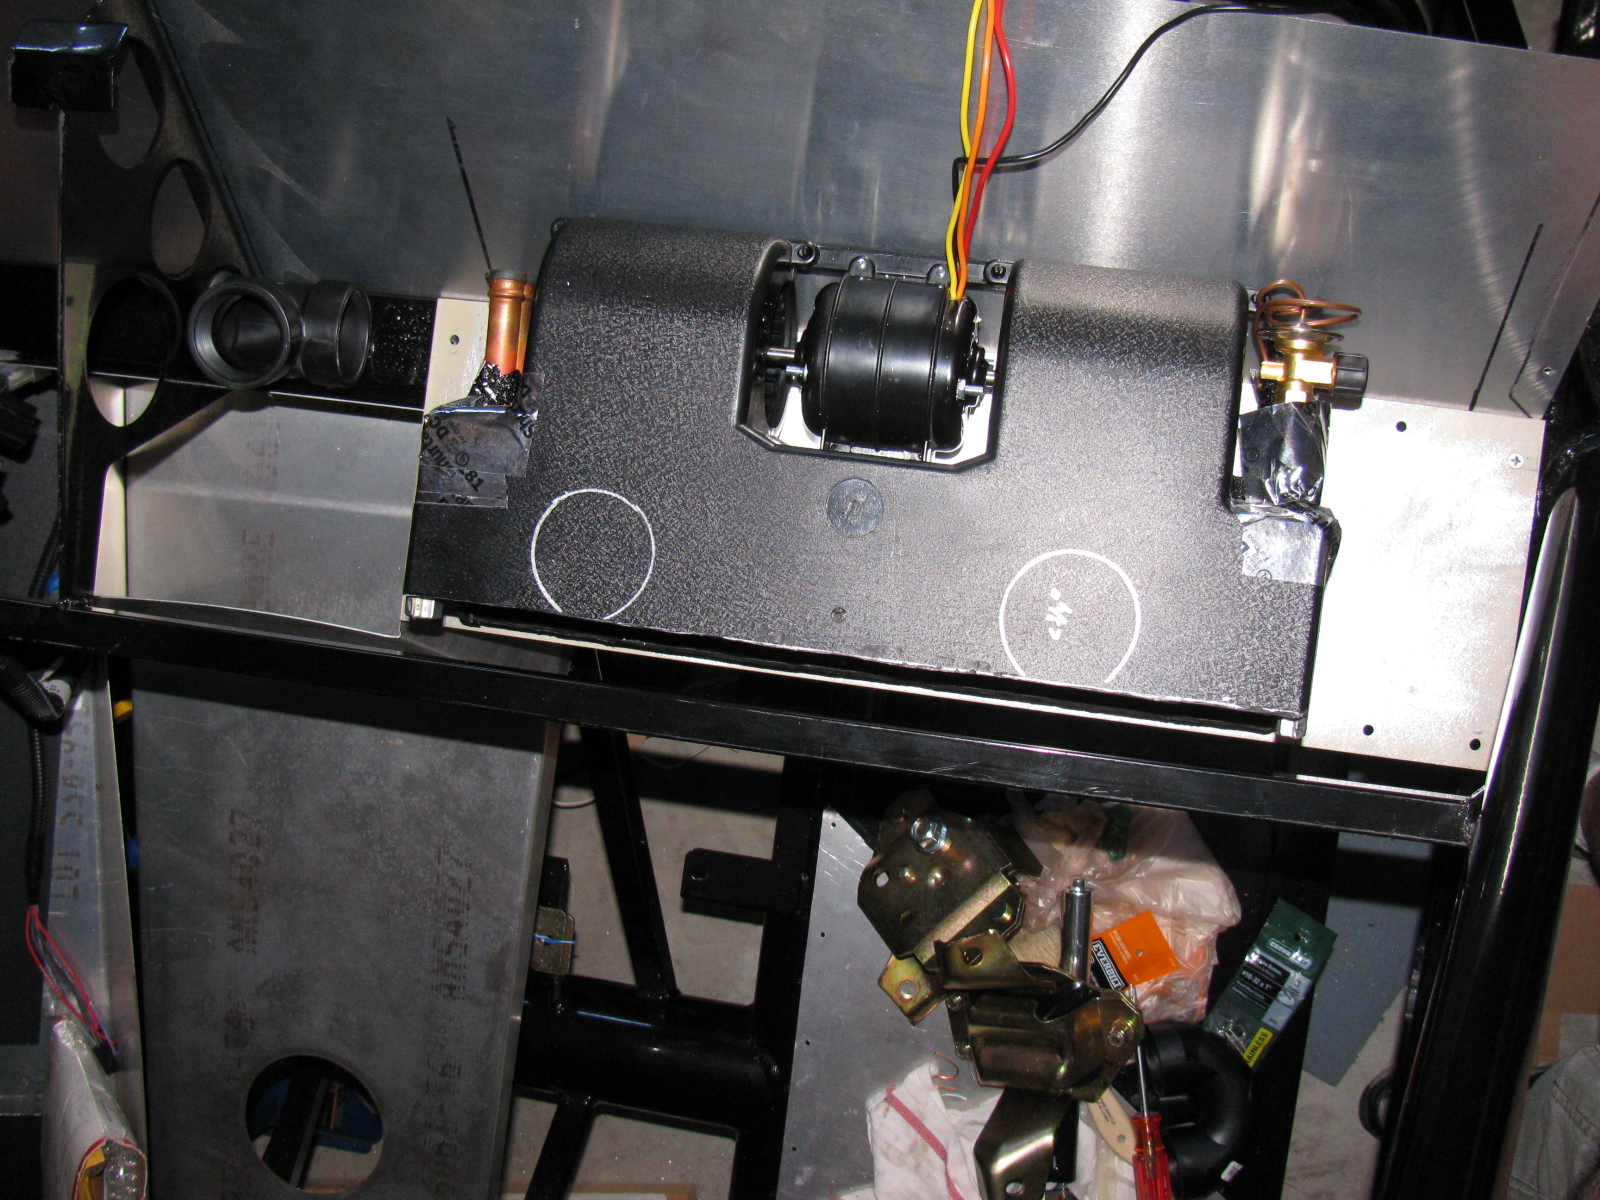
I decided to do some work on the A/C unit for the Coupe. I cut and chopped the housing cover for several hours, and then decided it might be easier to just make a whole new cover using fiberglass and resin. . . . I did some research on composites, epoxy resins, fiberglass and boat repair, and lost-foam casting. Interestingly, I am doing the same research for some stuff at work. I will try my hand at making a custom duct for the A/C unit. I have a layout in my mind, but there are a lot more things that need to go behind the dash panel besides the A/C ducts. The new cover/duct will have to make several 90- and 180-degree bends. I hope to avoid the use of too many fittings by making a single duct/top cover for the A/C unit. Maybe it should be called a “manifold” instead.
Here are some pictures of the air conditioner and the “dry fit” of where it will mount.


I also re-installed the firewall. I had to take it off and re-paint it with a higher quality silver paint. I do not have pictures of this, but it does look better than before. The paint is “harder” than the other paint I used.
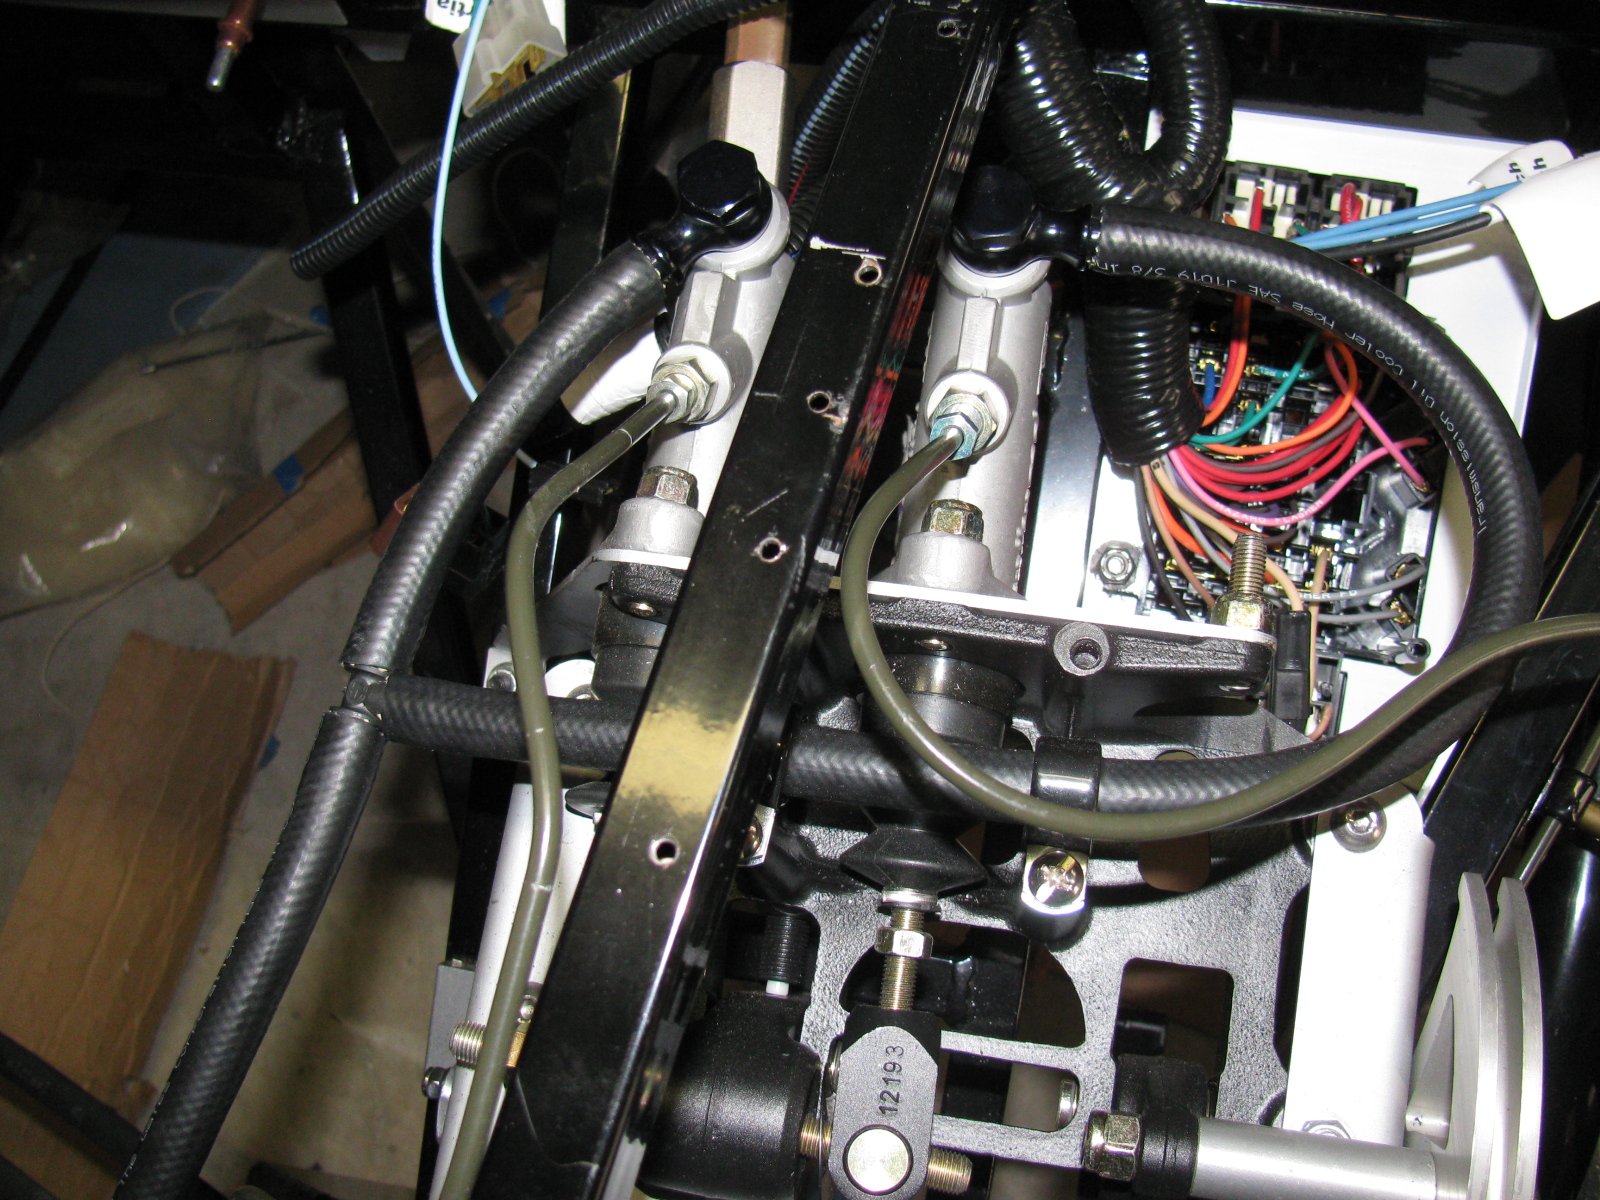
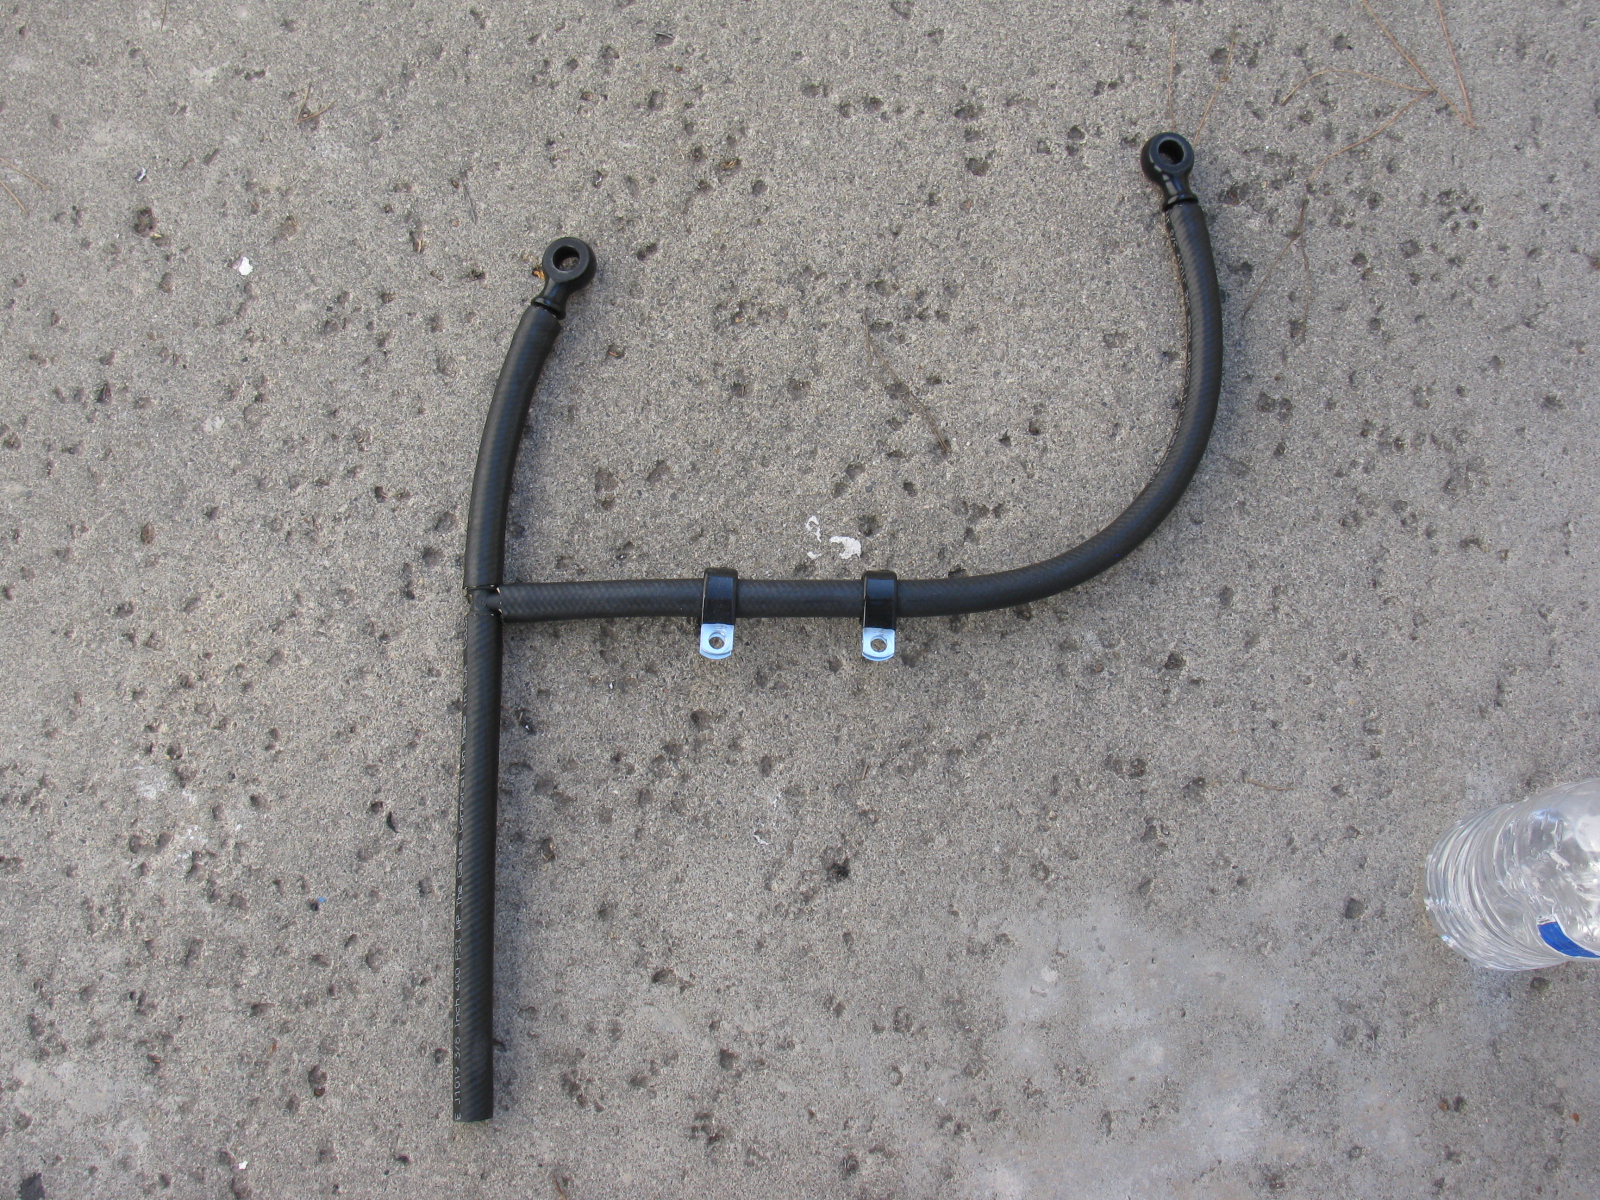
Next, I removed the “bad” brake hoses originally from the Complete Kit and replaced them with the proper red hose from the third technical bulletin from Factory Five Racing. This is the hose going from the reservoir to the master cylinders. The new hose is much softer and easily slipped over the fittings. I hope they won’t leak. We will find out soon when I fill and bleed the system.


I also started to look at engine hoist options – I want to drop the engine in SOON!

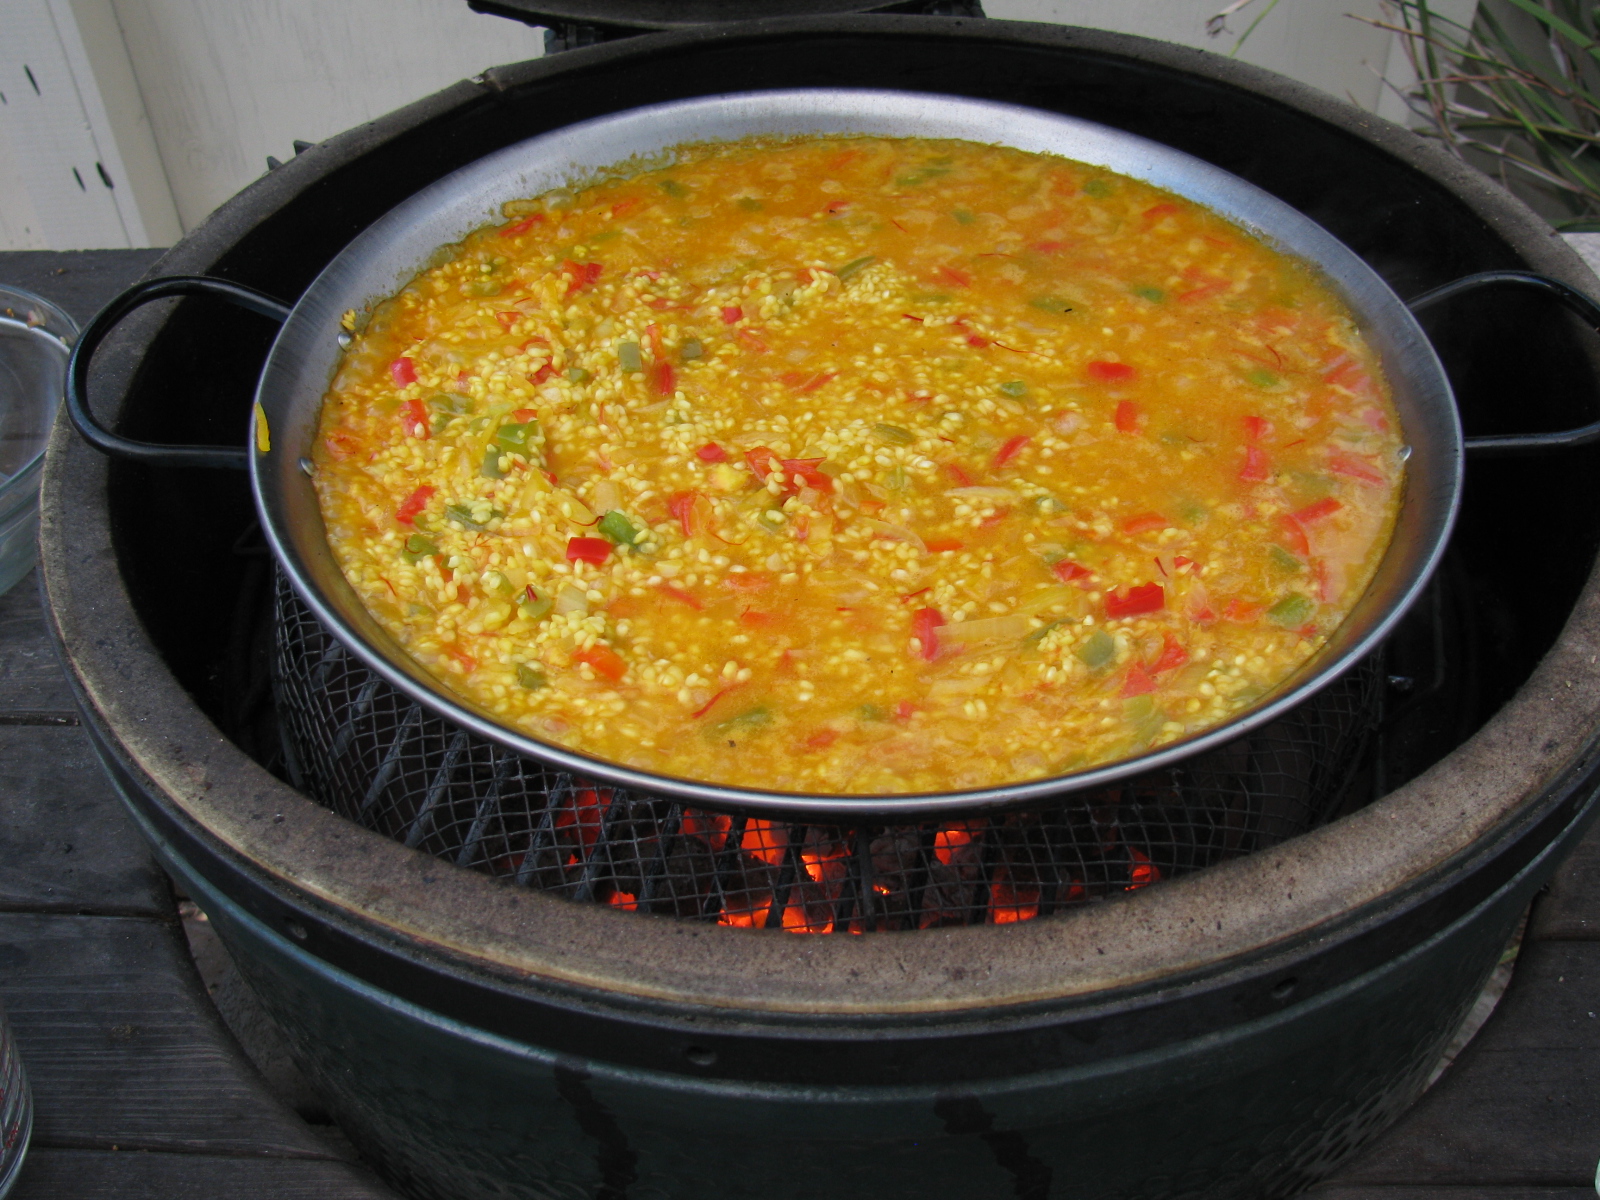
Paella is a delicious rice dish. There was a reference to paella on a Seinfeld episode. I have eaten lots of paella, but never made it. So, after several Maker Faire events in the Bay Area, I really wanted to try making my own.
Based on a recommendation from a fellow Big Green Egg fan (Thanks Dale!), I bought a paella pan made in Spain and Bomba rice from La Española Meats, Inc. in Harbor City, CA.
My 15-inch pan would be perfect for my Large Big Green Egg – except for the handles. They are too big and prevent the pan from sitting on the grill grate. I think I can bend the handles so it will fit the 19-inch grate on the BGE. I didn’t let this glitch stop me. I inverted the grill basket used for the vegetables, and put the paella pan on top. If you look closely at the pictures, you can see the basket under the paella pan. Seemed to work OK.
Of course, my paella pan is not as big as the giant ones used by Gerard’s Paella at the Maker Faire, but my pan is large enough to make 8 servings.
I used Steven Raichlen’s recipe from Primal Grill, Season One as a starter. (“Paella Primavera (with Vegetables and Beans But No Meat.”) His version is vegetarian, using all roasted veggies and vegetable broth. I had some Portuguese sausage in my freezer, and chicken stock, so I used them in my first attempt.
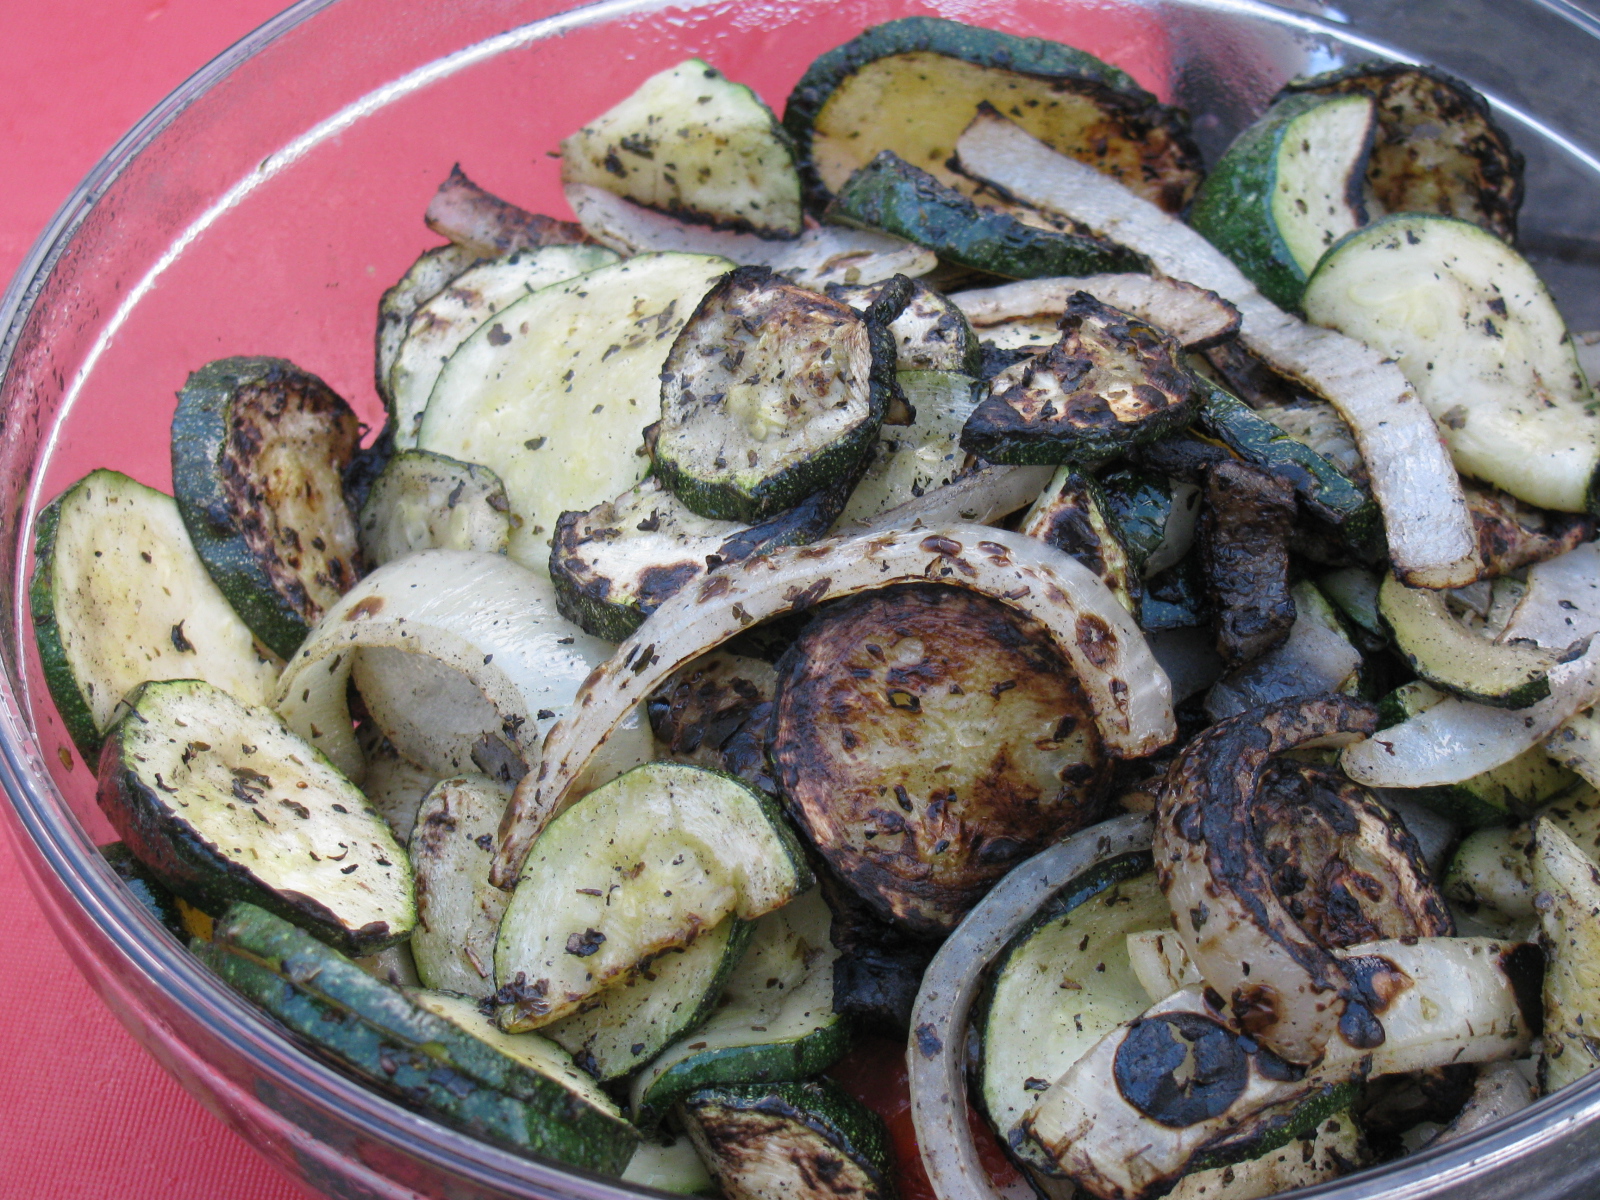
Here are the grilled veggies – Onions, garlic, red and green bell peppers, tomatoes, zucchini squash. These were direct-grilled in a basket. I used extra virgin olive oil and tossed on some sea salt, oregano, black pepper and basil.

Next, I direct-grilled the sausages in the basket. These were Hoffy brand Portuguese sausages. I wasn’t too pleased with this sausage. It was not bad, it was just a little too plain and mild for me. I still have several other brands of Portuguese sausages from Hawaii in my freezer. I need to test those soon.

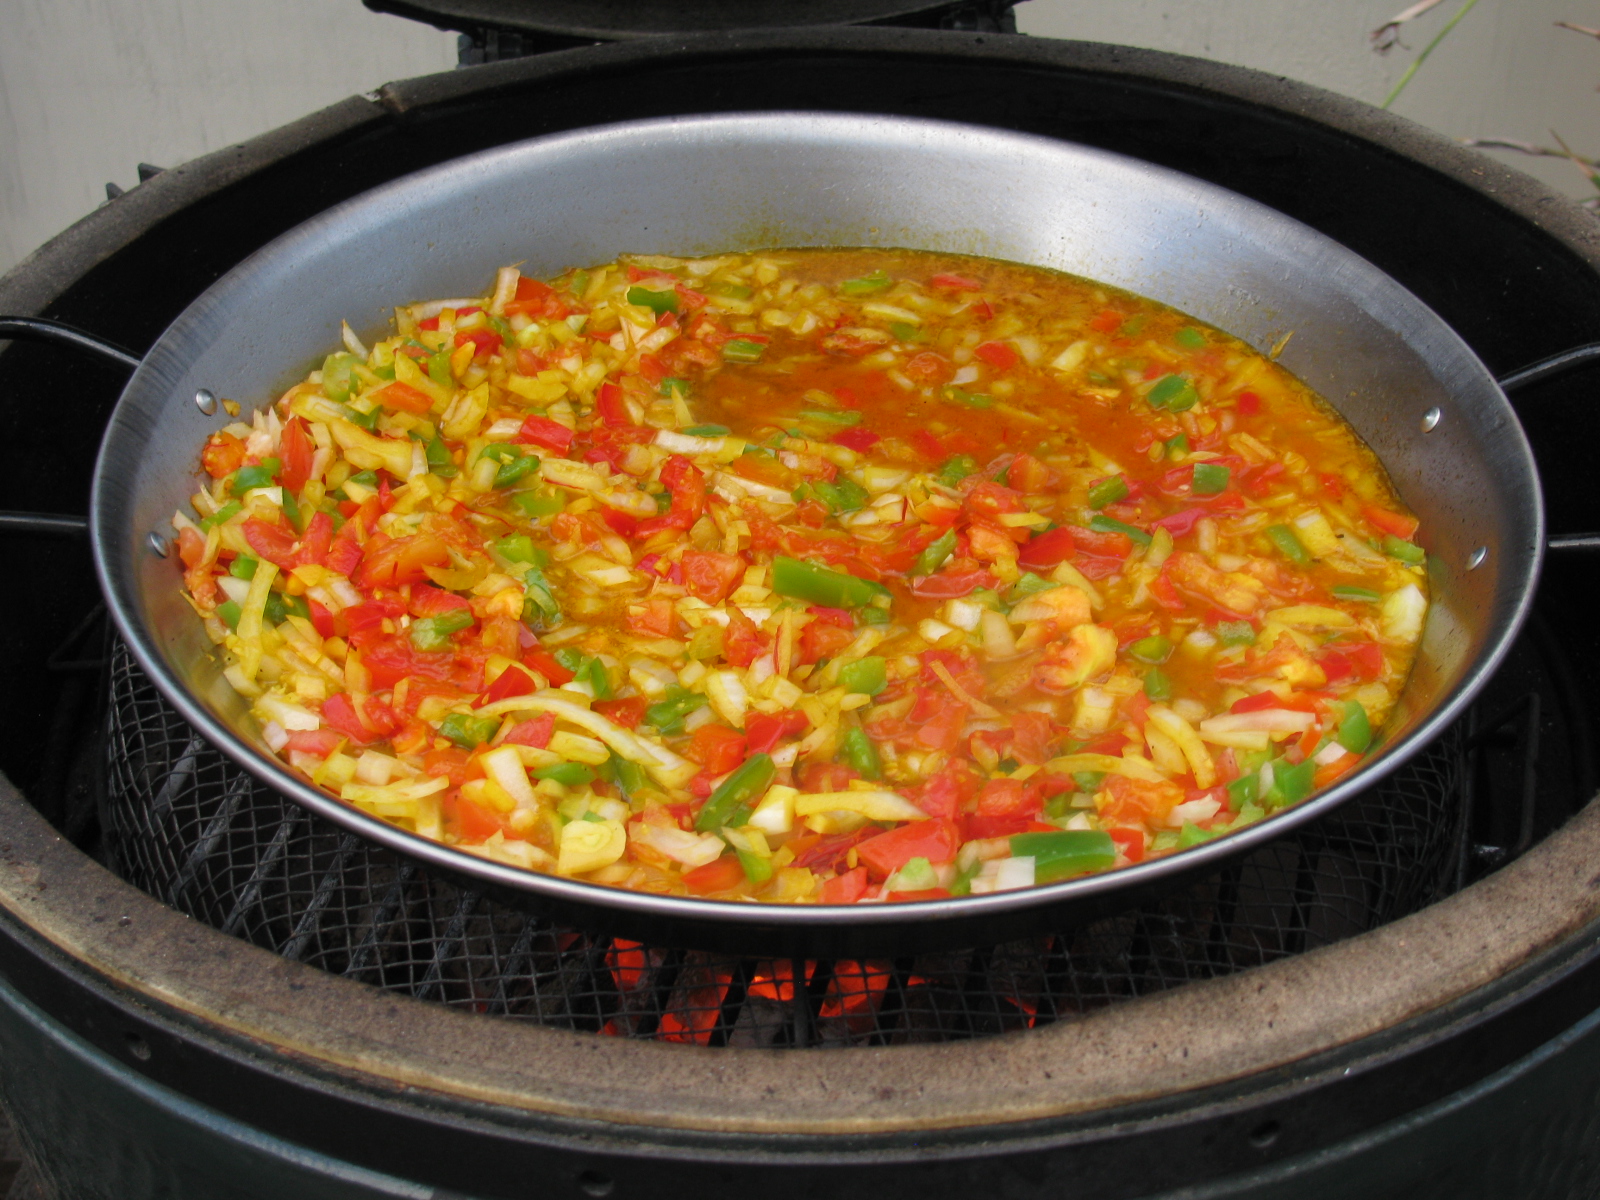
I heated up the paella pan and added some olive oil. This is the chopped onion, garlic, peppers, saffron and chicken broth. . .

After several minutes, I added the Bomba rice. . . .

I almost panicked as the broth dried up – the rice was not fully cooked, and I was afraid of scorching the pan and ruining the dish. But, I quickly added some chicken bouillon to add more liquid. I had to add a total of four additional cups of liquid to get the rice just right. This is a total of 10 cups of broth. Not sure why this is so much more than Raichlen’s version. I do not recall how long I cooked this dish – I just cooked until the rice was tender.
Here is the dish with all the liquid absorbed. Bomba rice is nice and tender, and very tasty. Bu wait – there’s more. . .
Next, I added the grilled vegetables and the sausage. . .

This would be a great one-pan party dish for a good sized and hungry group.
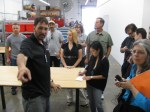
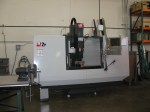
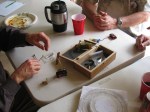
I discovered an announcement of this open house the night before the event. The lead came from a Meet Up post from Make: OC, since I have been displaying at Maker Faire for several years now. It was a very short notice — but I am glad I saw it — especially since the Urban Workshop is less than 5 minutes away from my office.
Steve Trindade is the Founder and CEO of the Urban Workshop.
Urban Workshop is a hacker space, a membership organization where creative and talented people can get together and learn from each other. Urban Workshop provides the tools and support staff to help people build what they imagine.
They have an impressive array of stationary power tools for wood as well as metal, including a laser cutter and CNC mill. They have all types of welding equipment, too. And of course, they have a very expensive-looking 3D printer.
There is a full page of classes on a variety of subjects, including automotive alignments and race car chassis setups, CAD concepts, CNC router programming, electronics soldering basics and Arduino programming, machine tool instruction and more.
The equipment is all high-end, professional gear, and looks brand new.
Click here for more information on Urban Workshop.
Here are some pictures. . . .
Immediately after the San Bernardino Microwave Society (SBMS) Tune-Up Party at the Fairview Park in Costa Mesa, the annual summer BBQ was held at the QTH of Dennis, W6DQ.
As usual, the food was great, and Dennis did a great job at the BBQ. It is nice to be a guest at a BBQ every now and then….
Probably the best thing I enjoy at these events is catching up with the club members and see what projects they are working on.
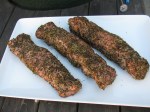
I am still cleaning out my freezer, so I decided to defrost some pork loins and cook them on the BGE. The recipe comes from Steven Raichlen’s book, How to Grill. This is a great book on barbecuing just about anything. I especially like the sections where Raichlen shows us how to butcher the meats. Excellent dish. I served it with some homemade pickled onions.
Summer is here, and this means corn on the cob. A local grocer had a great sale, 6 ears for a dollar, so I bought a dozen. Some people do a lot of prep work when they barbecue corn, I decided a long time ago to just soak ’em and grill ’em.
I trim the husks but leave the stems and soak the ears in plain water for a few minutes. No need to remove the silk inside. I do, however, check for worms and other critters inside the husks, just in case anything alive is crawling around inside. Anything inside will die, so there isn’t too much to worry about.

Soaking corn on the cob
Make the fire in the Big Green Egg. Set up for direct grilling, high heat.

Direct grilling corn on the cob
This takes a while. . .

At some point, the husks will turn brown. This is the fun part, since the husks usually catch fire and burn. If this happens, do not panic. Just grab the ear with your tongs and use the fire to burn off the silk and the husks.

When corn husks catch fire – just let it burn off the silk and the husk – saves time later!

Peel the husks down if you want, and roast the kernels directly. This will add some nice grill marks to your corn
I like to keep the husks on, this gives the eater something to hold when eating the ear. If I am serving guests, I will use butcher string and tie and lace the husks into a “handle.”
And there you have it — corn on the cob on the Big Green Egg!
Use your imagination for finishing and serving the corn. Other than some freshly ground salt and pepper, I enjoy the corn as-is.
There are some fancy corn dressings out there, here’s one from Steven Raichlen, my BBQ hero: Cambodian Corn