Freightliner Cascadia 113 with Cummins Westport ISX12 G CNG engine and Allison 4000 automatic transmission.
Photo from: TruckingInfo.com
Click here to see >>> A nice video tour of a new vehicle fueled by Agility Fuel Systems
Freightliner Cascadia 113 with Cummins Westport ISX12 G CNG engine and Allison 4000 automatic transmission.
Photo from: TruckingInfo.com
Click here to see >>> A nice video tour of a new vehicle fueled by Agility Fuel Systems

This is a screen capture showing the KH6WZ APRS beacon data from the Discovery Science Center – Meet the Makers event.

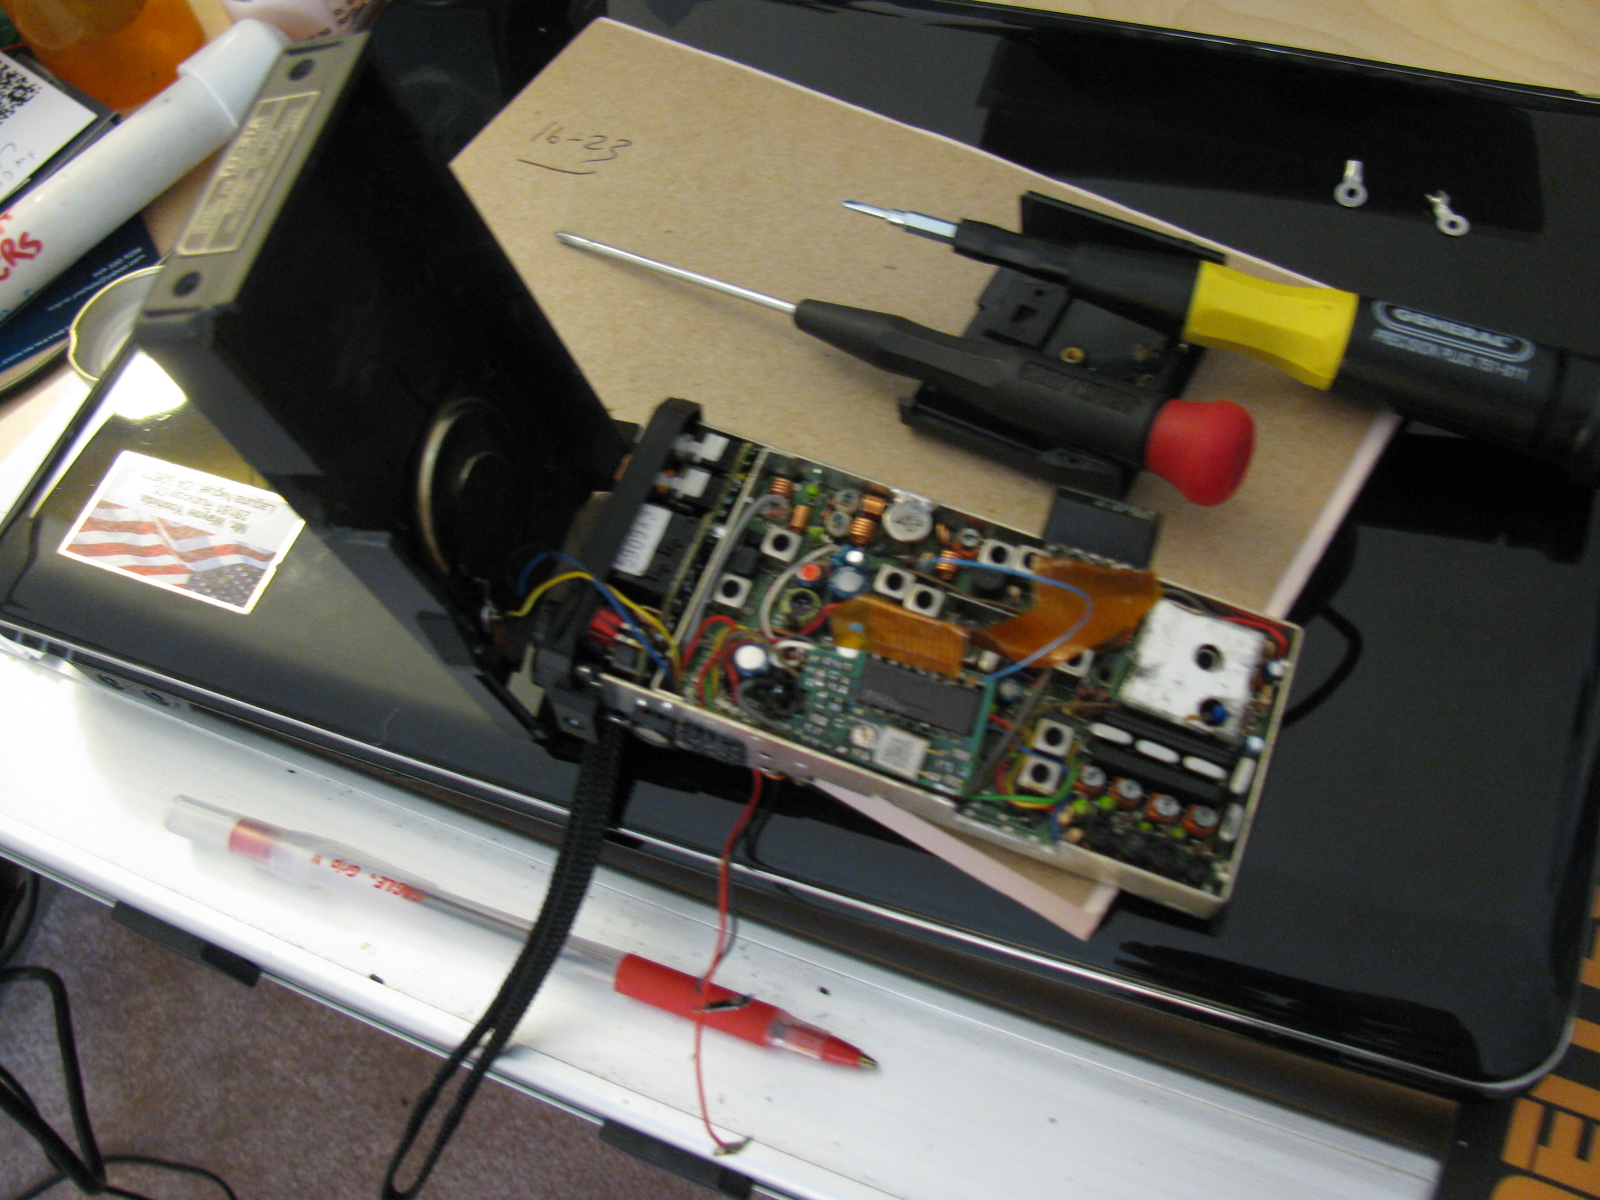
Where does the brake reservoir go?
Before I drill any holes, I need to verify where the brake rez can should go. This polished stainless steel can looks great, and it is small. It must be easily accessible for filling and must also be higher (at level with) the brake master cylinders.

Location of the brake rez here or there?
A few weeks ago I received a box of accessories from Russ Thompson, expert maker of Coupe add-on items. Here are some pictures. . .


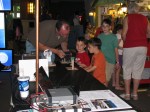
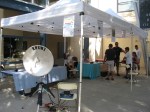
Discovery Science Center – Advanced Ham Radio on Display at the Meet the Makers Event

Signage at The Discovery Cube announces the Meet the Makers Event
Dennis Kidder (W6DQ), Walter Clark and I demonstrated our Maker Faire ham radio projects at the Discovery Cube in Santa Ana on June 29 and 30, 2013. We used my TinyTrak APRS beacon to indicate our location during the event. In case the plot is removed or expires, here is an image of the map showing our location. KH6WZ is indicated by the eye icon near the Interstate 5 freeway in Santa Ana.
This is a screen capture showing the KH6WZ APRS beacon data from the Discovery Science Center – Meet the Makers event.
This was a great opportunity to expose people to today’s technology Amateur Radio, and continued along my Maker Faire theme, “Not Your Grandpa’s Ham Radio.”
Dennis brought his dual band 10 GHz and 24 GHz transverter, controlled and interfaced to his software-defined radio (SDR).
Walt brought his polarization demonstration units, which helped people visualize how radio signals propagate and change as they travel through the air. Here’s how Walt explains his demos:
Two demonstrations show the structure of radio waves – in this case microwaves.
One
The structure of a radio wave in angle around the direction of travel: This is called polarization. A spinning bargraph that has a receiving antenna that also spins will reveal the way radio waves “look” to a receiving antenna. The lesson here is that the receiving and transmitting antennas have to be oriented to the same angle.
Two
The structure of a radio wave along the direction of travel: When a receiver is arranged to look exactly in [or along] the direction the radio waves are going out, reflections can be measured; just like in radar. The reflection off of the hand or the chest of a person causes the speaker to be loud or quiet depending on the exact position. It cycles from loud to quiet every 1.5 cm whether inches or many feet away. The lesson here is that with this equipment, you can picture in your mind the wavelength and especially note that the wavelength is the same no matter how far the radio wave travels.
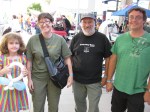
We did not establish any goals for this event, but there were several memorable visitors to our little table display, including teachers, Maker Faire participants, some current and ex-ham radio operators, many engineers and retired engineers as well as engineering students.
This “Meet the Makers” event was a double treat for me, since this was the first time I visited the Science Center, and I had a blast talking about the new technologies being used by today’s ham radio enthusiasts.
Here are some pictures of this event . . .


Acknowledgements
Thanks to Bequi Howarth, of the Orange County Mini Maker Faire, who introduced us to the Discovery Science Center.
Links to More Information
Byonics (TinyTrak APRS and Weather Units)
Discovery Science Center, Santa Ana, CA
Orange County Mini Maker Faire, University of California, Irvine (UCI)
American Radio Relay League (ARRL)

APRS display of the KH6WZ-5 location beacon at the 2013 OC Mini Maker Faire at UCI. Notice the beacon message at the top of the screen capture includes the URL of the event – a great publicity tool!
This past weekend, the second OC Mini Maker Faire happened. And it just so happens to be the second running of my ham radio demonstration called, “Not Your Grandpa’s Ham Radio (2)!” This is my continuing mission to remind people of two things:
First, “The Maker Movement” is nothing new, Amateur Radio operators have been doing this for a almost a century, and nearly 2 million people worldwide are involved in ham radio in some way.
Second, Ham radio is not necessarily an old man’s hobby where weird guys talk to strangers from garages and basements. We are skilled wireless communicators and use today’s technology, from GPS and microprocessors to lasers and microwave frequency linking.
This time I added static and working displays of my various APRS beacons (KH6WZ, KH6WZ-5, and others). I programmed the OC Mini Maker Faire’s URL to the beacon message so people can take a look at what was happening – an excellent publicity tool!
I also planned on making some 10 GHz contacts with my rig, since this was also the same weekend as the ARRL 10 GHz and Up Contest. The transverter covers were removed so people can see the system’s guts.
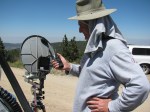
Based on previous experience at the Discovery Science Center “Meet the Makers” event, I demonstrated radio wave polarization- horizontal vs vertical – with my rig and the microwave strength meter.
Since I had plenty of space, I shared my booth with a company that makes interesting computer and microprocessor related items. This may sound trivial, until you realize this company is run by these three young guys . . .

Huxley, Max and Ethan showing one of their products called the SmartPac.
There seemed to be more people at this Faire, probably since not too many other events were happening nearby. The 405/605/22 freeway closure did not affect the MF, since it started after the event ended.
More than a dozen hams – either active or at least licensed – stopped by to visit. We talked about this event as well as the Bay Area Maker Faire, and what ham radio activities we are involved with.
One more thing: I met several guys from the San Diego area – they are finalizing the plans to have a Mini Maker Faire in the San Diego area – this is great news. Stay tuned and I will announce an update as soon as I hear something from the committee!
Here are some pictures from the event. I am already thinking of building some new displays for next year.


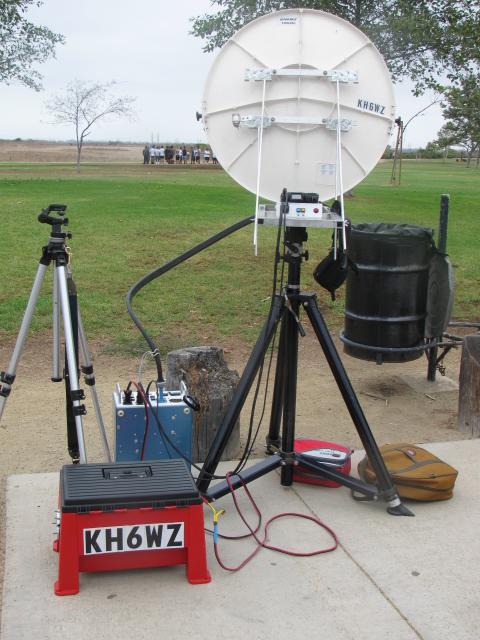
Microwave radio dishes used for ham (Amateur) radio communication.
The Orange County Mini Maker Faire is coming up (August 17 at UCI), so I added this intro to ham radio on the microwave bands. The Maker Fair coincides with the ARRL 10 GHz and Up Contest, and so, rather than missing the contest, I thought it would be fun to try working the contest from the Maker Faire. . . . .
Click here to view the presentation>>>> Microwaves: Not Just for Leftovers
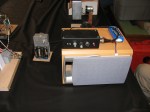
KH6WZ 10 GHz rig at a tune-up party
A presentation about record-breaking two-way ham radio contacts during the 2007 10 GHz and Up Contest
View the slide show in PDF >>>> XE2 to W6 in the 2007 10GHz and Up

Getting the Big Green Egg up to temperature (250 degrees F). Hickory chips were added.
A recap of my first few cooks with a Big Green Egg ceramic cooker. Click the link >>>> A Barbecue Summer
Microwave Contest Driving Directions from the Glenn Allen KE6HPZ List (Originally from SBMS Newsletter, January 2004)
Note:
This is a copy and paste (with some minor edits) from a post by SBMS member Glenn, KE6HPZ and some additional postings from other members. I have operated from many, but not all of these locations, so verification with new maps or other means might be a good idea. If you have a correction or would like to add a “known good” contest location, please let me know and this list can be updated.
Some pictures will be posted as I find or make them. . . .
Click the link below for a PDF version of this list:
Microwave Contest Driving Directions from the Glenn Allen KE6HPZ List
**Update** Thanks to Dan, K6NKC, here is a link to the KE6HPZ list on the SBMS website.
Goleta State Beach – DM04bk — This location has a good shot to the Baja gang. It is DM04bk, and we parked right in the parking lot of the Goleta State Beach. In the Santa Barbara area, take the 217 Highway south from the 101 Highway, about 1.9 miles. Get off the freeway where it says Goleta State Beach, and cross over a bridge and you will be entering into the beach parking lot. Turn right, and go about a ?? of mile down the parking lot till you find a place that has no trees in the way, and shoot over the water. (N34 25′ 0.6″ W119 49′ 58.2″)
Summerland (Santa Barbara) Lookout Park – DM04ek – To get to this location, get off at Evans Street in Summerland, near Santa Barbara. You can try working from the park which is on the south side of the freeway, but there are trees in the park, and we found that parking lot was full. For those that have to work out of the back of their trucks this place didn’t work. So, we found a better spot, still on the South side of the freeway, just .2 miles east of the park. Get on the southbound on-ramp to the 101 freeway, which runs beside the freeway. Right before the on ramp enters the freeway there is a small road the will break off to the right. This is Finney St, and it goes over the railroad tracks and goes into a parking lot. From the parking lot it goes east down the hill. We just pulled of the side of the road, and worked Baja. This spot is DM04ek (N34 25′ 09.1″ W119 35′ 46.1″) I used an 11 element 440 beam to get into Signal peak, or one of the San Diego machines.
Ventura (Grant Memorial Park) – DM04ig – To get to this location from North bound 101 get off at California St. There is no South bound off ramp for California St. Get off of the next exit (Harbor blvd, or Seaward Ave) and get back on the North 101 freeway and get off at California. Head up California (N) till you hit Poli Street (California Tee’s into Poli). Turn Left onto Poli, and turn right on the next street, which should be very small street. (Brakey St). It winds through some houses, and climbs up the hill. You will come to a four-way intersection, of small roads on the hill. Take the left or lower road a couple of hundred feet down the road, to a turn out. The location is DM04ig (N34 17′ 05.3″ W119 17′ 41.3″) at 300 ft above Sea Level.
Point Mugu – DM04lc – The operating position of Point Mugu is right next to the very huge rock. On the east side of the Rock there is a parking lot. It is on the south side of the road. So you cannot turn into the parking lot going north bound on the 1. Only the southbound traffic can turn in to the parking area. So if you are going North on the 1, continue past the rock, and turn into the parking lot on the North-west side of the rock, and come out of the parking lot and head south on highway 1 to go around the rock, and go to the other parking lot. The location is DM04lc (N34 05′ 13″ W119 03′ 43″) I have found that this location is blocked to DL29cx, and DM10xl by Catalina Island.
Point Dume – DM04na -Point Dume itself has a bunch of No Parking Tow away signs. So I set up on the South side of the road a couple of miles North-West of Point Dume. There is a large dirt pull off that worked great. Its location is DM04na (N34 02′ 09.8″ W118 51′ 27.4″) I was also able to work people on PV across the tip of Point Dume. Catalina Island gets a little bit in the way when the Baja guys are in DL27.
Las Floras Canyon – Somewhere near Las Floras Canyon Road at Highway 1. Stay in the Floras area. If you go too close to Malibu, you will be below 10 miles to the Point Dume location. If you go too close to Topanga Canyon you will be shooting through PV.
Palos Verdes North and South – DM04ts – The easiest way to get to Palos Verdes is to come in from the 110 Freeway. Get off at PCH (Pacific coast Highway) Highway 1(N33 47′ 26.1 W118 16′ 55.0). Go West 3 miles on PCH, and turn left on to Crenshaw (N33 47′ 31.6″ W118 20′ 00.6″). Go 3.4 mile on Crenshaw up the hill. Turn right on to Crest (N33 46′ 07.4″ W118 21′ 50.1″). Go 1.6 miles on Crest. Go through Hawthorne Blvd, 150 feet. Pull off to the side of the road, and this spot works Frazier and other north locations. Its location is DM04ts (N33 45′ 41.2″ W118 23′ 39.8), and it is 874 ft above Sea level.
PV South – DM04tr – Turn around from the North location, and turn right (South) and go 1 mile down Hawthorn Blvd. The location in on the south side of a divided road, so pass up the location, and make an U-turn at the Salvation Army driveway. Head up the hill to the vista point. There is parking for about 4 cars here. This spot points south to San Diego, and Baja very well. This location is DM04tr (N33 44′ 53.3″ W118 23′ 39.4″). It is 535 FT above Sea Level.
Huntington Beach I – DM03xq – Huntington Beach works well to Baja. During the middle of the day it might be hard to find a parking spot. Pacific Coast Highway (Highway 1) runs along the beach for miles. So if you can get into one of the parking spots, just point out to Baja. Metered parking DM03xq. The Huntington Pier is DM03xp (N33 39′ 17″ W118 00′ 16.2″). Take Beach Blvd south off of the 405 about 5.8 miles to get to PCH.
Huntington Beach II – DM03xq – An alternate DM03xq to number one above is the park that overlooks the Bolsa Chica wetlands. This place is called Overlook Park. This location is accessed via Seapoint, off PCH. Take Seapoint to the east, and at the intersection of Garfield Ave, continue thru the pipe gate, up the hill. Continue to the farthest parking spaces, near the handicap parking slots. There is plenty of parking, and not much visitor QRM, but no restrooms or water fountains. This location gets very windy in the late afternoons. This location is not good to the south to San Diego or to Mexico via a direct path. Marginal signals may be possible via a reflection/refraction off Catalina Island or the oil derricks offshore to the west and over the water. Note – please respect the privacy of the residents there. Complaints may lead to closure of the park to the public. (KH6WZ)
Signal Hill North and South – DM03wt – To get to Signal Hill you have to exit the 405 Freeway at South Cherry exit. Head south on Cherry Ave .8 miles and turn left onto Skyline drive, and head up the hill. When you get to the top of the hill, and you can turn left into the park at the top. You can work east (Heaps) and North (Frazier) and west up the coast to Ventura and beyond. To work San Diego and Baja, you pass by the park and continue to Southward about .3 miles on Skyline, to a dirt field on the right, (N33 47′ 54.7″ W118 09′ 34.1″) DM03wt
Fairview Park, Costa Mesa – DM13ap – this is where the SBMS Tune-Up Picnic is held. Address is 2501 Placentia Ave. It is near the intersection of Placentia and Adams. Across the street is Goat Hill Junction, a miniature train station. The gravel parking lot may be used if parking at the part is not available. – NOTE this is only 9km away from Huntington Beach (DM03xq) – too close for the ARRL contest, minimum 16km/10 miles.
El Segundo (North side of Hill Top Park) DM03tw – To get to this park, get off of El Segundo Blvd, and head west about 1.4 miles. Turn right on Sepulveda Blvd (Highway 1). Go 0.2 miles and turn left on Grand Ave. Go 0.6 miles to Maryland St, and turn right. Hill Top Park is on the left and go down the street 700 ft to the public parking structure on the left. Go up on the parking structure – there is no roof, so overhead clearance is no problem, except for low-hanging pine tree branches. Go to the parking locations that are marked on the map, and point between the trees. This is the highest point that you can get to in El Segundo at a high altitude of 176 ft, plus the height of the structure. The only thing in the way from this location is piece of PV that is 250 ft high. The location of the structure is N33 55′ 14.7″ W118 24′ 25.1″
Highway 2 Overview (La Canada) – DM04vf – From the 210 Freeway you will exit Highway 2 Angeles Crest Highway. This is National forest area. This area requires daytime headlights, and you will get a ticket for not having them on. Be aware that the rangers will write you up for having a battery out in the open, because of fire danger. So leave the battery in the vehicle, and use something else heavy to keep the tripod from blowing over. To get there, head North up the hill 2.5 miles and you will see a large dirt pull-off on the right. It has an elevation of 2000 ft, and it talks south. But lower Baja locations were weak to this location. You have a large mountain right behind you so you would have to do a bounce shot to get anywhere else. DM04vf (N34 13′ 41.3″ W118 11′ 09.6″)
De Soto and 118 Freeway – DM04qg – It is located just north of the 118 Freeway and get off at De Soto Ave. It has talked to both the closer and farther away Baja locations. Just find a high spot above the freeway DM04qg (N34 16′ 32″ W118 35′ 17″) around 1300 ft elevation.
Secret Site 51 (Loop Canyon) – DM04ti – Secret site 51 is a great spot for talking all over the LA Basin and much south. It is located at (N34 21′ 13.4″ W118 24′ 58.4″) DM04ti at an elevation of 3918 feet. It takes about 30-40 minutes to get up there, from the 5 and 14 highway spilt. To get to there, get on the 14 freeway (3.3 miles) and get off at Placerita canyon road. Turn right, and go south-east (5.1 miles) on this road till you hit Sand Canyon Road (N34 22′ 51.8″ W118 24′ 48.4″). Turn right on Sand Canyon road for 2.9 miles up to Bear Divide (N34 21′ 35.1″ W118 23′ 33.1″). Turn right, and go up the road (3N17) (2.9 miles). You will come first to Contractors Point (repeater site). Continue down the road 1 mile to Fire Camp 9. Drive slowly through the camp, and go 0.4 of a mile up the hill, to the repeater site. Park on the side of the road about 100 ft down from the gate at the repeater site. This will give you a clear shot at Mexico, and a clear shot at Frazier. If you have a portable rig, you can walk up to the top of the hill and have a 360-degree view.
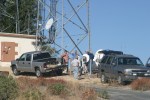

Whitaker Peak – Whitaker peak is close to the 5 freeway, and it takes about 10 to 15 minutes to get up there off the freeway. It has a good shot South. It does not have a shot north. You can do a bounce shot to Frazier off one of the hills to the east. It is located at (34′ 56.2″ 118 deg 43′ 08.8″) at 3646 ft. It is between Castaic Lake and Pyramid Lake. To get there going north on the 5 freeway, get off at Templin Highway (N34 34′ 20.8″ W118 41′ 27.6″). Go under the freeway and head north about 2.4 miles on the old road, running beside the freeway. On the left you will see a small one-lane road. It is labeled 6N53 (N34 35′ 05.6″ W118 42′ 56.7″). If you are going south on Highway 5 you can get to the old road, by get off at the Brake Inspection area. Just at the end of the area, were the road is about to get back on the freeway, there is a little road that will turn off to the right (N34 35′ 03.2″ W118 42′ 36.8″) that will take you to the old road, in a few feet. Turn right and you will be at the 6N53 in a ?? of the mile. A few feet up the 6N53 there is a fork in the road. Take the left fork and start heading up the single lane that is a somewhat asphalt road. This road is about 1.8 miles long. You will have a microwave repeater site in front of you, and a gate in front of you. Look behind you on the ridge and you will see a small dirt road running the ridge. Run up the ridge, about a ?? of a mile to a high spot. This is room for about 2 trucks. You will have to do a couple point turn, to turn around, to come back down the hill.
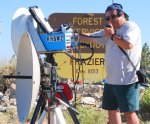
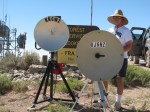
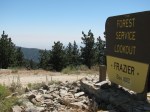
Frazier Peak- DM04ms – (N34 46′ 28.4″ W118 58′ 7.3″) Frazier Peak is 8400 ft mountain that has good shots all directions. There are some trees to the South. It takes 45 minutes to get up there from Highway 5. From Highway 5, get of the Frazier Park exit. Head west on Frazier Mountain Road 6.9 miles. Turn left on Lockwood valley road. Go 0.9 mile down the road. Turn left to into the Ranger Station (8N04) Go through the ranger station, and head up the road about a mile up the road you will go past a campground. Continue up the road about 6 miles to the top of the hill. There will be several forks in the road. There should be a sign that points toward the fire lookout.


Comments and Updates from the SBMS Reflector (old)
PALOS VERDES updates, August 2009
One of the best locations for working north is from the rear parking lot of the Rancho Palos Verdes City Hall.
From: Glenn Allen
A few hundred feet away is a Giant Repeater site, on the back of a church school.
33°46’10.42″N
118°22’34.93″W
I have operated for a short time for a UHF/VHF contest from the back of the church parking lot. But the RF noise floor was high. A parking lot to the north of the repeater site is a rest home, and I pulled into the back of that lot for a quick contact, but it was hard to hear the coordination radio. I was hearing News, weather and sports…
Doug Millar wrote:
This is probably the only turn out on the North side of PV with a good NW SE look. It is 300ft above PCH and sea level and easy to get to: At the corner of Pacific Coast Highway and Anza Blvd. go south. Anza turns into Vista Montana. Go up the hill to Via Corona and turn right. A short block and you should be at a cul de sac that overlooks the area. I doubt if it is 10 miles from San Pedro, but it is plenty from Signal hill: 33d48′ 23.09″ N 118d21′ 59.09″ W.
Mulholland
Alternative to Mulholland: NIKE PARK – DM04rd
Lat and lon for Nike Park (DM04rd): 34 07 42.25N, 118 30 47.00W. You will need to take the 405 freeway to get to it. Take the Skirball Center Dr/Mulholland exit. There are a couple of turns you need to make in order to get on Mulholland. Do not take Sepulveda unless you want to take a scenic route through some neighborhoods.
Also, do not try to use a gps nav aid or Google maps to get you there. It will try to send you a way that you cannot take. Just follow Mulholland Drive.
This place is a park and according to the signs the gates close at 6pm. That is gate on Mulholland that closes at 6pm. The road is a bit rough in spots but even in my Honda Civic it is still drivable. You just need to be careful.
Chris n9rin
From Ed, W6OYJ of the San Diego Microwave Group:
Mount Soledad – DM12ju – in San Diego
I am writing these notes for anybody to use getting to our famous 822 ft mountain. (More real DX has been worked from here than from Pike’s Peak!) Getting to Mount Soledad in San Diego is easier now, but still confusing. Most maps do not show the following changes. The name of Ardath Road has been changed to La Jolla Parkway. The Hidden Valley Rd intersection has been moved.
1A. If you are arriving on I-5 from the South (Downtown San Diego), take the La Jolla Parkway Exit (It used to be named Ardath Road). Follow it over the summit, stay in the left lane. Turn left at the first signal onto Hidden Valley Rd. Go to Step 2.
1B. If you are arriving on I-5 from the North, Stay on I-5 at the I-5/I-805 junction. After passing Gilman Drive, take the Hwy 52 East (Yes East!) Exit and continue about 3/4 mile on Freeway 52. Take the Regents Road Exit, turn left under the Freeway 52 overpass, and turn left again to get on Freeway 52 WEST. Move into the far left lane and continue as it goes up over I-5 and merges with La Jolla Parkway. Stay in the left lane. Turn left at the first signal onto Hidden Valley Rd. Go to Step 2.
1C. If arriving on I-15 from the North, stay right and take Freeway 163 at the I-15/Fwy 163 split. Then after a few miles take Freeway 52 West. Go several miles, stay on 52. After passing the Regents Road Exit move into the far left lane and it will merge with La Jolla Parkway. Stay in the left lane and turn left at the first signal onto Hidden Valley Road. Go to Step 2.
2. Continue ahead on Hidden Valley Rd. Pass the stop sign. Follow the double yellow lines as it curves while gaining altitude. Eventually you yield and turn right at a Tee-intersection onto Via Capri. This steep road climbs through residential areas until it reaches the roadway summit with a sharp right turn at a yield sign. Stop here at this blind corner, signal a left turn, and wait until the traffic from the right is clear. They do not stop! Turn left into Mt Soledad Park. (Gate here supposed to open at 7 A.M.)
3. On your immediate left is a paved parking lot (overflow parking). The north point of this parking lot is a good spot for working stations to the NW, N, and NE. It is blocked by the higher part of the Park toward the ENE, E, and ESE. From this same parking lot, on the side next to the Park entrance road, you can find a spot with a view to the SE, over Downtown San Diego. This location works for direct shots to Baja. The problem with this location is that you cannot work Arizona or some of the SD locals due to the terrain blockage to the East. There are usually very few tourists here.
4. The main part of the Soledad Park is the area just east and NE of the big Cross at the summit. As you proceed up the park road, stay to the right as it goes counterclockwise around the Cross. There are only four parking places in the first parking area East of the Cross. These are closest to where you want to be, but you have to be lucky to get one. Further around the Cross on the North Side are about 20 parking spaces. This is where most of the tourists congregate, but they will find you in either spot. From these two locations you can attempt to work Arizona. The first spot is best overall, though due to recent concrete “improvements” at the Veterans Memorial surrounding the Cross, you will have to move North a bit to allow direct shots toward Gaviota (304 degrees true).
5. True beacon headings from Soledad: Palos Verdes=314, Frazier=324, Santiago=344.5, Mt San Miguel (San Diego)=119. The grid square here is DM12ju.
6. Bulletproof shielding and filtering is a must for Mt Soledad due to megawatts of TV, FM broadcast, paging, and commercial radio comms.
7. If you want to go home on I-5, you will have to retrace your movements back to Regents Road and again do a U-turn under the 52 Freeway, so you can go west and take the “Los Angeles” ramp to I-5 North.
Closing Note
If you are a licensed ham operator already, and want to try a new challenge, visit the San Bernardino Microwave Society (SBMS). Meetings are held the first Thursday of each month in Corona, Calif. and are broadcast on W6ATN/BATC.tv
For more SBMS information, go to http://www.ham-radio.com/sbms/