It was great to see the announcement of a new Maker Faire event in Orange County, Calif. after so many years. Organizing and launching a new event is a ton of work, thank you to all planners, sponsors and the volunteers to make this happen!
I am glad all of my Maker Faire projects are still intact and have not been hacked for parts or made into other projects. So I brought some of my favorite projects from past events. This had to be done, since I had a short notice of the event.
I answered many questions on the items on display, and so I decided to share some details of what I did to these projects to make them “Maker Faire friendly.”
And, as part of our theme – Not Your Grandpa’s Ham Radio – all projects – as one visitor said, “do not look anything like the radios I have seen.”
My team of ham radio operators are always inspired to explore, experiment, improve, and create new and fun gadgets with some radio related twist. Integrating, hacking, modifying, breaking and fixing are all part of the ham radio experience. This is a ham radio tradition over 100 years old – and continues. Our mission is to explain and expose people to today’s ham radio and the technologies we use. It is truly “not your grandpa’s ham radio.”
Projects on Display – Details
Transverter System for the 10368 MHz (10.368 GHz) Amateur Radio Band
My current transverter system is based on a kit from Kuhne Electronic, in Germany. It is an older unit, their website has a new and improved version. I said “current” system because the rig has changed many times over the years, which is why my transverter is named “Morpheus.”
In Greek mythology, Morpheus is the god of sleep. However, My use of the name is derived from the many iterations of the basic components, layout/ergonomics, performance and packaging. In other words, it has “morphed” or changed many times.
By the way, the transverter is only one part or module of a working 10 GHz ham radio transverter station. The transverter must be interfaced with other sub-assemblies in order to actually communicate.
I covered this aspect in several articles, here are some articles available online:
Lightning Detector Circuit from Charles Wenzel’s TechLib (Technical Library)
Lightning Detector/300 kHz Receiver
As mentioned during the show, the lightning detector is a very low frequency (VLF) receiver. The circuit can be found on Charles Wenzel’s site, TechLib, short for “Technical Library.”
My Lightning Detector at Bay Area Maker Faire 2016 can be seen in this LinkedIn post.
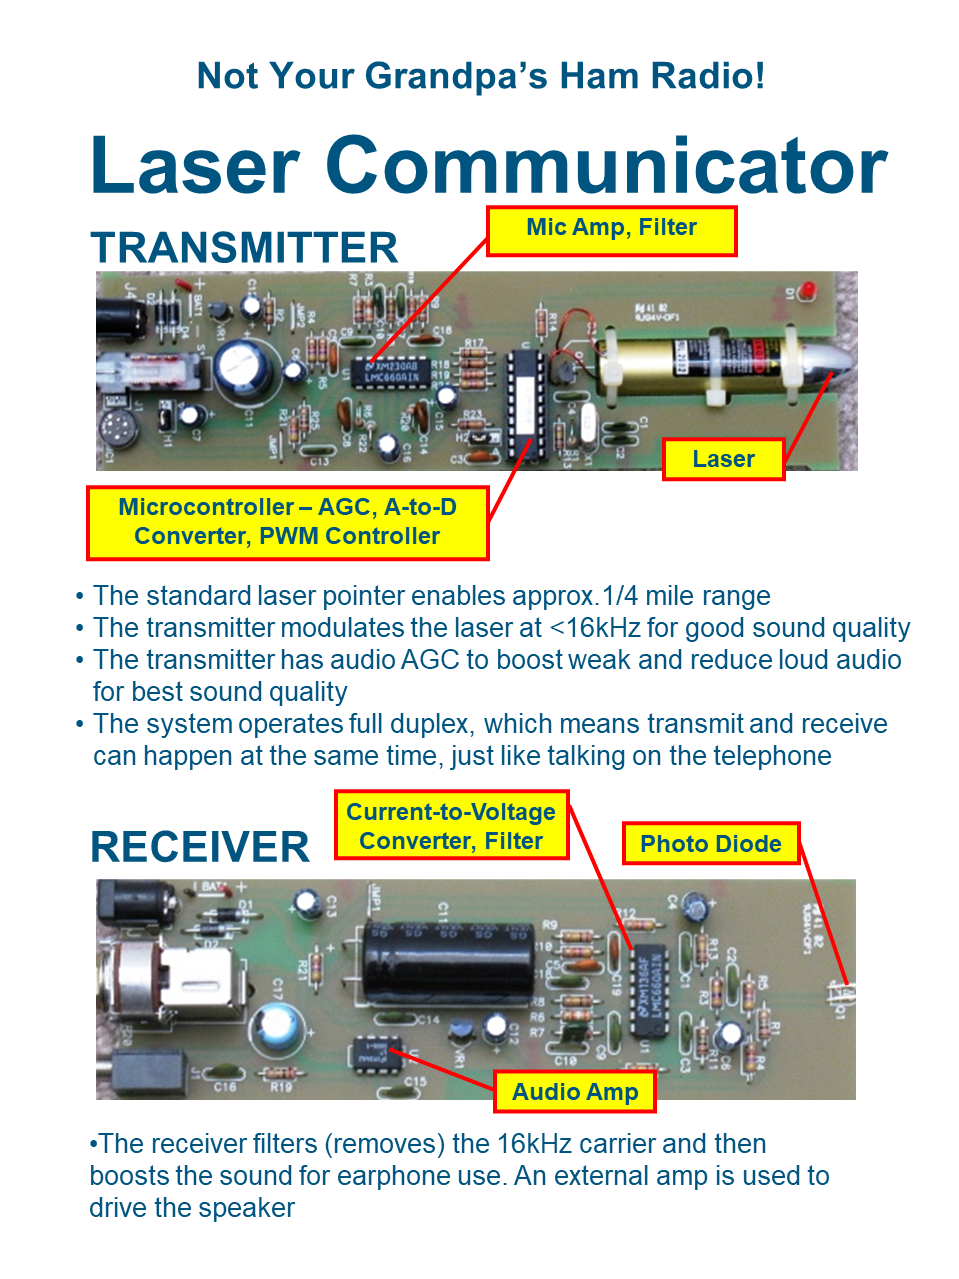
The LASER Communicator
Ramsey Electronics Model No. LBC6K. No longer made but may be available on online auction sites or other sources.
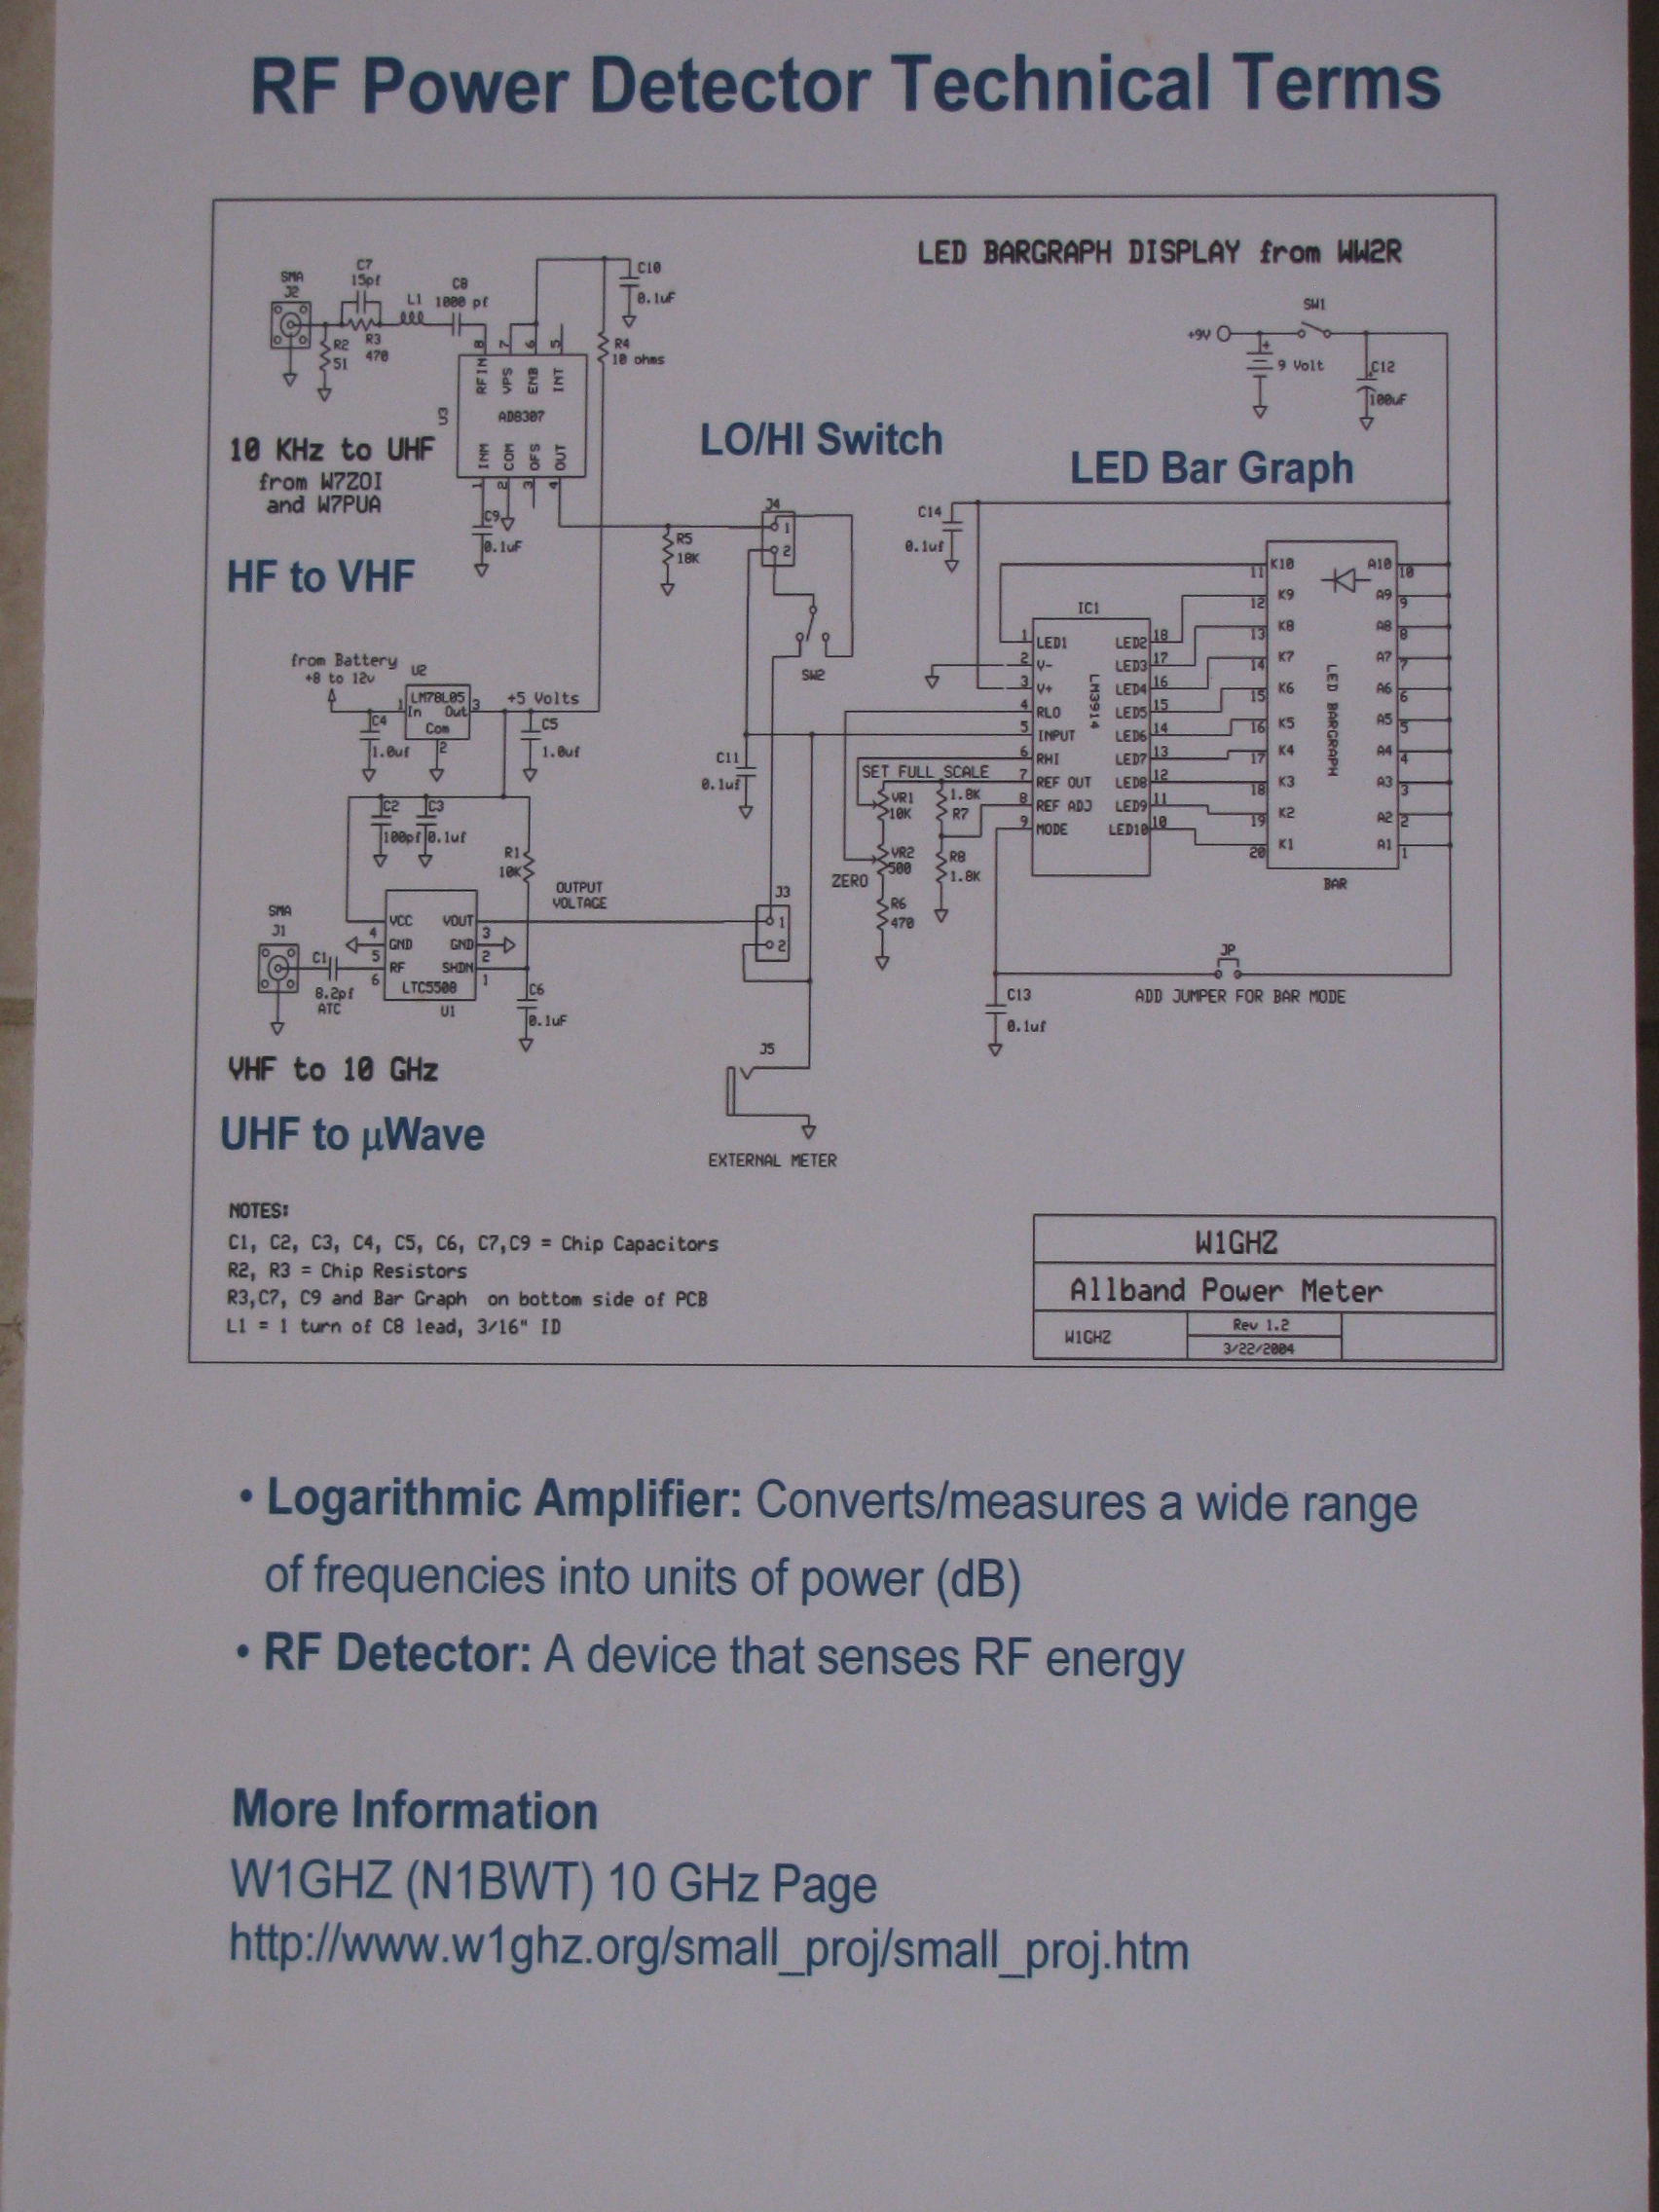
The RF Signal Detector
The RF detector is based on a portable power meter available as a kit from Down East Microwave (DEMI). It is called the W1GHz All Band Power Meter Complete Kit, Model ABPM. I replaced the LED bar graph display with individual LEDs to make the “meter” more visible.
The 1152 Board: The Magic Frequency
The 1152 MHz synthesizer is a modified circuit board from a surplus Qualcomm electronic logging device (ELD) for freight trucks. Modification information can be found on the San Bernardino Microwave Society (SBMS) website.
Gene Kranz NASA Flight Director (retired). Kranz celebrated his 88th birthday on August 17. NASA photo
Gene Kranz – my troubleshooting hero
My presentation is inspired by two things: Observing a problem during an emergency communications drill and the movie “Apollo 13,” starring Tom Hanks as Jim Lovell and Ed Harris as Gene Kranz.
Kranz’s experience, decision-making and guidance helped the massive team of experts to troubleshoot and resolve the crisis on the mission. All by “remote control” and without tools.
In our everyday operations no matter what the conditions or situations are, someday, something will go wrong. We must be prepared for this and try to get back on the air, sometimes quickly.
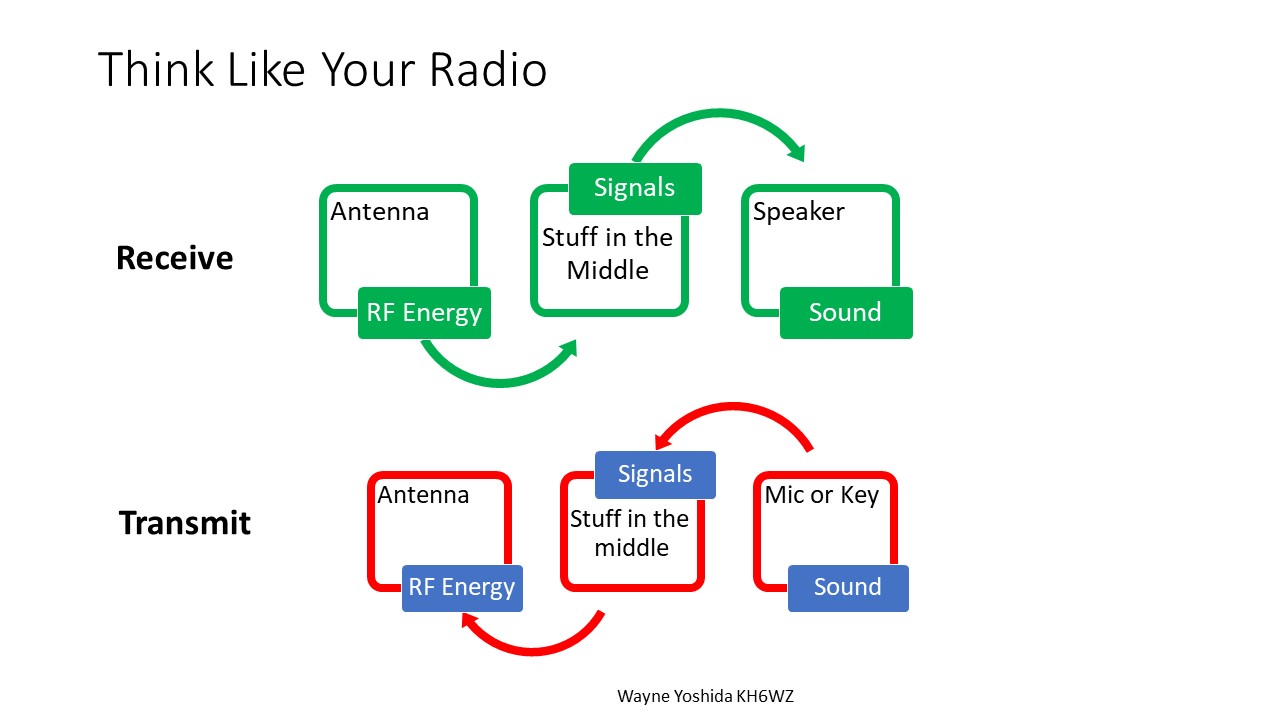
The basic concept to troubleshooting – anything – is the need to understand how the item works, in its most basic sense. For receivers and transmitters, it can be as simple as this:
Very basic receiver and transmitter concept
An increased understanding of how the item works often helps the troubleshooting process.
Next, consider why something is not working correctly – develop a theory – and then check to verify whether your assessment is correct.
Guessing and replacing parts is usually time consuming, expensive and often never solves the problem.
Another Way to Look At Things
Sometimes, we must think about what it is not, rather than what it is or can be.
For example, my front-loading clothes washer developed a problem: rinse water was in the compartment when the washer finished. At first, the bin was just moist, but when it was filled to the top, I decided to correct this to prevent a possible flood.
Doing some research on the internet, I found many entries about the detergent dispenser not working, and not adding soap into the washer.
Although this is not exactly like my issue, it is similar. All repair suggestions centered around the water supply not flowing properly into the detergent bin.
The solutions included making sure the water supply had enough pressure, cleaning the incoming water supply path into the dispenser using a piece of wire or a pipe cleaner, and cleaning the detergent dispenser.
This made the suggestions almost useless for solving my problem, since the fabric softener was going into the washer, and, since there was rinse water in the softener bin, water supply is not the problem.
I had to think about this some more: Water in the bin means water supply is fine. Softener is going into the washer. But why was the softener bin full, all the way to the top? Normally, the amount of liquid softener fills the bin at less than an inch.
So, something is not allowing it to drain, the opposite of filling it.
I checked to see if the washer was level. Maybe gravity helps drain the bin. Nope, a bubble level confirmed the washer was level in all directions.
Wait! There was something about cleaning the dispenser. I examined the dispenser tray unit and noticed the softener path was different from the detergent path.
I disassembled the dispenser tray and cleaned out the softener hole and mating tube. There was not much to clean, so I was not sure it would make a difference.
Clothes washer fabric softener dispenser
I ran a batch of laundry. The problem is fixed!
Understanding how something works and observing symptoms when it does not work, will often lead to a solution.
A Question for Later
There was an excellent question from the session: “How do we prevent things from going wrong in the first place – what are some best practices to prevent things from going wrong?”
This will be the topic of a future CQ magazine “Ham Notebook” column.
If you have any questions on troubleshooting basics, or if you have a story about how you solved an equipment problem to get back on the air, let me know, and I will share your story in an upcoming update to this presentation!
Some additional information to supplement my presentation called “Building and Contesting on 10 GHz.”
This is not a complete listing of “microwave amateur radio knowledge” but it is a one-page resource to help you get started.
The first thing I would recommend is to find and join your local VHF and above ham radio club. There are clubs that focus on microwave technology and operating all over the world – find yours to meet new people, learn new things, get a rig going and join the fun!
Microwave Update (MUD)
One of the best places to meet active microwave band hams and learn more about the SHF ham bands is the Microwave Update (MUD). The event is sponsored by various clubs around the USA.
All-mode transceivers become the IF on the uWave bands
All-mode transceivers become the intermediate frequency (IF) stage in a microwave transverter system. I like to call the IF rigs the human to “transceiver interface” because this is the unit we use to tune the operating frequency, hear through the speaker and transmit audio via the microphone. Usually the IF radio also initiates the receive to transmit change-over as well.
It is important to know that IF radio performance does not affect overall performance on the microwave frequency.
In other words, fancy filtering, special ovenized oscillators and even CW or SSB filtering are not mandatory. While all those features and functions can enhance enjoyment, it’s the transverter at the microwave frequency that determines performance for the microwave station. In fact, I have two Yaesu FT-817s. One is equipped with CW filters, one is not. Sometimes, because stations often drift, the IF radio with the filter may not be able to hear the other station because the stations have drifted beyond the receiver passband. I normally bypass the filter on my IF radios.
But this is also a good thing, since it means inexpensive and even used VHF, all-mode rigs can be used.
Also remember, for transverter use, the transmit power from the IF rig is on the order of a few mW or less. So, if you are able to find, for example, an all-mode 2m rig being sold “for parts or repair” – that may be a viable candidate for an IF radio.
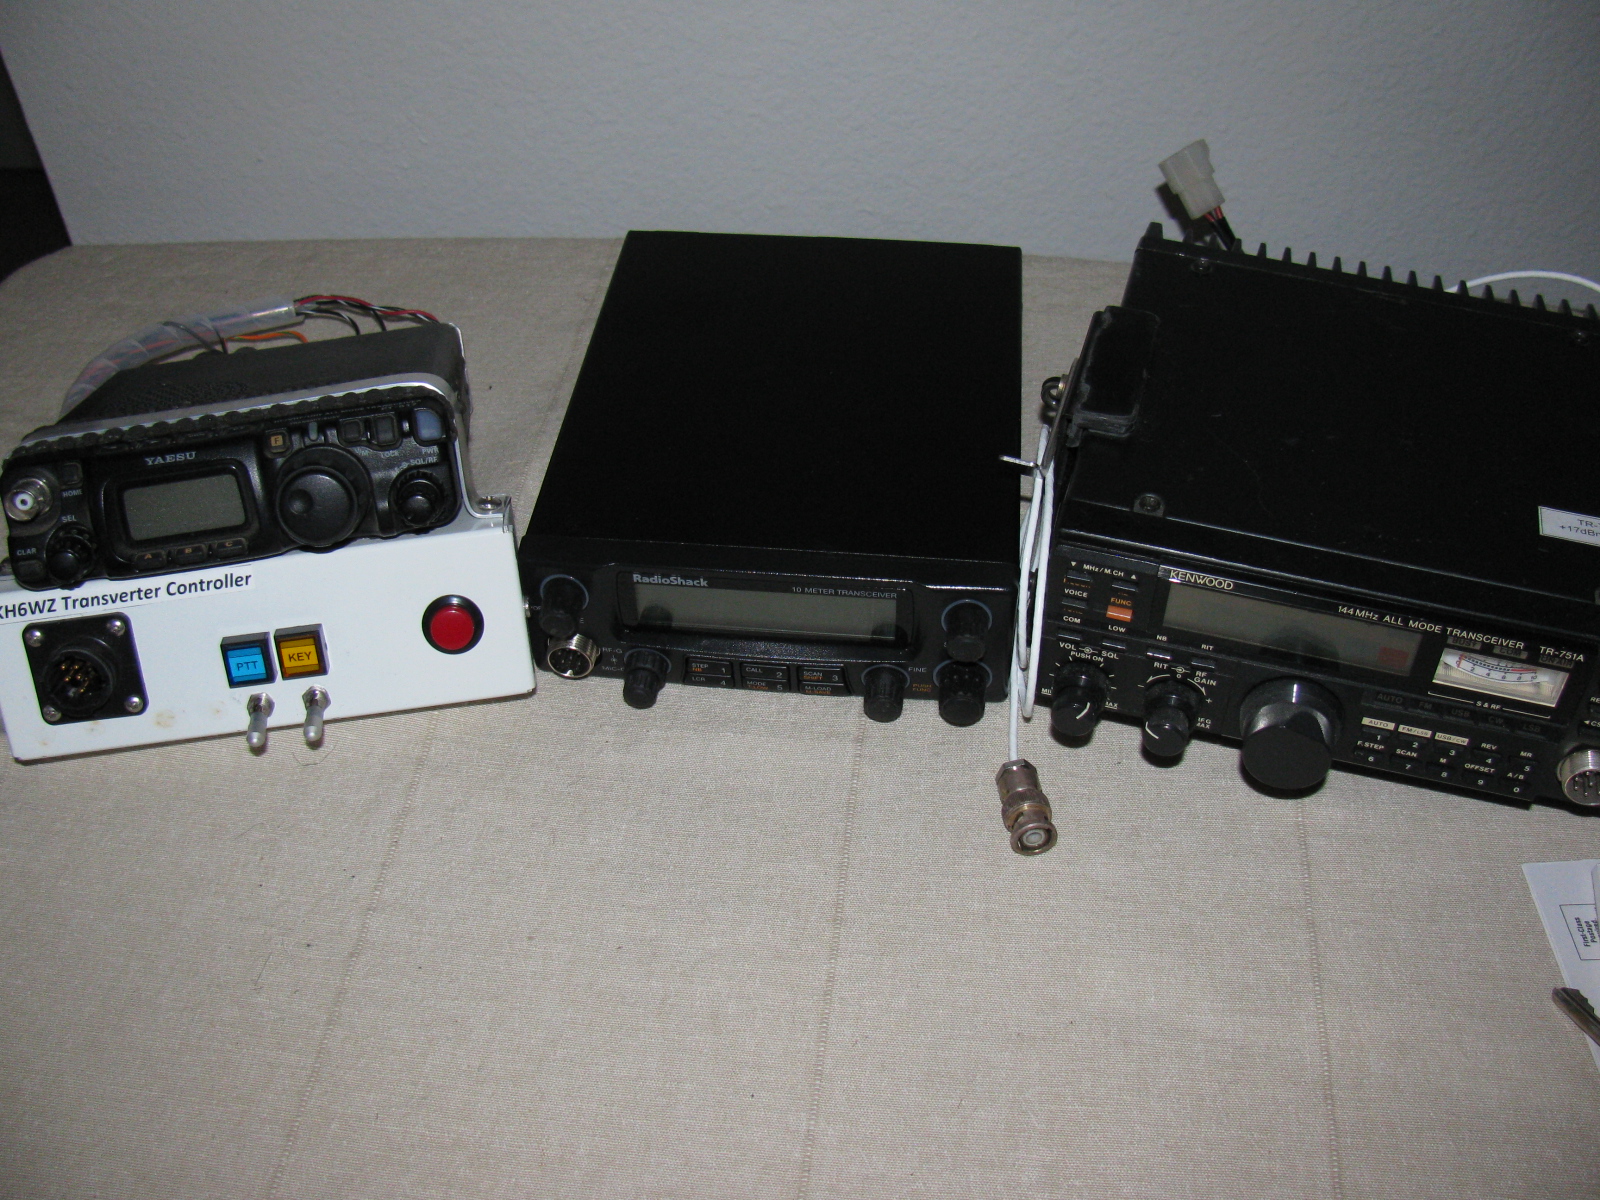
On most of my IF radios, I added a “convenience box” interface. This box converts all the interface connectors to ordinary RCA jacks. This is very handy in case my IF radio breaks: I can quickly swap any IF radio and swap it almost instantly, regardless of the IF radio model. My IF radios include a Kenwood TR-751, Yaesu FT-817, Radio Shack HTX-10, and some others.
Here is a picture of the convenience box on my FT-817 . . .
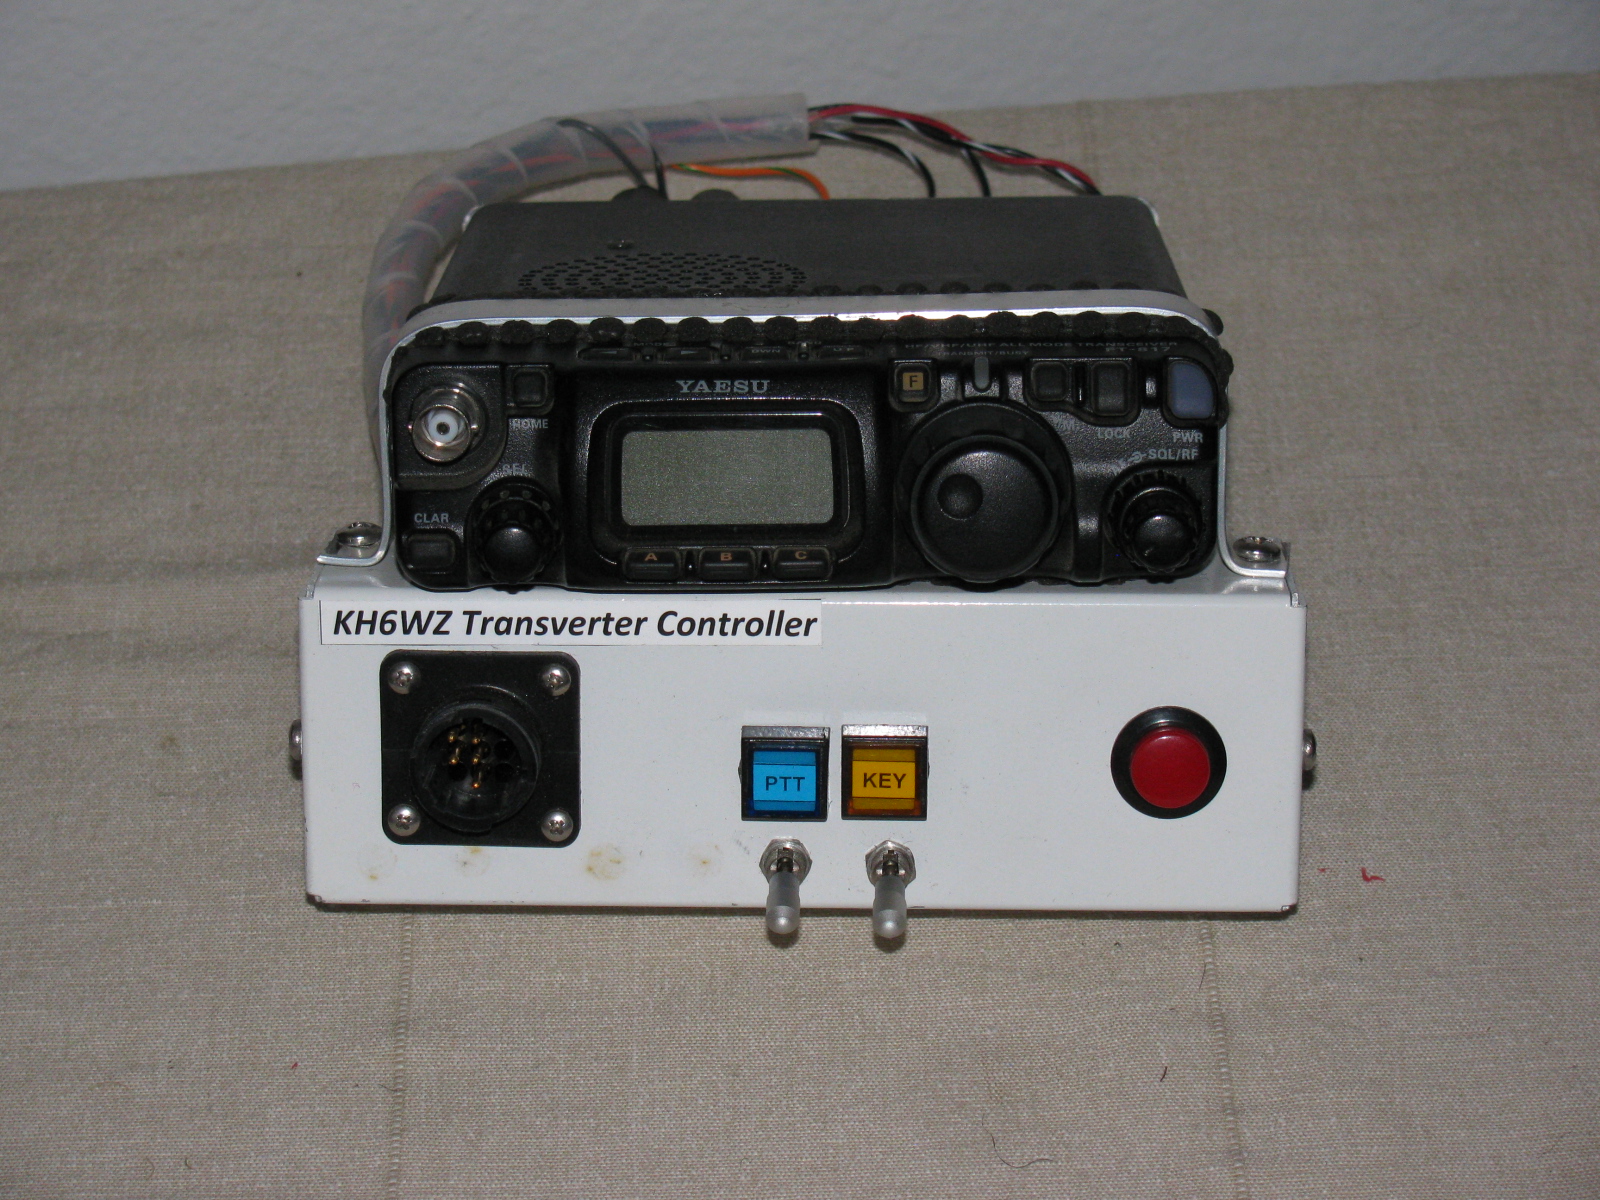
KH6WZ IF Rig with RCA Jacks
IF Radio Convenience Box – Control
The white box front panel, from left to right: Multi-pin interface jack for DC power and control. Center left: Above, blue LED for “PTT Closed” indicator. The locking toggle switch is used to lock the IF rig into transmit (PTT Lock) mode to make it ready to send a carrier/beacon tone. Center right: Above, the yellow LED indicates “Key Condition.” The locking toggle switch is closed and locked to key the transmitter after the PTT is locked into transmit. The red push button is used to send CW in case I forget to pack my key or the key breaks in the field.
Essential for Success: Accurate Reference Frequency
To help ensure successful two-way operation on the microwave bands, a stable and accurate 10 MHz Reference oscillator is essential.
This can take the form of Ovenized Crystal Oscillators (OCXO), GPS-Disciplined Oscillators or Rubidium Oscillators. All of my transverters have OCXO units that I calibrate at a friend’s lab. Once set, I can depend on being very close to the displayed frequency. One secret: I keep the reference oscillator continuously powered throughout the contest weekend.
Although some club members have rigs using a rubidium or GPS standard, my OXCO-equipped rigs are able to match those other, more sophisticated radios without any problems.
Improvement Paths
Receive
Low Noise Amplifier (LNA) for 10 GHz
Low Noise Amplifiers (LNAs) can be found as Low Noise Block converters (LNBs) for Ku-band (12 GHz to 18 GHz) satellite TV receivers. Noise figures at or better than 1dB and 20dB-plus gain can be achieved. The modifications are easy and can be done without test equipment. Chip, N6CA published an example on his webpage.
Antennas
2-ft Dish vs 6-ft Dish
I call the picture above “Dish Envy.” On the left is Dick, WB6DNX with his 2-foot prime-focus dish. On the right is Robin, WA6CDR with his 6-ft dish.
Most beginning 10 GHz ops start with discarded and usually free satellite TV offset-fed dish antennas. But 24-in. diameter prime focus dish antennas or 24- to 30-in. offset feed antennas work better. Paul Wade, W1GHZ is an excellent online “microwave antenna handbook” – a great resource for hams.
Amplifiers – SSPA, TWTA
10 GHz SSPAs
It is amazing what one can find on eBay and other online auction sites.
High power amplifiers – Solid State Amplifiers (SSPA) and Traveling Wave Tube Amplifiers (TWTA) as well as other materiel for the microwave bands such as waveguide, SMA, Type-N and other connectors and assemblies are becoming available to just about anyone.
As mentioned briefly in the presentation, you must be careful when bidding or buying an amplifier for the 10 GHz ham bands, since some non-ham band amps may not be easy or may be impossible to convert to the 10 GHz ham allocation.
However, there are also many 10 GHz amplifiers that can be re-tuned (“snowflake tuning”) or used as-is. The term snow flaking is used when describing the tuning of microwave amplifiers or other surplus items. A step-by-step article about snow-flaking a surplus amplifier for 10 GHz is posted on the San Bernardino Microwave Society (SBMS) website. See “10 GHz Qualcomm Modification Notes” and “Modifying the Qualcomm 1W Ku-Band PA for use on 3.4, 5.7 or 10.3 GHz.”
When snow-flaking, a small wooden stick with a tiny speck of copper foil is touched and moved around the traces of an RF section while monitoring RF power. Watching for peaks, the small probe is removed, and a piece of copper foil is soldered in that location.
It is tedious but can be fun and rewarding when the job is completed and you have more power on the X-band.
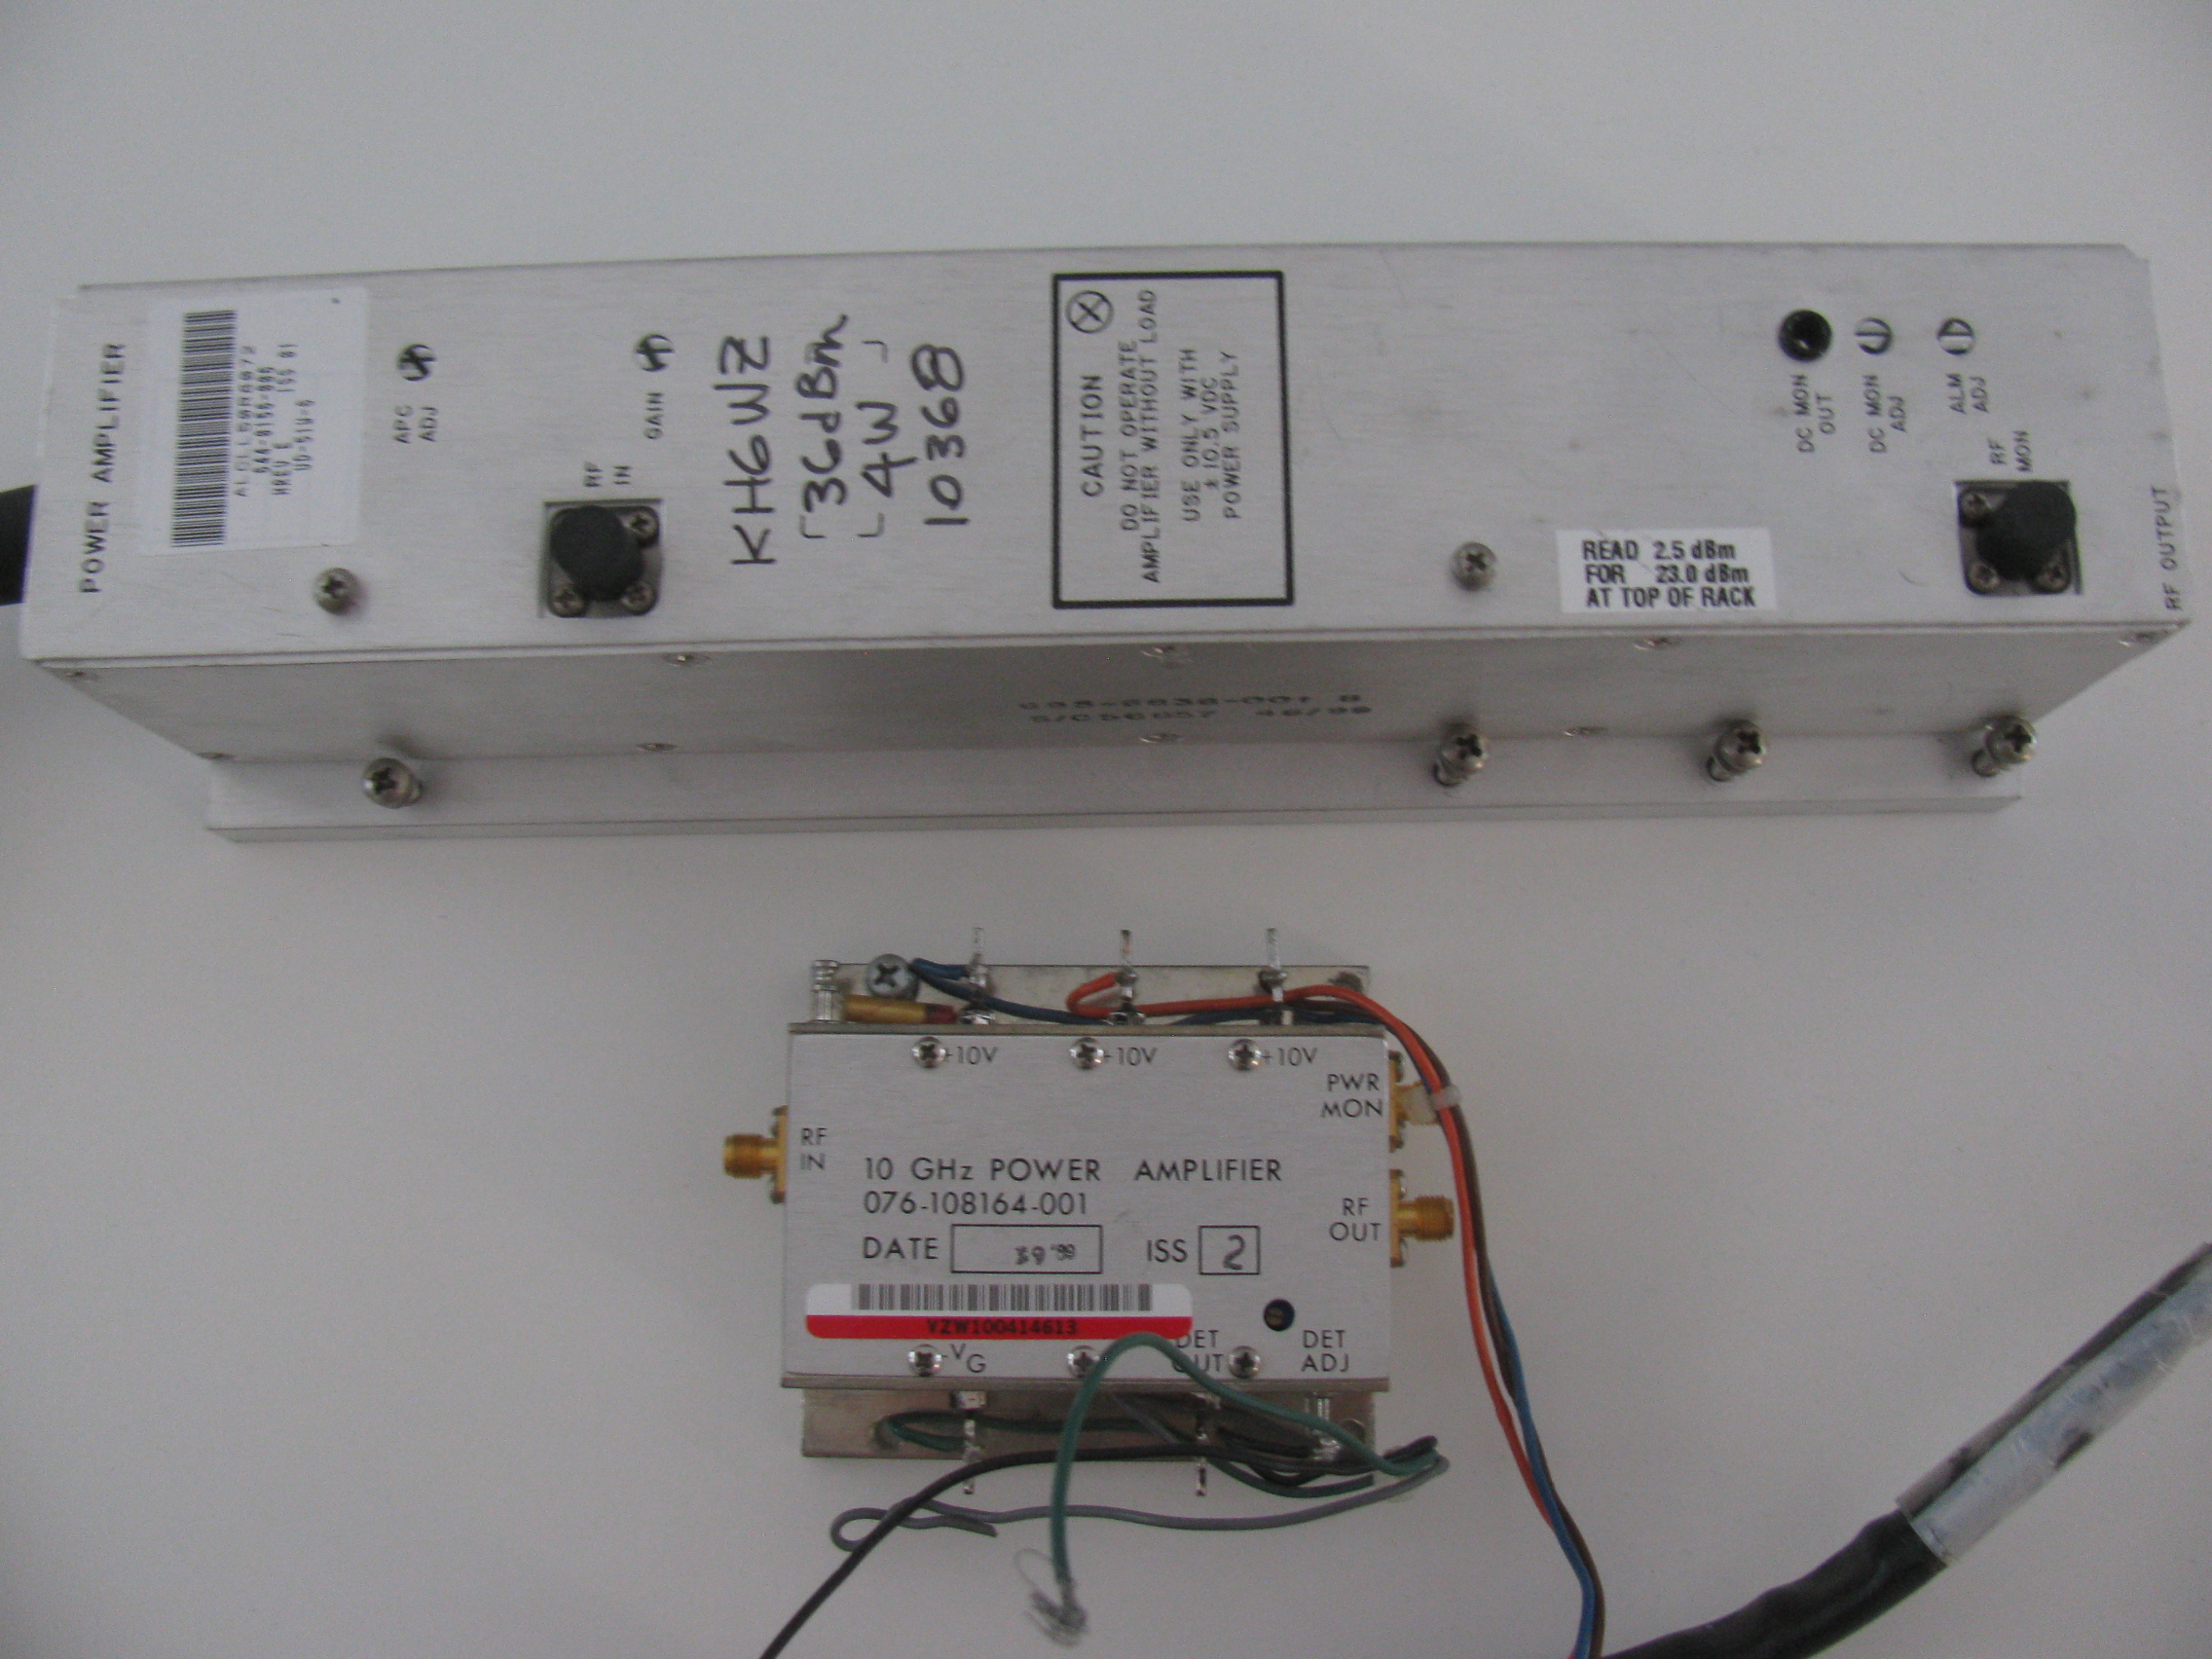
An excellent example of a small amplifier often found on eBay can be used without modification is the Harris-Farinon Model SD-108175 / 076-108687-001 solid state power amplifier (SSPA). I have several of these in use, and the power varies from about one watt to three watts on 10368 MHz.
The good news is that many microwave ham bands over-lap the commercial or other non-ham service allocations (such as Wi-Fi, Bluetooth and Industrial, Scientific, Medical [ISM]), and amplifiers intended for these services can often be used as-is without modifications to the RF section. No tuning necessary.
In any case, all amplifiers will require a power supply (various voltages), power supply sequencing and high power transmit/receive changeover to integrate into a “beginner system.”
Sequencers: Protect Your Investment
Sequencer Demo at Maker Faire
When moving to higher than “driver power” (milliwatts), it is important to protect the receiver and amplifier circuits by delaying the time between receive and transmit. The delay needed is only a few milliseconds, enough time to allow the relay contacts to close and settle before the change from receive to transmit happens.
A sequencer automates switching various stages in this specific order:
Antenna relay
Transverter enable
Power amplifier enable
Transmit enable
The order is reversed when going from TX to RX.
In my Maker Faire display, pictured above, the W6PQL 4-Event Sequencer is used to drive a large Type-N relay (for T/R) and three high current power relays used to turn on the transverter support functions. It is available as a kit from the W6PQL website.
I have also built and use several sequencers based on Chip N6CA’s “Time Delay Generator” circuit, presented in many years of the ARRL Handbook (1997 and others).
I hope my presentation inspires more hams to try something different. There are many developments and new technologies to explore in ham radio, let’s continue the century-old Ham Radio Tradition in the 21st century style and remind people ham radio is still relevant today!
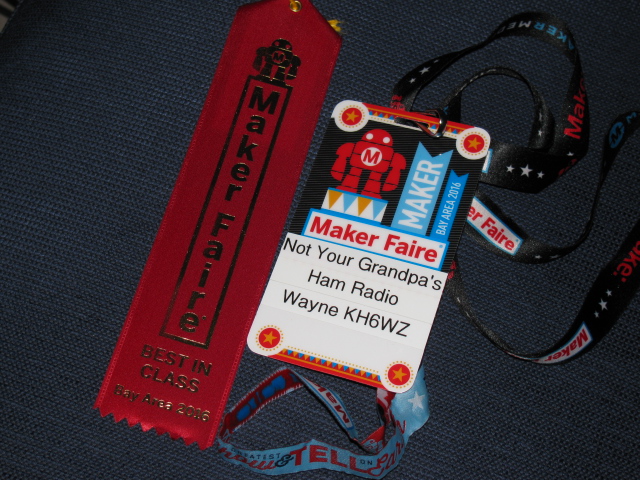
Not Your Grandpa’s Ham Radio Wins ‘Best in Class’ Ribbon
Maker Faire Bay Area was extra-special for us this year: We won a ribbon for “Best in Class.”
Maker Faire Hq. explains there are two ribbon categories: a blue ribbon for best in show, and a red ribbon for best in class. The red ribbons are also used to show the Maker has an educational element.
This red ribbon is an excellent victory, because the Maker Faire staff recognizes for our mission statement:
To show people what today’s ham radio operators are doing with the newest technology, and to change the image of ham radio, making it both contemporary and chic in a hi-tech way. We also want to emphasize how ham radio can be used for science and technology education and a possible career path for youngsters.
Our projects demonstrate how ham radio technology changes with the times, yet still includes both past and present to accomplish one thing: Creating ways to communicate voice and data over the ether, without wires.
Notice several Makers have multiple ribbons. Now we have an additional Maker Faire goal: We need to win a ribbon each year.
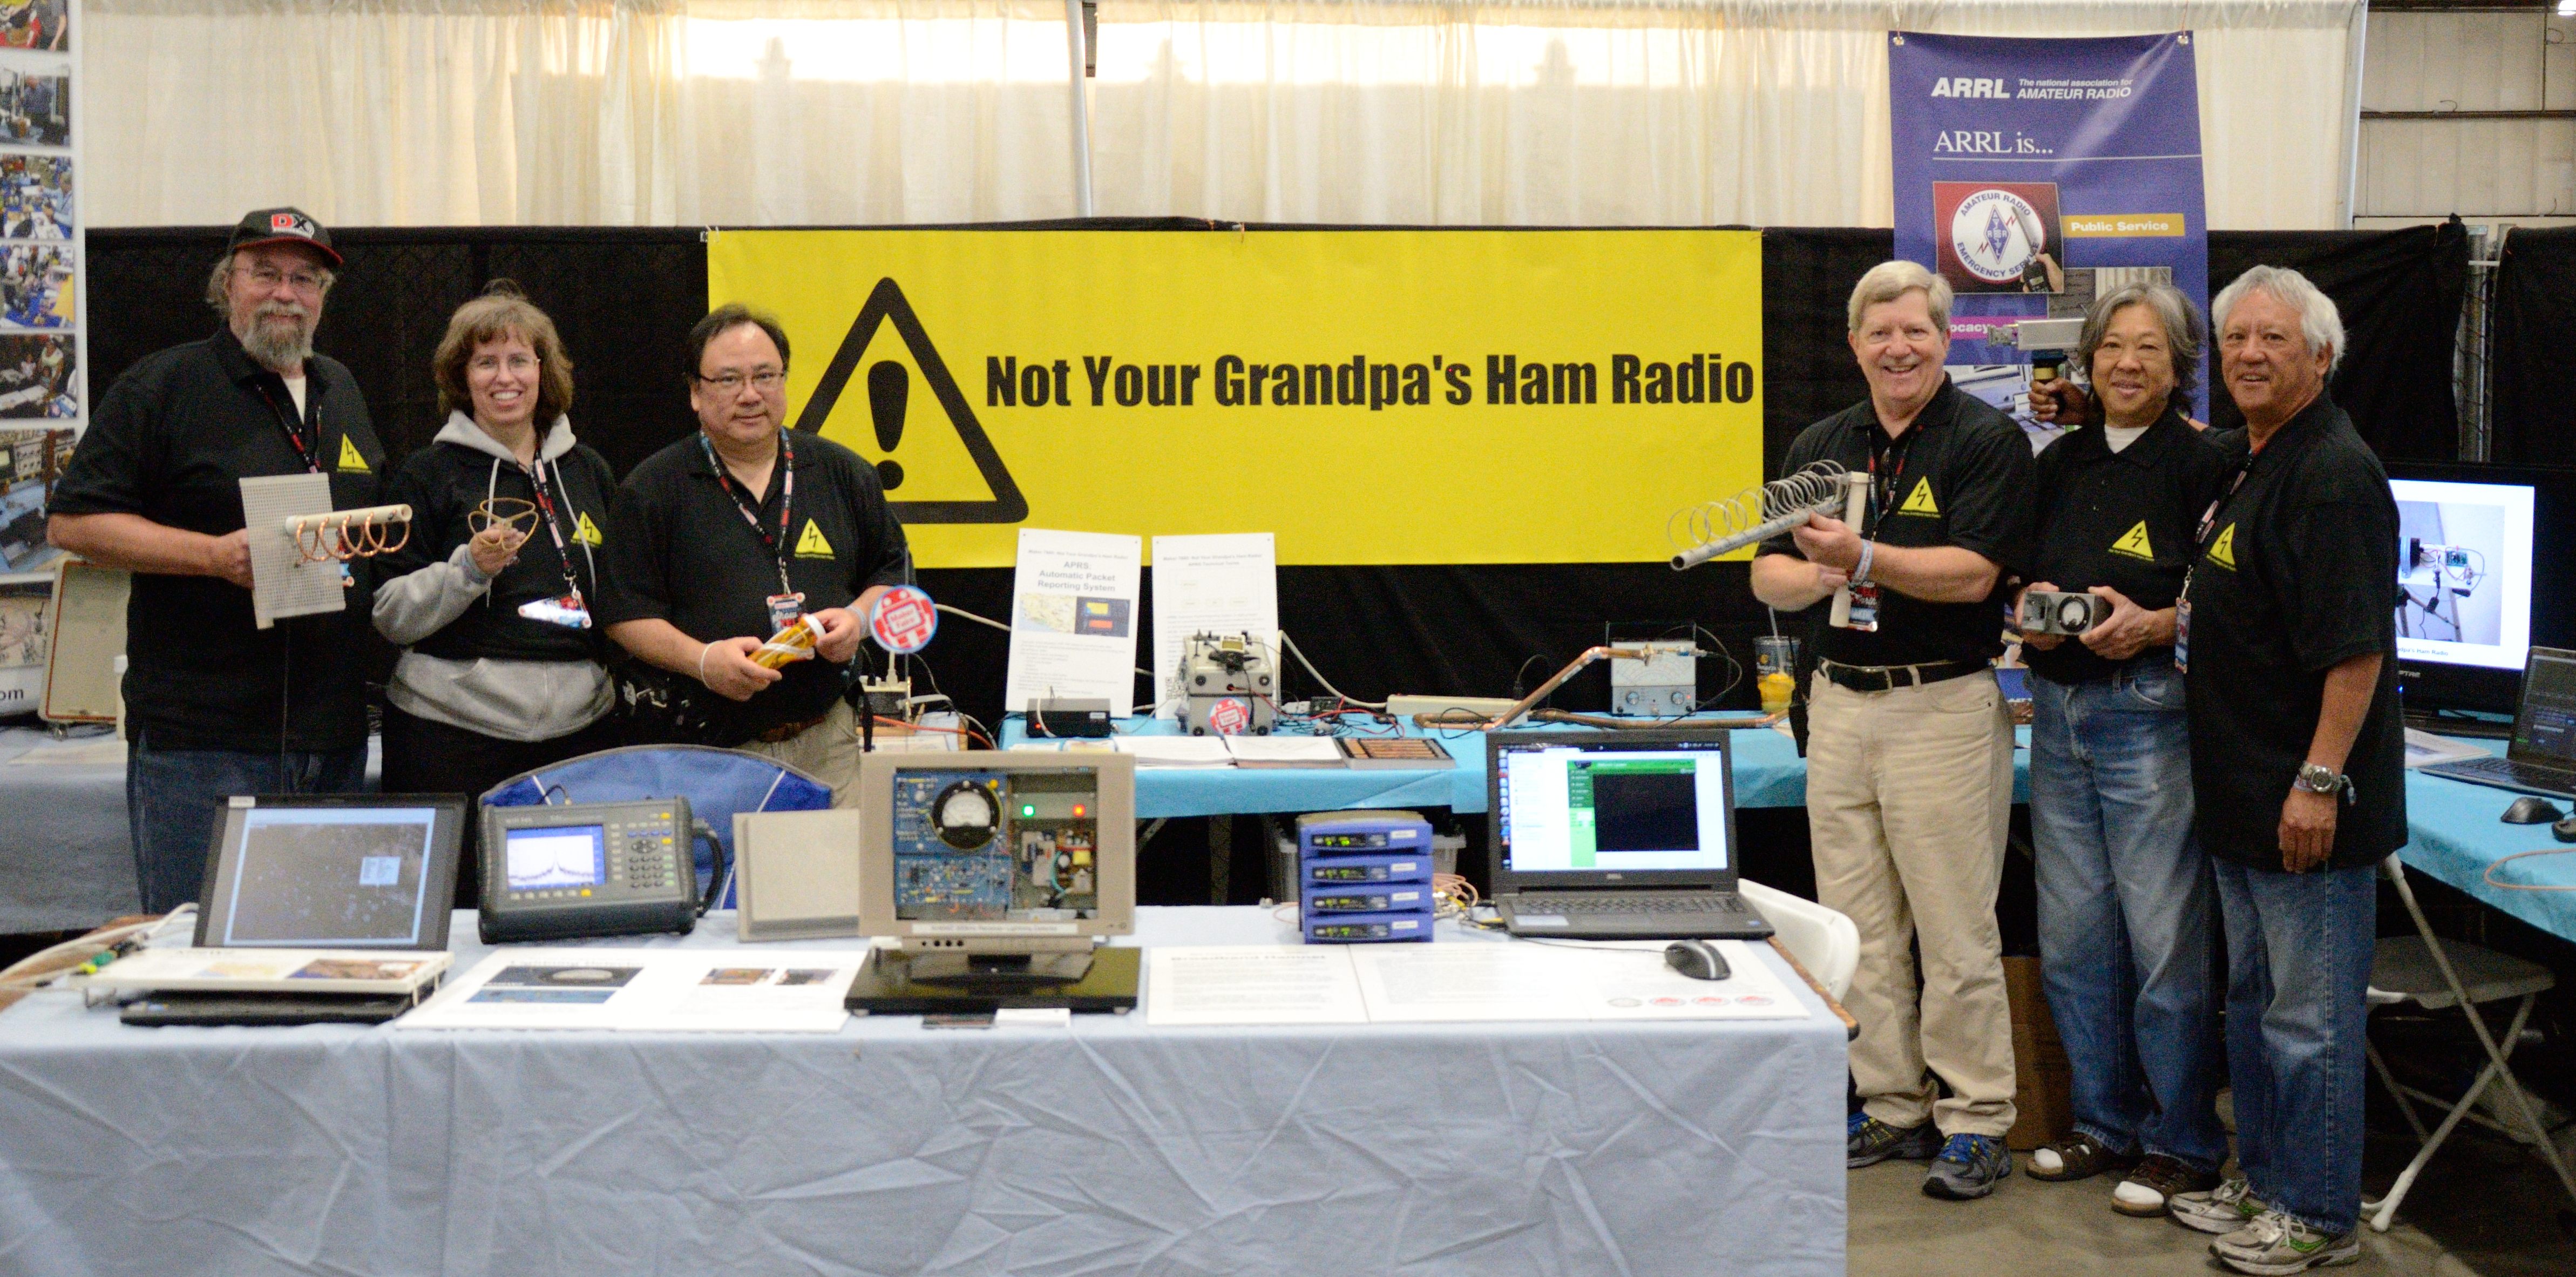
Maker Faire Bay Area Team 2016
Left to right: Dennis Kidder W6DQ, Lisa Gibbons KF6QNG, Wayne Yoshida KH6WZ, Marty Woll N6VI, Patricia Yee, Brian Yee W6BY. Not pictured: Joel Wilhite KD6W, Victor Frank K6FV and Paul Zander AA6PZ. The new polo shirts made by Dennis gave booth staff a professional look. Photo by Dennis Kidder.
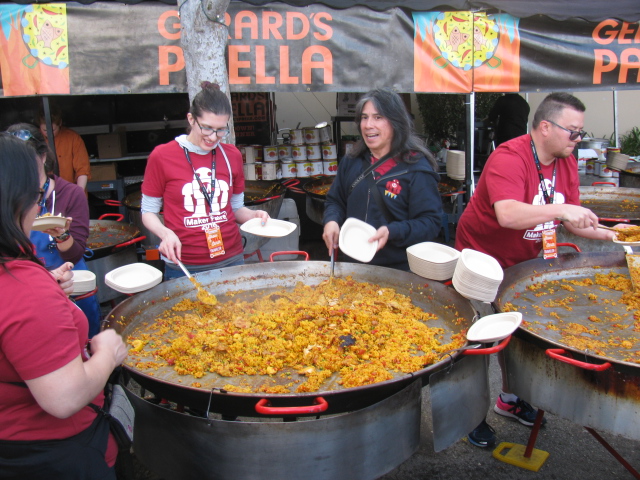
A Setup Day Tradition and Treat – Gerard’s Paella
Hungry Makers ready for paella and various beverages after setting up their displays and activities.
Volunteers scoop and serve paella to the Makers after Maker Faire Bay Area setup day.
Gerard and his nephew Tom as the paella feast winds down.
This is a tradition at the Maker Faire Bay Area: Gerard’s Paella. Gerard Nebesky trucks in his crew and giant paella pans, which are about 20 feet in diameter. Gerard feeds over 2500 hungry Makers on Friday evening. A great big Thank You goes out to Gerard and his Maker Faire crew!
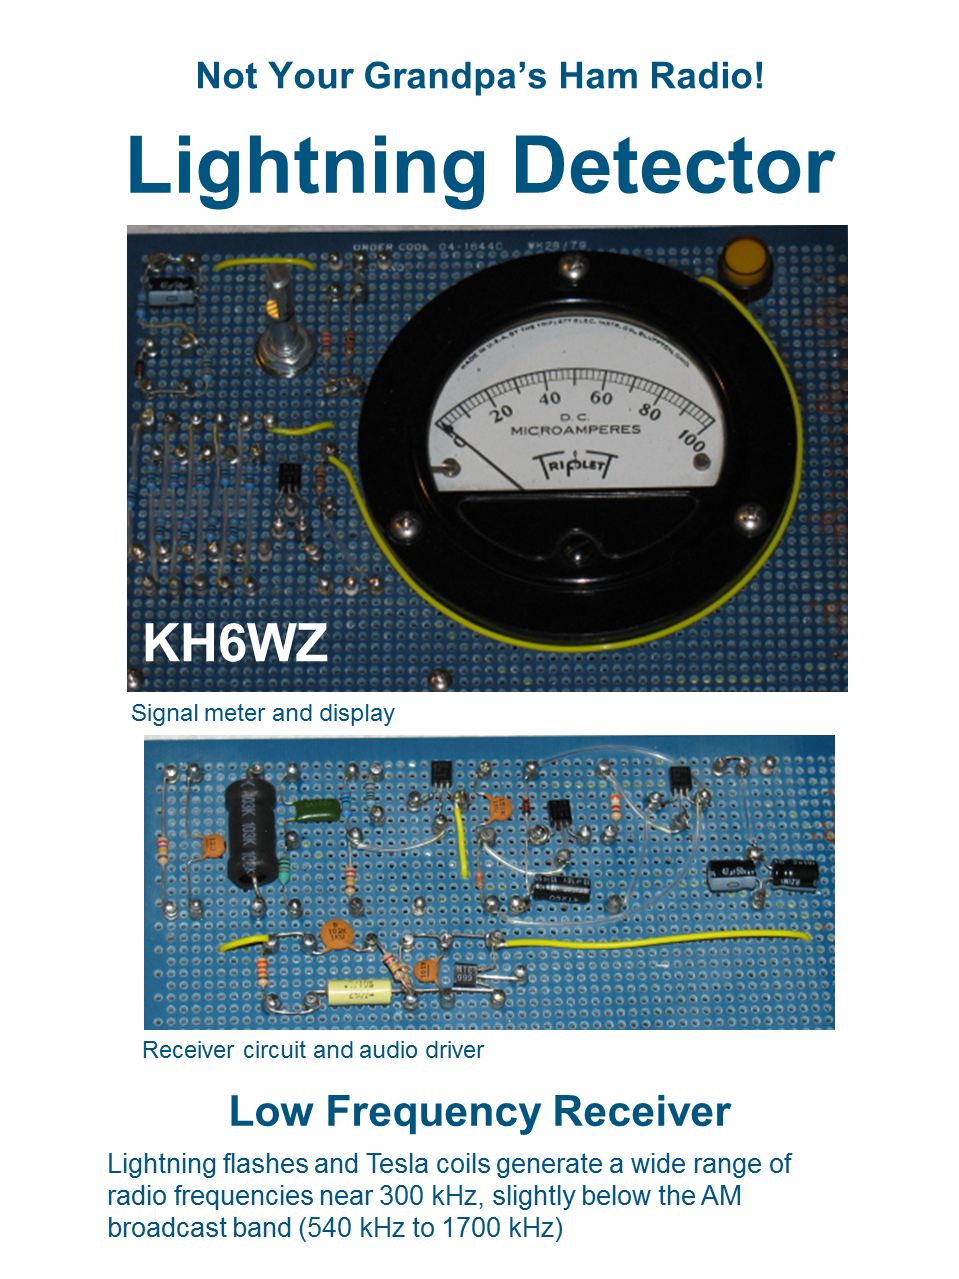
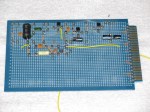
Lightning Detector, Low Frequency (300 kHz) Receiver
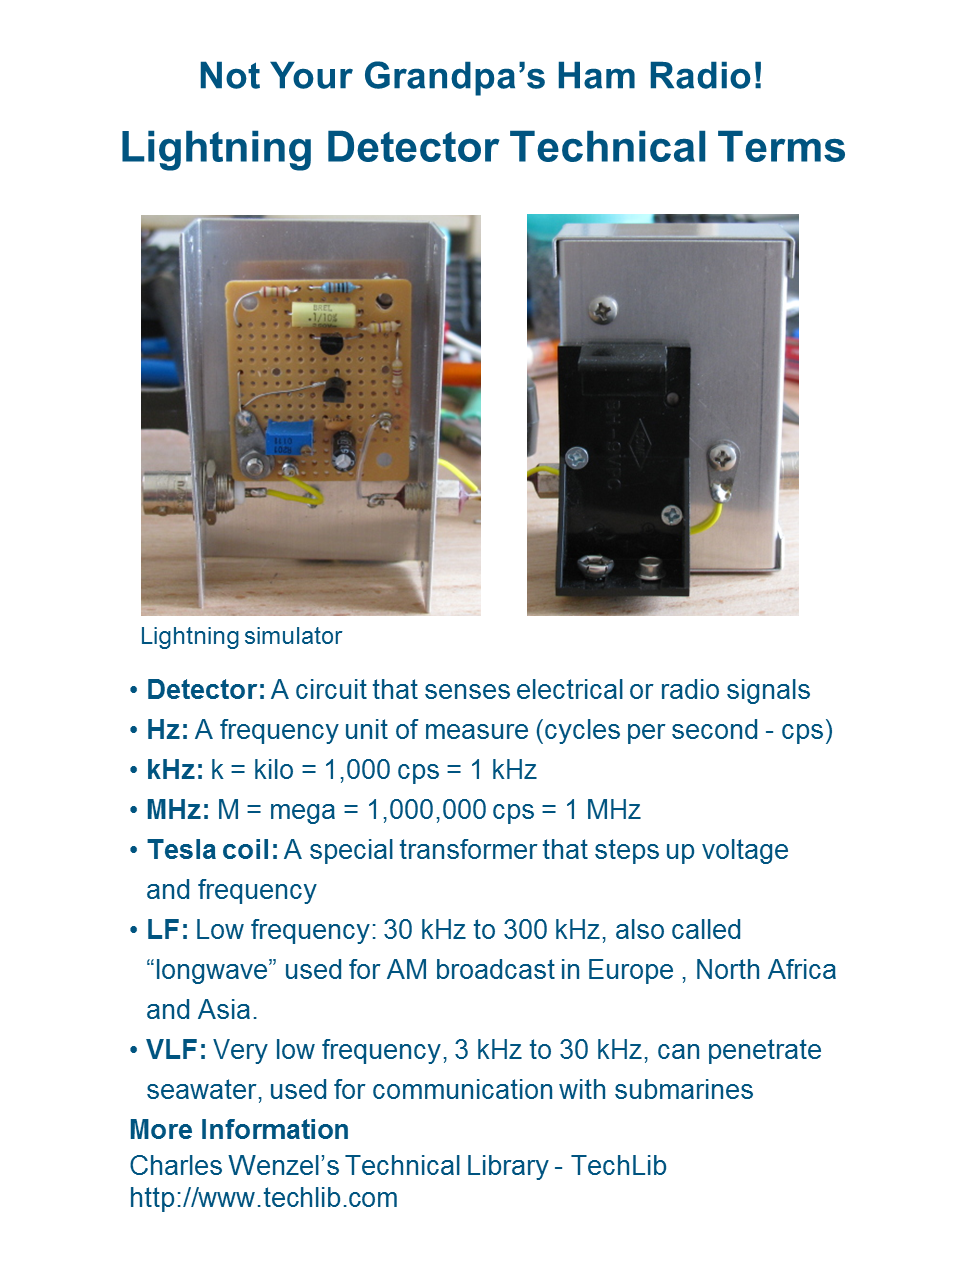
The completed lightning detector-300 kHz receiver completed a few nights before the Maker Faire. On the right is the “lightning simulator” – a piezo BBQ striker in a plastic pill bottle.
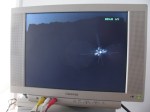
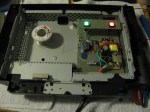
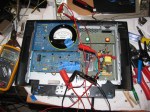
The lightning detector-300 kHz receiver is built into a broken LCD TV cabinet. Originally, I thought I could re-use the power supply, infrared remote control and audio amplifier. Unfortunately, the TV is built with a small number of ICs with multiple functions. The power supply performed strangely when I probed around to map out the output voltages. Since I was on a tight schedule, I gutted the unit, and kept only the speakers.
Lightning flashes and Tesla coils generate a wide range of radio frequencies near 300 kHz, slightly below the AM broadcast band (540 kHz to 1700 kHz). The electrical impulses can be perceived as “noise” or “static” in a radio receiver.
The Lightning Detector is a “resonant tank circuit” which detects the electrical impulses, amplifies them so the noise can be heard on a speaker, seen on the yellow LED and moves the needle on the meter.
A lightning simulator is used to test or demonstrate the unit in action when no storms are in the area. It is a low frequency, low level oscillator. Another way to simulate lightning is to use a piezo electric striker, like the ones used in some cigarette lighters and gas barbecue starters.
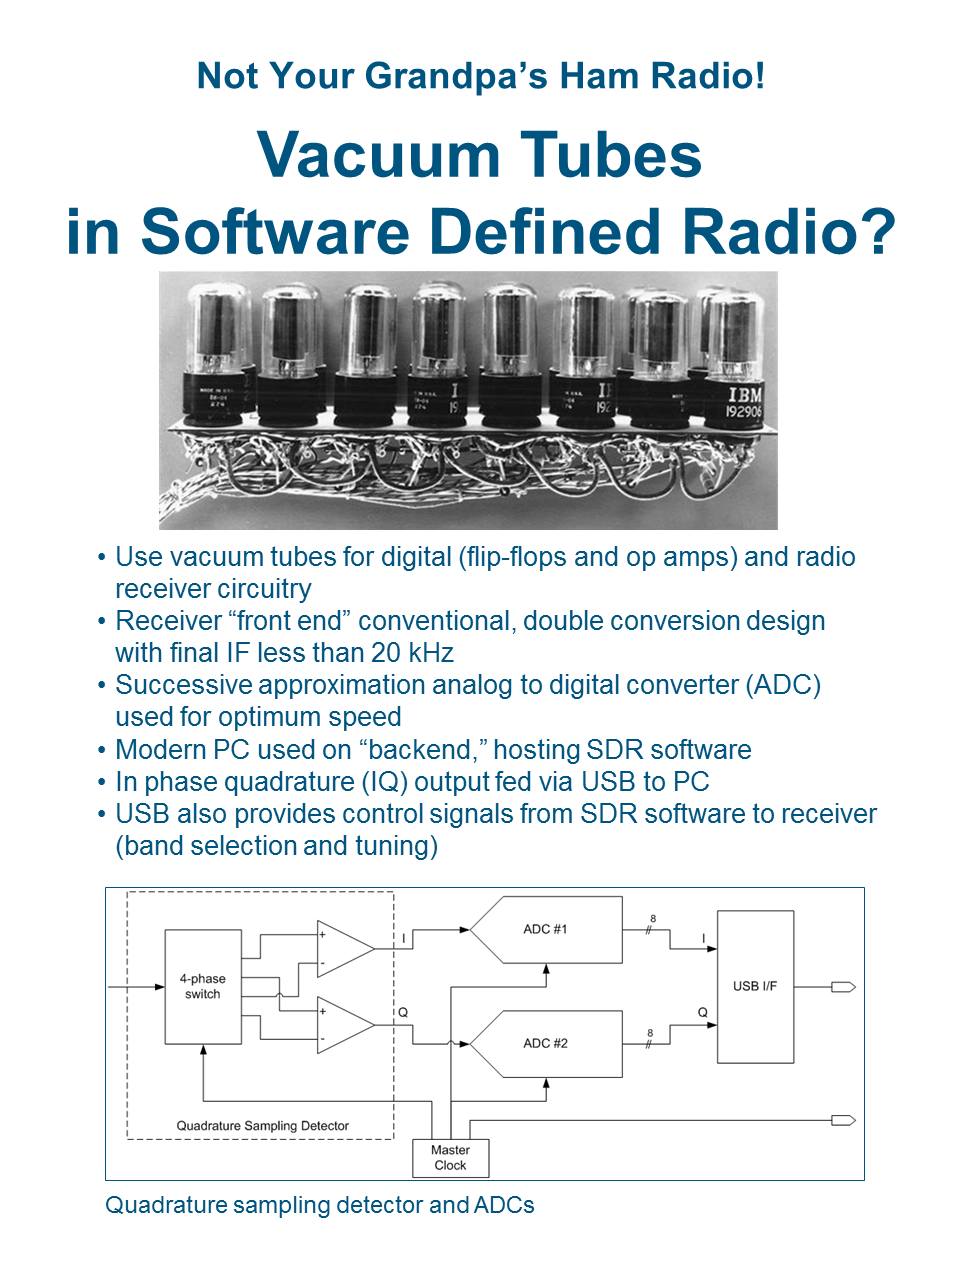
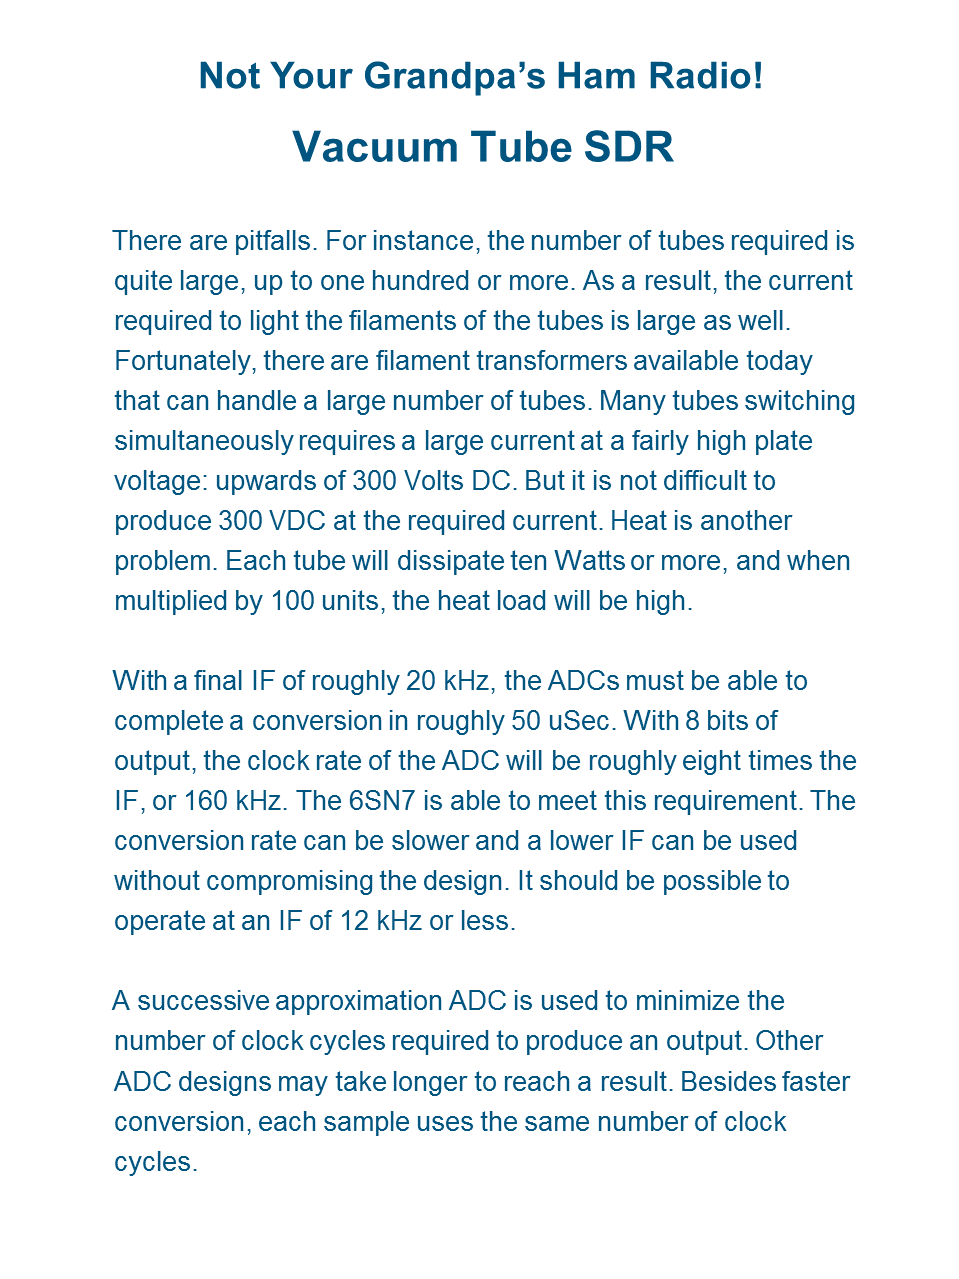
A Software Defined Radio – Made with Vacuum Tubes
A what made with what?
This is an interesting mix of old and new. Dennis Kidder, W6DQ, came up with this idea. Vacuum tubes are fully capable of performing many of the same functions as modern solid-state devices.
Dennis says, “The best part of using tubes in a project — they look really cool!”
24 GHz Beacon
Brian Yee, W6BY, brought his Amateur radio beacon. A beacon is a one-way radio transmitters usually used as “propagation indicator” to help see how signals are traveling through the air. They can also be used as a signal source or reference to measure frequency, calibrate radio receivers and test antennas. Brian’s beacon operates on the 24 GHz band, and is made with modified microwave telecommunications sub-assemblies. An Arduino Nano is used as the beacon identifier. It sends out Brian’s ham radio callsign W6BY every 10 minutes (an FCC requirement) as well as a series of tones to help locate and identify the beacon.
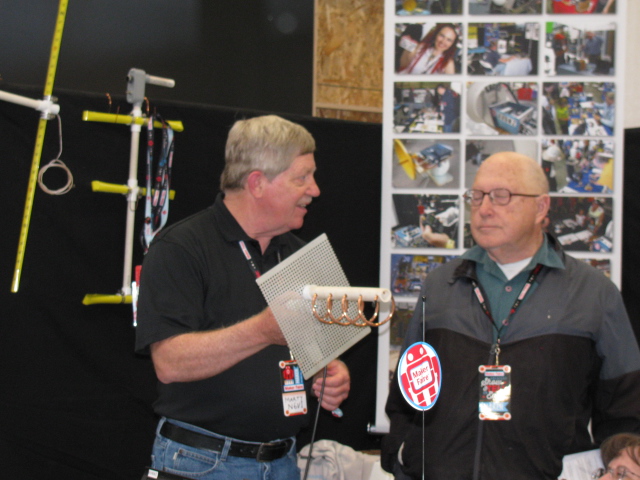
N6VI Antenna and Spectrum Analyzer Demonstration
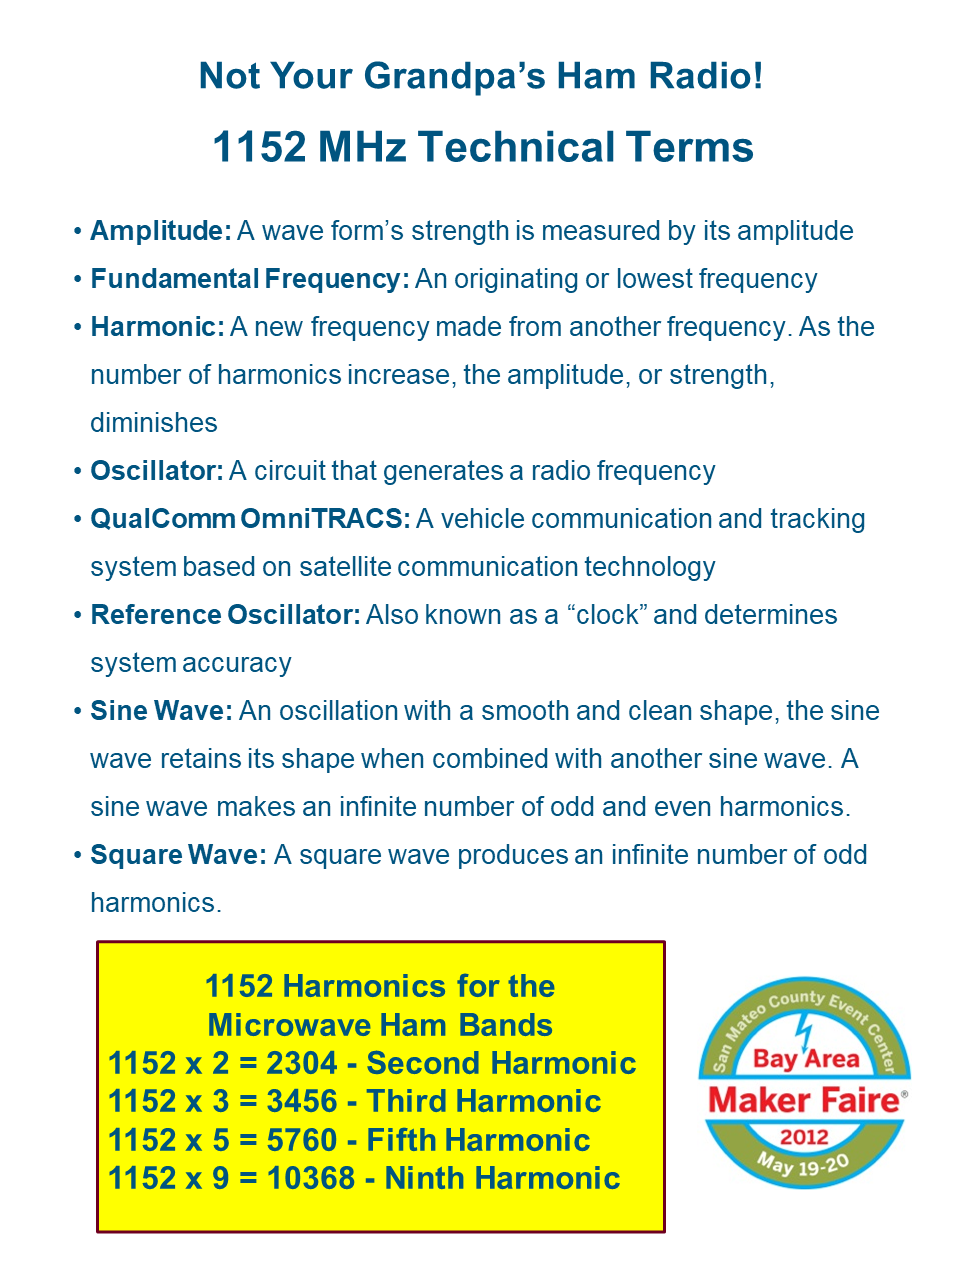
Marty Woll brought a portable spectrum analyzer and an assortment of hand-built antennas, including this corkscrew (circular polarized) antenna. A weak signal source was placed at the far end of the booth. By moving the antenna around, the spectrum analyzer shows frequency and signal strength. This can visually demonstrate antenna polarization and direction as well as frequency and harmonics.
KH6WZ 10 GHz Transmitter-Receiver System
The “anchor project” from past events is my 10 GHz transverter system. This station is used to demonstrate and explain frequency multiplication and division, frequency up-conversion (transmitting), down-conversion (receiving), polarization and antenna directivity to non-hams and even children.
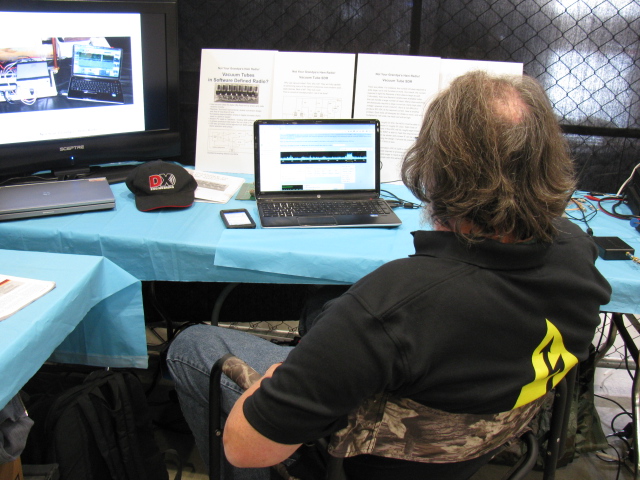
W6DQ Software Defined Radio (SDR) Demonstration
Dennis Kidder W6DQ, displayed his software defined radio (SDR). There were many questions about SDRs and many visitors were surprised to learn ham radio operators have this technology. But this is another example of what radio hams are using these days.
Virtual Air Traffic Control Receiving Station Using ADS-B – Automatic Dependent Surveillance – Broadcast
ADS-Bis the “next generation” air traffic control, to replace/supplement ground-based radar. Each aircraft transmits identification, GPS position, flight information and other data.
It is very easy to make an ADS-B receiving station. Here are the things needed:
A digital TV (DVB-T) dongle – DVB-T is Digital Video Broadcast – Terrestrial, a digital TV standard used in Europe and other, non-North American locations
Antenna for 1090 MHz, this can be built with cable TV coaxial cable and a few other items.
Windows PC
ADSB# (ADSB Sharp), a free application
Virtual Radar Server, another free application
Browser and Internet Connection
An inexpensive (less than $20 US) digital TV software defined radio in a USB dongle is used to decode ADS-B signals. Free downloadable applications for Windows PCs are used to decode and display the live air traffic broadcasts on a computer.
There is one important thing to know when buying your DVB-T dongle: The decoder and display programs work only with dongles using the Realtek RTL2832U with the RaefaelMicro R820T Tuner chip set.
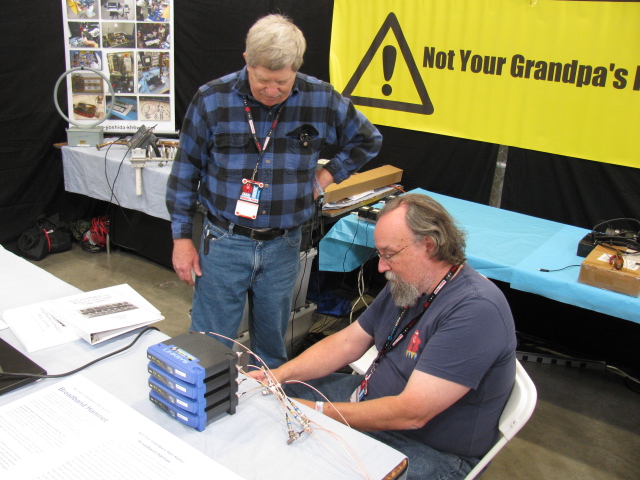
Broadband-Hamnet™ (formerly called HSMM-Mesh™) Demo
Dennis W6DQ (seated) assembling the BBHN network demo as Marty N6VI asks a few questions about the network.
Broadband Hamnet (BBHN) re-purposes commercial Wi-Fi equipment to operate only in the ham bands to create robust, wireless, IP-based networks suitable for emergency communications or remote monitoring and control.
Commercial Wi-Fi equipment is restricted through FCC Part 15 regulations, limiting power and range and precluding the user from modifying type-accepted products.
However, licensed ham radio operators are legally allowed to modify Part 15 devices to make them operate in the FCC Part 97 rules for ham radio operation. Larger antennas, higher power, adding receiver pre-amplifiers and other techniques are allowed for experimentation.
The result is a system which creates an ad-hoc, meshed network, supporting IP traffic, e.g., voice, video and data. A meshed wireless network affords greater reliability by providing alternative route paths in the event of a failure.
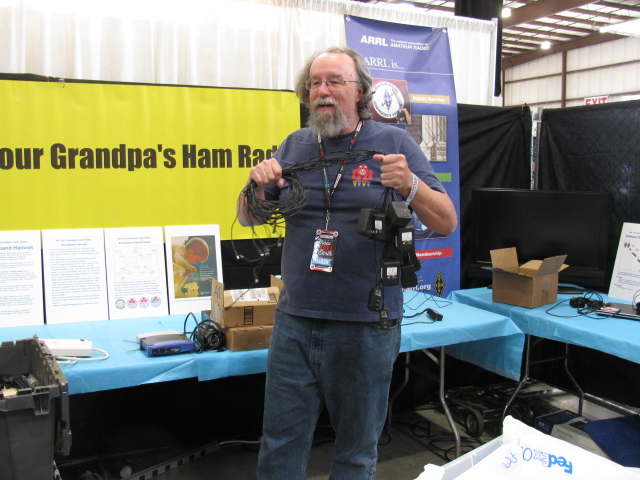
Dennis says there sure a lot of wires needed for wireless networking.
Joel Wilhite KD6W constructed a 10 GHz and 24 GHz dual-band transverter system for portable use. It consists of various modified modules from several sources.
We encourage kids and parents to talk to each other using our home-built radios. It helps make things more interesting than just looking at things.
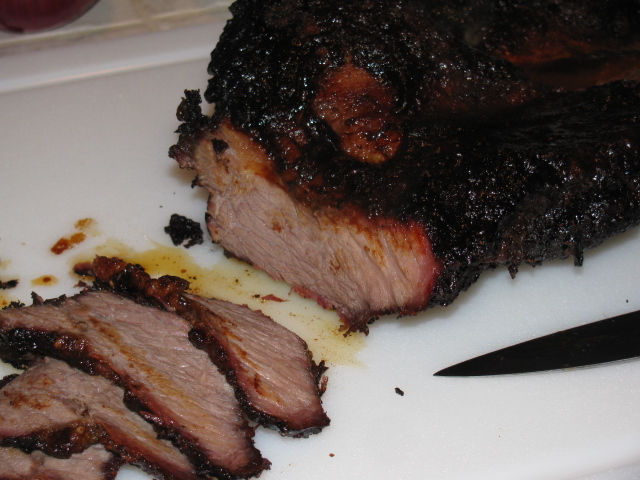
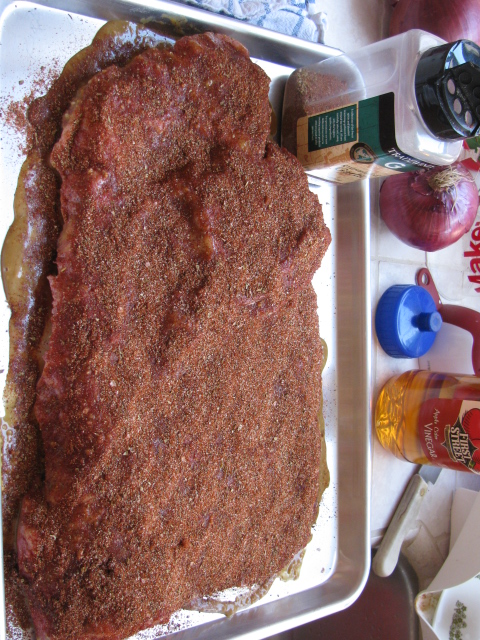
I made a brisket for the first time a few weeks ago. I followed the directions in Steve Raichlen’s BBQ University (“Smokelahoma” Brisket), and used my large Big Green Egg.
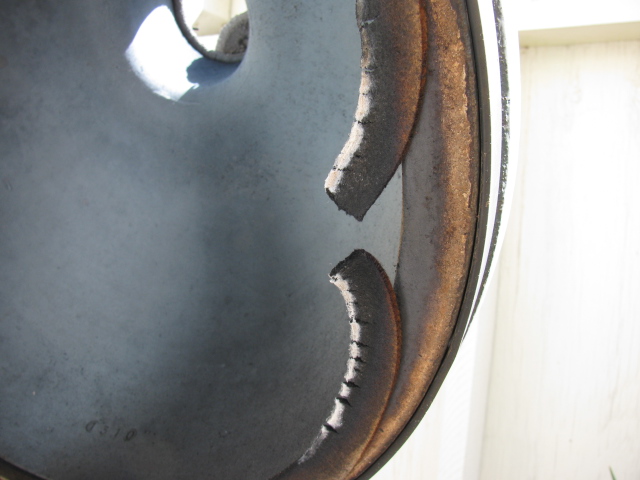
But, there was a casualty — there was a fire in my cooker and table, discovered this the morning after my cooking was done.
I think the gasket failed. I have a picture of what looks like a “blow-out” the gasket is actually curved / curled outwards. I believe this happened because the outer shell was cracked – remember I dropped it when it was new? It finally gave out.
It is also interesting to see how it changed when I moved it outside to store. It used to be inside the garage. I noticed the shell would sweat – water would come out of the ceramic shell when cooking with it. So there’s expansion and contraction. All contribute to the fire.
So, I think this is the scenario, CSI style:
The fire box was over-loaded. I did not want to re-fuel during my cook (9 Lb brisket). Filled it too high. Lit the fire, temp was about 200 degrees to 225, low and slow. Cooked for 6 or 7 hrs.
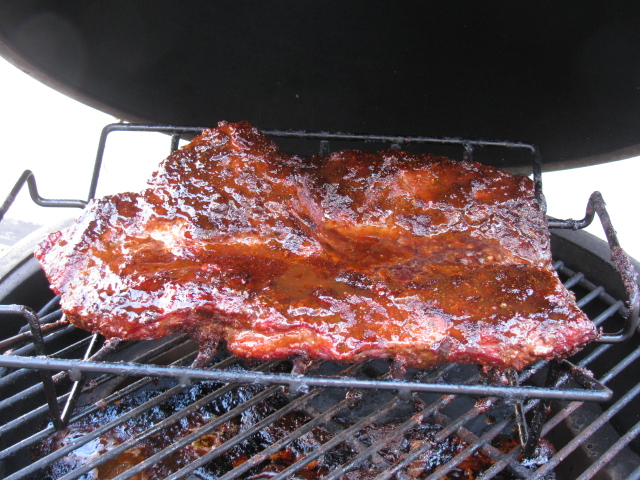
After it was done, I did my usual “sterilization burn” — open all the vents fully open and closed the lid to clean everything.
The crust was sugary and so added an element of catalyst to the fire, along with the grease.
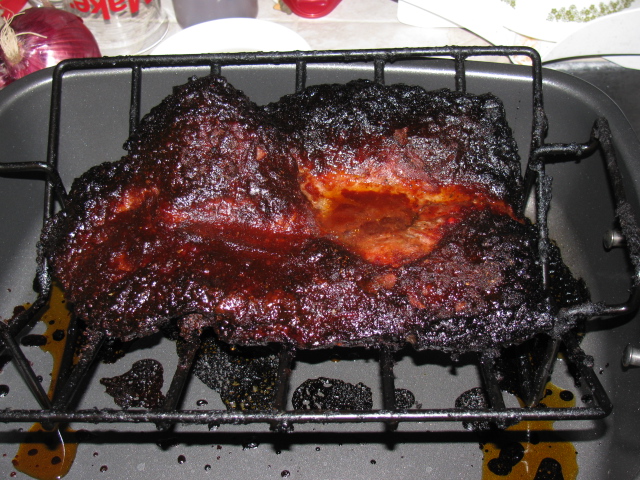
By this time it was very dark outside, I had to use a flashlight to check the temp and the meat. I thought I saw the thermometer pegged all the way, so it was more than 700 or 800 degrees.
I didn’t think anything about that, since I always burn the crud off. Went to bed. . . Next morning, I saw this:
I wish I could have seen the fire! Easter Sunday morning, I looked outside – and saw the table. No smell, no fire, I think there was early AM dew. So the fire was out. Notice the table stopped burning by itself. Lucky.
I guess the good news is — I get to buy a new one!
I spent the last two weekends in the garage, getting back to the Coupe Project. It was nice and relaxing to lay on the creeper, under the chassis and working with tools again.
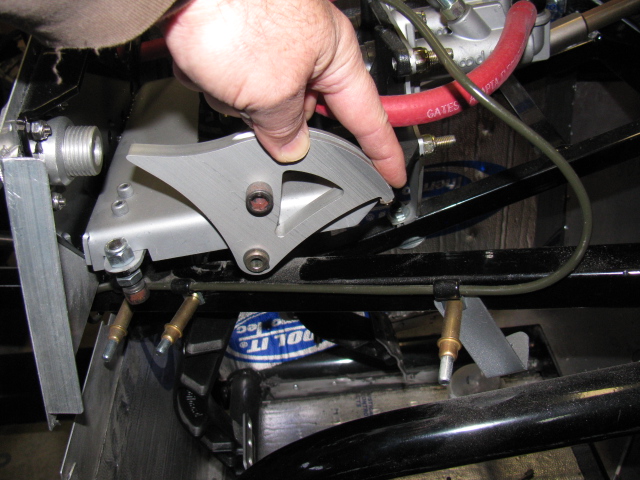
I had to modify the chassis in the pedal box area to allow more clutch pedal movement. This is a known issue in the Roadster forums, but not so much in the Coupe forums. This happened when Factory Five Racing changed the Wilwood pedal box – the old version would actually break. The new and improved pedal box moves the clutch pedal arm over to the left by about an inch or so, and the arm hits a brace, limiting pedal travel.
When the modification is done before the pedal box is bolted into place, it is a simple chore to make two cuts, chopping a small triangular cut into the frame member. This can be done with a reciprocating saw or maybe power jigsaw.
However, if the modification must be performed after the pedal box is bolted into place, the tube must be accessed from below, in an awkward angle. A small grinder tool would be ideal for this, but the only tool I have that will fit the space and the angle is a Dremel tool. It took me two half-day sessions to do this.
In the pictures above you can see the half-moon shape cutout I had to make. This is a view from under the chassis, looking up from the creeper. This will be painted black later. The tube looks normal from the top, so that is good. And clutch pedal travel is doubled, so free play adjustment range should be much better.
Since the brake system is installed, filled and bled, I removed the Clekos and riveted the lines in place. I changed several P-clip anchor points so it complies with my “routing and clipping manual” from the office. Unfortunately, I followed some other builders’ clipping, and mounted several p-clips upside down. Most of them will be under the car, and might be hidden from view when the car is finished. But I know they are upside down.
Here is a picture of how the clips should be mounted. This is the X-member in the front of the chassis.
Looks like I didn’t take a picture of the riveted clips. I will post them later.
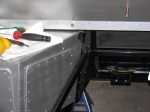
Next, I made a bracket to support the ECU for the MSD Atomic fuel injection system for my 302. This plate will secure the ECU and provide strain relief for the cables going in and out of the unit. It is on a plate so it can be easily removed if I have to work on the wiring or the ECU later. It is mounted with 1/4-20 stainless steel studs and nylon lock washers. It was raining so I was not able to paint this plate. Will have to do that at the next build session.
The passenger side footbox is on the left. Three stainless steel Allen head screws come through the wall and into the passenger box. The center photo shown the ECU engine cable going into the engine bay, and the right photo shows the MSD computer and plate inside the passenger footbox. Carpet will cover the interior, so a carpeted cover will be made to hide the ECU and wires when the car is finished.
I am also laying out the air conditioner system components on the chassis. I have to make several brackets and small boxes to mount the A/C components on the chassis.
As I was doing this work, I took another look at the battery box mentioned in an earlier post. It is installed with clecos so it can be removed. I think I want to mount the battery above the passenger footbox. Two reasons for this:
First, it will shorten the battery cables, decreasing the voltage drop.
Second, the “factory location” for the battery – in the rear center – blocks the rear axle pumpkin. So, when I have to change the oil or make adjustments, the battery must be disconnected and the battery and the box must be removed. Sounds like a painful procedure for a simple maintenance chore.
I will make a mock-up of this in my next build session. Stay tuned . . . .
For the 12th consecutive year, skipper Peter Barbour and Christmas boat D25 earns a first place victory in the 2015 Newport Beach Christmas Boat Parade. The décor at D25 for 2015 features a Christmas dolphin guiding a sleigh filled with gifts and pulled by a giant seahorse. Click here to see all the 2015 Newport Beach Boat Parade Winners
Here are D25’s Records 2015: Best Sailboat 2014: 1st Place Animation & Special Effects 2013: 1st Place Animation & Special Effects 2012: Best Sailboat 2011: 1st Place Best Humor & Originality 2010: Best Boat Under 30 Feet 2009: 1st Place Best Animation & Special Effects, Theme: Joys of Christmas Toys
In 2009, D25 demonstrated one of the most complex designs in the series. The entry included a matrix of colored ornaments, made with hundreds of individual bulbs. The matrix enabled the computer controller to make an amazing array of “bouncing ball” images that danced across a black background. 2008: 1st Place Best Humor & Originality, Theme: Tropical Island Cheer – Lanterns to Lights
D25 for 2008 was inspired by the origins of the Newport Beach Christmas Boat Parade on July 4, 1908, when John Scarpa, a gondolier, led a parade with eight fellow small boat operators. 2007: 1st Place Best Humor & Originality
Theme: Surf’s Up – Light Wave: Surf’s Up on D25 features over 5,025 lights illuminating a holiday surfer’s dream. In the middle of November, Original Productions, Inc. asked Peter to appear on a documentary on intense holiday decorations for TLC: The Learning Channel. The episode “More Crazy Christmas Lights” premiered on December 8, 2007. 2006: Best Boat Under 30 Feet
Theme: North Pole Holiday Magic 2005: 1st Place Best Humor & Originality
Theme: Classic Christmas. D25’s second design was inspired by a classic Christmas living room scene. A large decorated Christmas tree with presents stacked below the bows and a star atop, red brick fireplace with a roaring fire and stockings hung below a mantle. 2004: 2nd Place Best Use of Lights and Animation
Theme: Santa’s Sailing Sled. D25’s debut design was inspired by the idea of Santa’s sailing sled being borrowed by a mischievous elf.
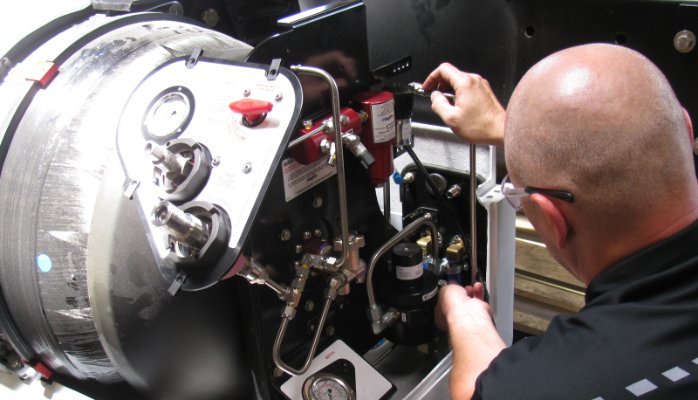
Repairing and maintaining a compressed natural gas (CNG) fuel system – with flammable gas and working pressures of 3,600 psi or more, can be safe if you understand and follow the rules.
CNG pressure zones determine to depressurize or defuel.
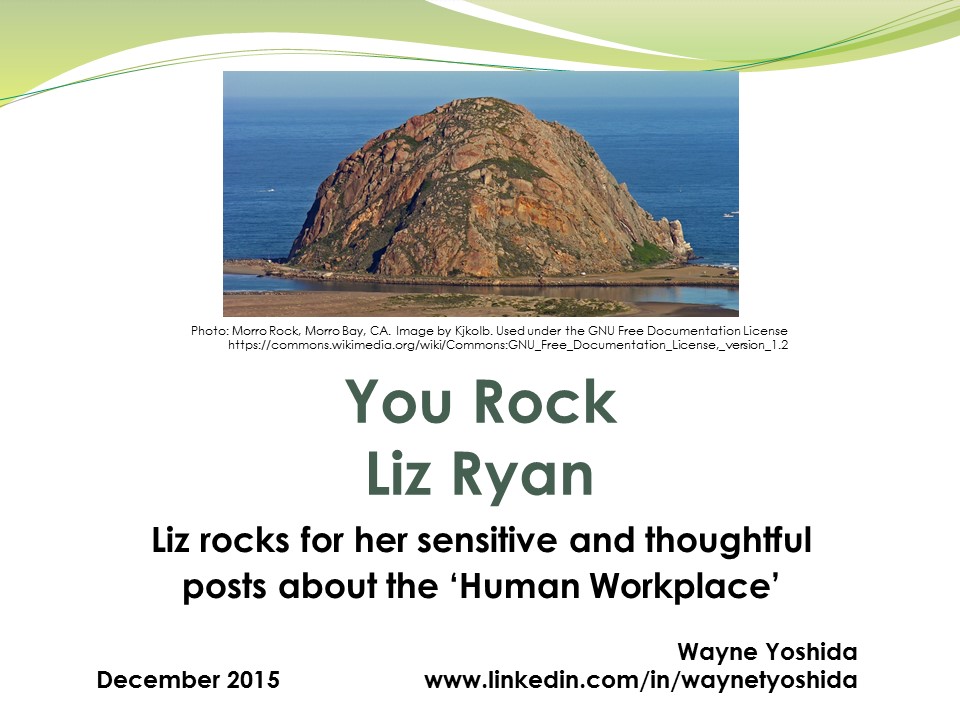
Each year, I think about the helpful people in my network, and thank them for their generosity. Here are the Top Five people who rock for 2015. Ladies first, so here we go.
Liz Ryan is the CEO and founder of Human Workplace. Liz says, “We launched Human Workplace to teach the practices that I’ve been speaking and writing about for years. Human Workplace is also a global movement to re-humanize work, with over 450,000 members.”
Viveka von Rosen is a LinkedIn expert and author. She does an excellent job of researching and teaching others about the LinkedIn platform. I learned about Viveka through an offer for a free lynda.com trial from LinkedIn. Visit her Linked Into Business blog and listen to her podcasts.
Paul Banwell is a co-worker at Agility Fuel Systems, and was able to help me work through a strange, but normal glitch in the CAD program we use at work. It took me several hours of searching and experimenting, but Paul came through with the solution.
Mike Gustafson is another co-worker at Agility Fuel Systems. In a similar but different CAD scenario, Mike helped me meet a deadline for a marketing department project.
Bob McIntosh is a job search coach and LinkedIn trainer. As his award states, he is constantly writing and sharing news and thoughts about career management. His blog, Things Career Related, is filled with useful information.
For a review of previous You Rock award winners, click here.
This is our fourth consecutive year as Makers. The 2015 SD Maker Faire team is Dennis W6DQ and Wayne KH6WZ.
Our mission is to change the image of ham radio, making it both contemporary and chic in a hi-tech sort of way. We also want to emphasize how ham radio can be used for science and technology education and a possible career path for youngsters.
Amateur, or ham radio has always included teaching-learning-making-modifying-hacking and networking (making new friends) traditions for over a hundred years. We want to remind people this “new Maker Movement” is not really a new idea. Read my LinkedIn Publish post called “The Original Makers” to learn more about this.
We also want to show everyone that ham radio technology changes with the times, and continues to include both past and present to accomplish one thing: Creating ways to communicate voice and data over the ether, without wires.
Here are some of the projects on display – stay tuned for more stories and pictures after the event!
Live virtual air traffic control radar receiving station
Homemade antenna
APRS / location tracker demonstration
Software defined radio modules. Photo by Dennis Kidder, W6DQ
Broadband ham radio network under construction
By the way – here are 65 reasons why ham radio continues to survive – and possibly thrive – in a world of instant, global communication fro everyone:
65 Great Things About Ham Radio
CQ magazine celebrates its 65th anniversary by making a list of 65 great things about ham radio. Ham radio can be considered one of the earliest forms of “social media,” “networking” and “making.” Items in italics can be considered “life lessons.”
1. It works when nothing else does 2. It makes you part of a worldwide community 3. The opportunity to help neighbors by providing public service and emergency communications 4. Some of the nicest people you’ll ever meet 5. Some of the smartest people you’ll ever meet 6. Some of the most interesting people you’ll ever meet 7. Some of the most generous people you’ll ever meet (along with some of the cheapest!) 8. Lifelong friendships 9. Friends around the world (including those you haven’t met yet) 10. The opportunity to go interesting places you might not otherwise go to 11. The opportunity to do interesting things you might not otherwise get to do 12. The opportunity to expand your knowledge of geography 13. The opportunity to expand your knowledge of earth and space science 14. Practical uses for high school math 15. Practical uses for high school physics 16. A good way to practice a foreign language 17. A good way to keep in touch with faraway friends and relatives 18. A good way to get driving directions when visiting someplace new (with or without GPS) 19. A good way to find the best places to eat when visiting someplace new (with or without GPS) 20. Finding “non-touristy” off-the-beaten-path places to stay, eat, visit, etc. 21. A good way to learn about virtually any topic 22. A good way to bridge the generation gap 23. A good way to keep tabs on elderly/infirm people 24. People named Joe (Walsh, Rudi, Taylor) 25. How many of your non-ham friends have actually talked to someone in some remote place such as Cape Verde or the Seychelles? 26. How many of your non-ham friends might have talked to an astronaut aboard the space station?
27. How many of your non-ham neighbors might have a satellite uplink station in their basements—or in the palms of their hands?
28. How many of your non-ham neighbors might have a TV studio in their garage?
29. What other hobby group has designed, built, and had launched its own fleet of communication satellites?
30. Where else can you play with meteors?
31. Moonbounce 32. Informal way to improve technical skills 33. Informal way to improve communication skills 34. Introduces a variety of career paths 35. Offers unparalleled opportunities for career networking
36. Opportunities for competition in contesting and foxhunting
37. A good way to collect really cool postcards from around the world (despite the growth of electronic confirmations)
38. Nearly endless variety of different things to do, on and off the air
39. Hamfests
40. Dayton
41. Field Day
42. Working DX
43. Being DX
44. DXpeditions
45. Contesting
46. Award-chasing
47. Double-hop sporadic-E
48. Worldwide DX on 6 meters (once or twice every 11 years) [The current extended sunspot minimum has shown that mechanisms other than F2 propagation can offer intercontinental DX on the “magic band” at any point in the solar cycle.]
49. Tropospheric ducting
50. Gray-line propagation
51. TEP, chordal hops, etc.
52. Getting through on CW when nothing else will
53. Unexpected band openings
54. Building your own gear
55. Using gear you’ve built yourself
56. Operating QRP from some remote location
57. Experimenting with antennas
58. Working DX while mobile or while hiking
59. Experimenting with new modes and new technology
60. The opportunity to help build an internet that doesn’t rely on the internet
61. DXing on your HT via IRLP and Echolink
62. Contributing to scientific knowledge about propagation
63. Keeping track of other people’s GPS units via APRS
64. Ham radio balloon launches to the edge of space, and as always…
65. Reading CQ!
Take a look at the CQ magazine websiteto find more interesting things about ham radio.
EssexHam
A ham radio club in the UK with over 200 members. Great intro to ham radio videos!
Huntington Beach RACES
The Huntington Beach Fire Department Emergency Management and Homeland Security Office administers the RACES team. RACES (pronounced “RAY-sees”) is not a club, it is a volunteer group within a government agency.
Automotive Links
Agility Fuel Systems
Need an alternative fuel system for your fleet of heavy-duty trucks and buses?
Factory Five Racing, Inc
The official Factory Five Racing website, showing descriptions of their component cars, gallery of completed cars and links to the Official Factory Five Racing Forum
Crash Space
“A collection of hackers… who generally like to break things and see what new things we can build with the pieces” Featured in my CQ magazine article
Make: Magazine
A printed (and online) magazine dedicated to Makers of all ages
Maker Faire
A two-day, family-friendly festival of invention, creativity and resourcefulness, and a celebration of the Maker movement
Orange County (CA) Mini Maker Faire
A gathering of talented Makers that meet in the Orange County area, and hold a Maker Faire on the UCI campus
Need an Alternative Fuel System for Your Fleet of Heavy Duty Trucks and Buses?
Agility Fuel Systems
Agility Fuel Systems designs, produces and markets alternative fuel systems for heavy duty vehicles. With thousands of heavy duty trucks and buses on the road, our systems have an extraordinary strength-to-weight ratio and a surprisingly small footprint.
Other
Angry Asian Man
I heard about this website and the guy running it (Phil Yu) on NPR recently. Strange and funny and weird and interesting
Photography
Lytro Camera
The Lytro Camera – A whole new way to enjoy still images
History of Ericsson
I found this While doing some research on Ericsson’s “three sausages” logo. Interesting look at the Swedish communications company.
Made by Monkeys
Design News magazine’s blog of things gone wrong
Microwaves 101
Great resource for RF related technology. My favorite section is the Microwave Mortuary. Note, sometimes the link to the Mortuary is broken.
Visit My YouTube Channel, KH6WZ
Ham radio, BBQ, car and Maker Faire projects for the visually-oriented folks. Other channels may be added as I find them