Archive for the ‘wayne yoshida technical writer’ Tag
The 2014 Bay Area Maker Faire is now history.
One of the Maker Faire team members, Brian Yee, W6BY, was not able to join us – we are all hoping Brian recovers quickly from his injury.
Dennis Kidder, W6DQ and Marty Woll, N6VI (ARRL Southwestern Division Vice Director) – along with several University of California, Davis engineering students and their faculty advisor, Professor Leo Liu, displayed and demonstrated their projects to the Maker Faire crowd. Estimated attendance: 120,000.
Here’s a two minute “drones eye view” of the Maker Faire 2014
Highlights during setup day included meeting Anouk Wipprecht, the fashion designer; Tenaya Hurst, the Arduino Woman; and the paella dinner, sponsored by Liquid Wrench.
This year, I included a handout of frequently asked questions about Amateur Radio, and it turned out to be useful. However, we quickly ran out of copies, so I am pasting the text here:
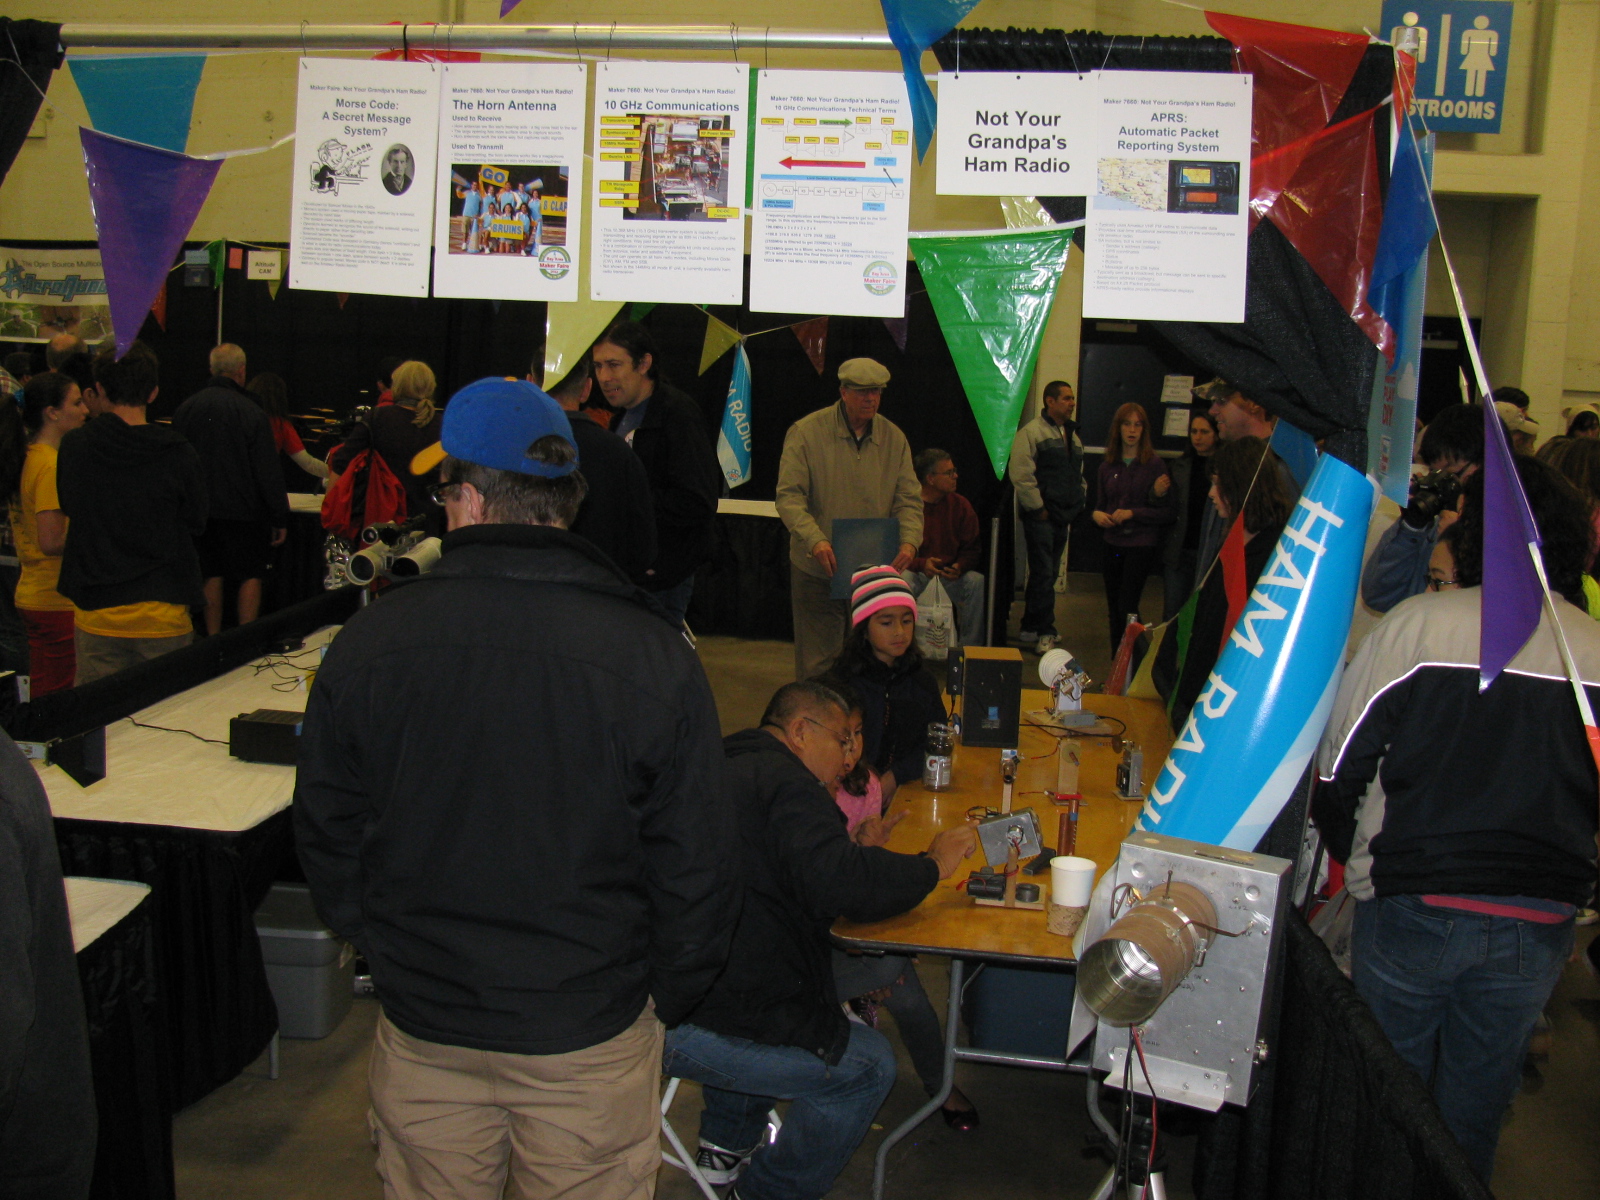
What Are We Doing at Maker Faire 2014
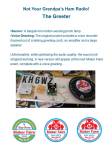
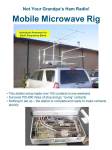
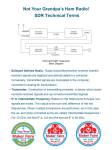
Not Your Grandpa’s Ham Radio
Thank you for your interest in our Maker Faire display. We are radio communications experimenters using the microwave Amateur Radio (ham) frequencies.
Who are we?
We are licensed Amateur radio operators (“hams”).
Is this like CB?
Yes and no. Ham radio is similar to CB because we use two-way radios to talk to each other, but hams can communicate using Morse code and computers in addition to voice, and we even have our own satellites. Ham radio requires a license issued by the Federal Communications Commission (FCC) in the USA.
How far can you talk?
We can communicate with other ham stations around the corner or across the globe, depending on a variety of factors that affect the way radio waves travel. The equipment we are using here operates on frequencies that generally follow line-of-sight paths. However, through experimentation, we find that signals can be reflected against objects such as buildings, trees, islands and mountains, to extend the range. Using these techniques, we are able to contact other stations hundreds of miles away.
What kind of radios are you using?
No commercially-built, “off-the-shelf” equipment for these frequencies exists, so we must build our own equipment, or modify commercially-made equipment meant for other services, such as cell phone, wireless links and radar systems.
How much does this equipment cost?
Like any other hobby, people spend as much or as little as they can afford. Most people involved in ham radio spend as much as any serious stereo enthusiast, amateur photographer or woodworker.
Where can I get more information?
Wayne Yoshida KH6WZ
http://wayneyoshida-kh6wz.com/
http://www.linkedin.com/in/waynetyoshida
American Radio Relay League (ARRL)
http://www.arrl.org
CQ, and CQ-VHF Magazines
http://www.cq-amateur-radio.com
The 50 MHz and Up Group
Meetings are held on the first Thursday of the month at 7pm at the TI (formerly National Semiconductor) Conference Center, Building E, in Sunnyvale, CA
http://www.50mhzandup.org/
The San Bernardino Microwave Society (SBMS)
Meets on the first Thursday of each month at 7pm at the American Legion Hall, 1024 Main St., Corona, CA
http://www.ham-radio.com/sbms/
The Microwave Group of San Diego
Workshops and informal meetings are held each month on the third Monday at 7pm in La Mesa, CA
http://www.ham-radio.com/sbms/sd/mgsd.htm
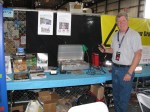
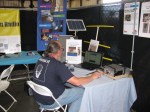
Here are some images from setup day, Friday May 16.
. . . More to follow. . .
This is our third consecutive appearance at the Bay Area MF, and continues my theme of showing how some ham radio operators continue the tradition of “teaching, mentoring, making, modifying, repairing and improving” radio and radio-related technology. Read my post about ham radio and the Maker movement.
Today’s ham radio operators have an incredible amount of exotic surplus material that can be converted into everyday use on the ham radio bands. Grandpa certainly never heard of surface-mount technology, talking on homemade 47 GHz transmitter-receiver systems or pocket-sized, satellite navigation systems (GPS). But he sure did mentor, make, modify, repair and improve the equipment in his bedroom radio station…..
Not Your Grandpa’s Ham Radio – Maker Faire 2014 Team
Wayne Yoshida KH6WZ
Dennis Kidder W6DQ
Brian Yee W6BY
Marty Woll N6VI
More information on the Maker Faire Bay area.
Here is a gallery of our booth posters for the 2014 Bay Area Maker Faire. More photos, videos and stories will follow. . . . .

The big show is coming soon. Last year, over 120,000 people attended this science-art-food-engineering-fun-educational event.
This year, my team (Dennis Kidder W6DQ, Brian Yee W6BY and Marty Woll N6VI) will bring their newest ham radio projects to show. We will continue with my original theme called “Not Your Grandpa’s Ham Radio.”
A group of University of California, Davis (UCD) engineering students will join us to demonstrate their experiments and projects. These new engineers are getting a great head-start by doing hands-on, practical experiments and projects that go beyond their lecture and textbook learning.
Read my LinkedIn post to understand my personal passion about amateur radio, Makers, the Maker Faire and education.

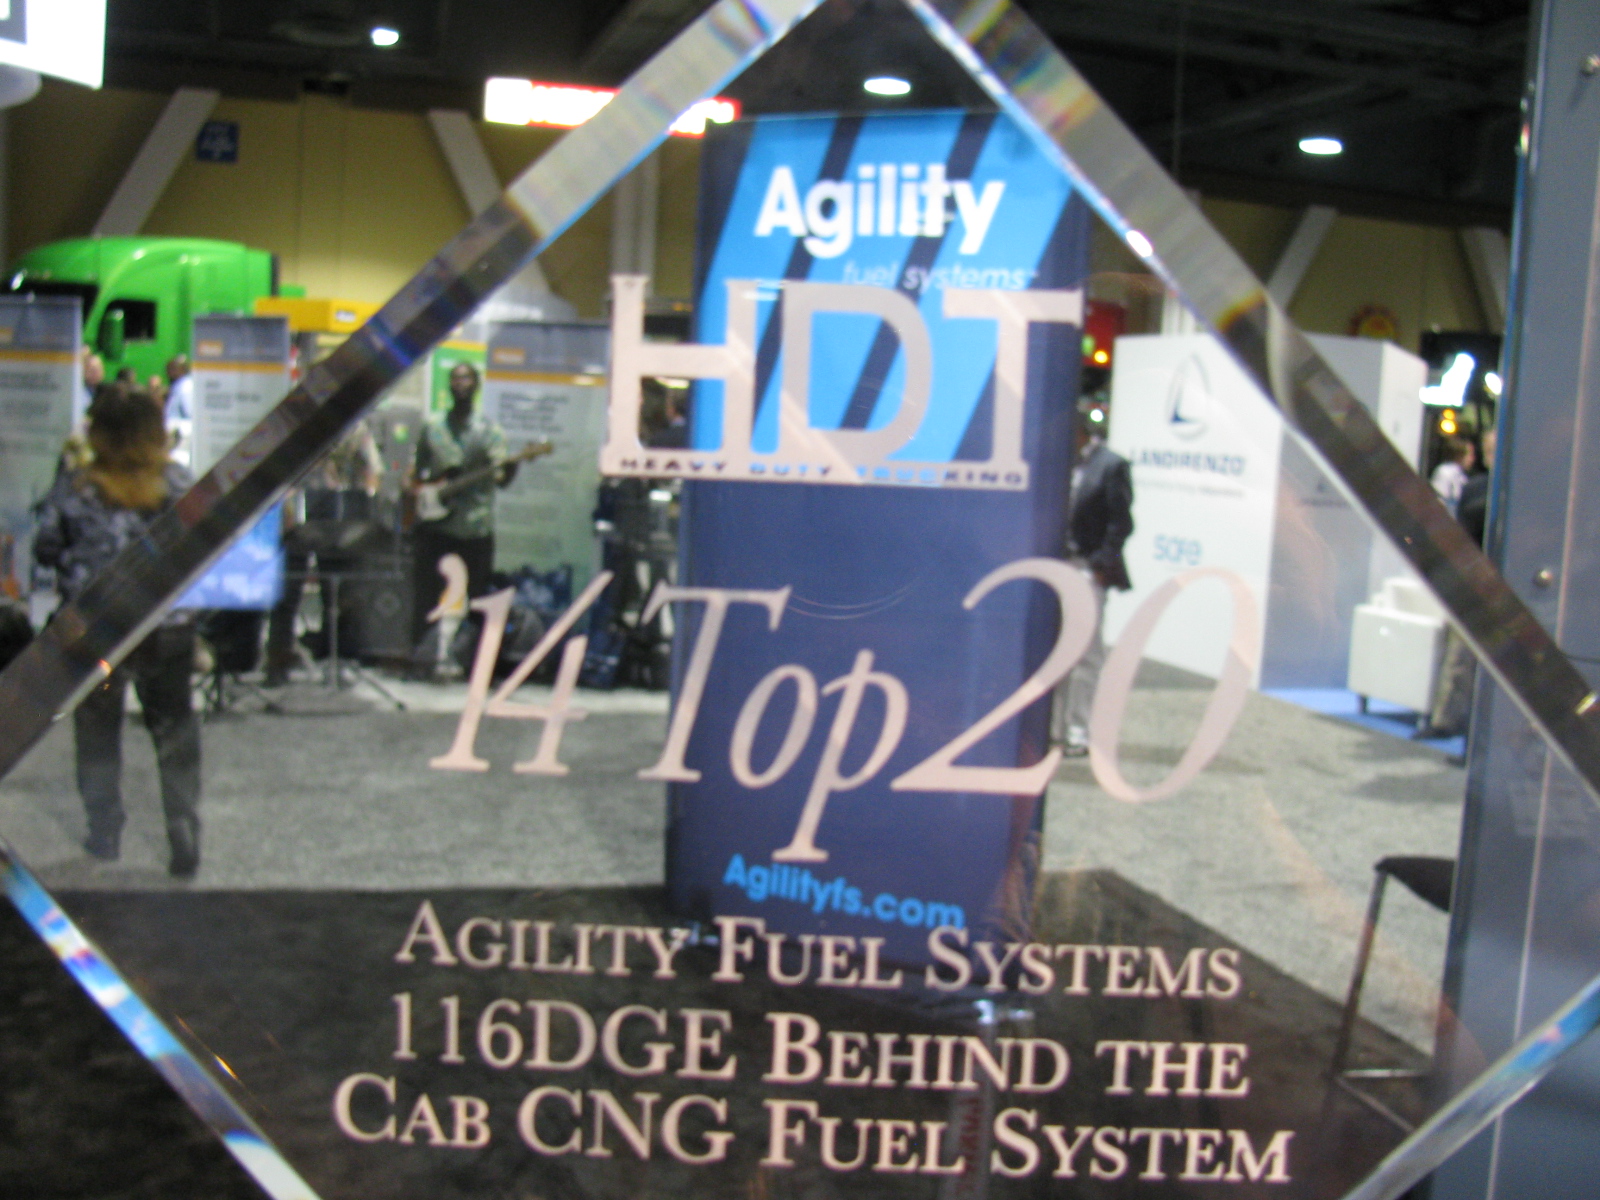
Today’s lead photo — an award we received…. The Agility Fuel Systems 116 DGE CNG Fuel System won a Top 20 Award from Heavy Duty Trucking – see more on the HDT website.

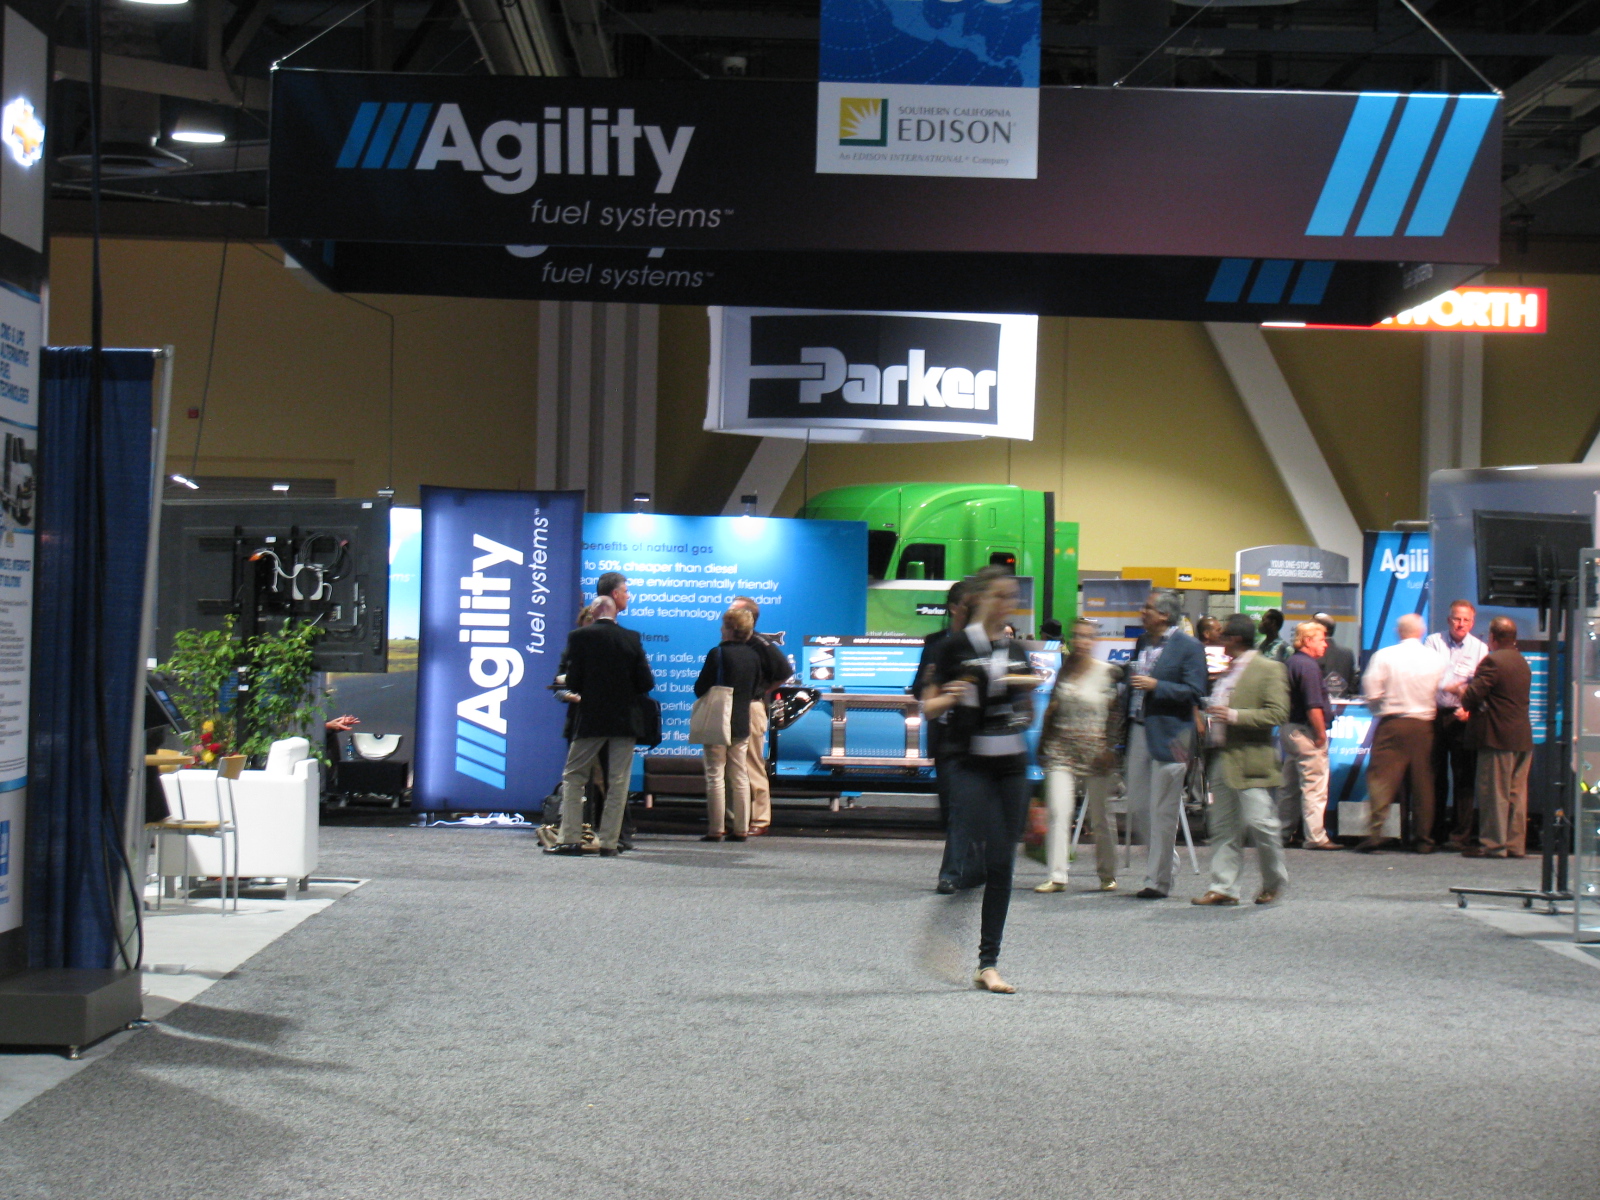
Our excellent booth location made it easy for visitors to find us. . . .

Left: Luis Salem, VP Marketing and Sales, explains the features and advantages of the new Agility Fuel Systems behind the cab (BTC) CNG fuel system to John Keltner of Daimler Trucks North America (DTNA).

I wish regular gas is less than $4 per gallon. I paid four-something per gallon last week filling my Prius . . .
And perhaps the biggest buzz on the show floor was the reaction to this news release we issued during the ACT show. . .
And this one, too. . .
The 7th annual Factory Five Racing Cruise-In and Car show is next week! Come and see finished and almost finished classic cars – each one individually hand-built. The car show starts at 9AM and it is FREE.
Here is a video of what may have been the very last “Moment of Thunder” at the 2012 event. It is a slow pan showing some of the cars on display revving their engines all at once – a tribute to friends who are no longer with us: Roger Stine, Dick Smith, Robert Feddersen, Paul Mastroinni, and Andy Salvaggio.
The Moment of Thunder is much louder in person.
More details are posted on the Official Factory Five Racing website.
I will be there to see how others finished their Type 65 Coupe kits!
After something like three or four false starts, I finally settled on a way to mount the external fuel pump on my Coupe. The final solution is so simple, I feel stupid….
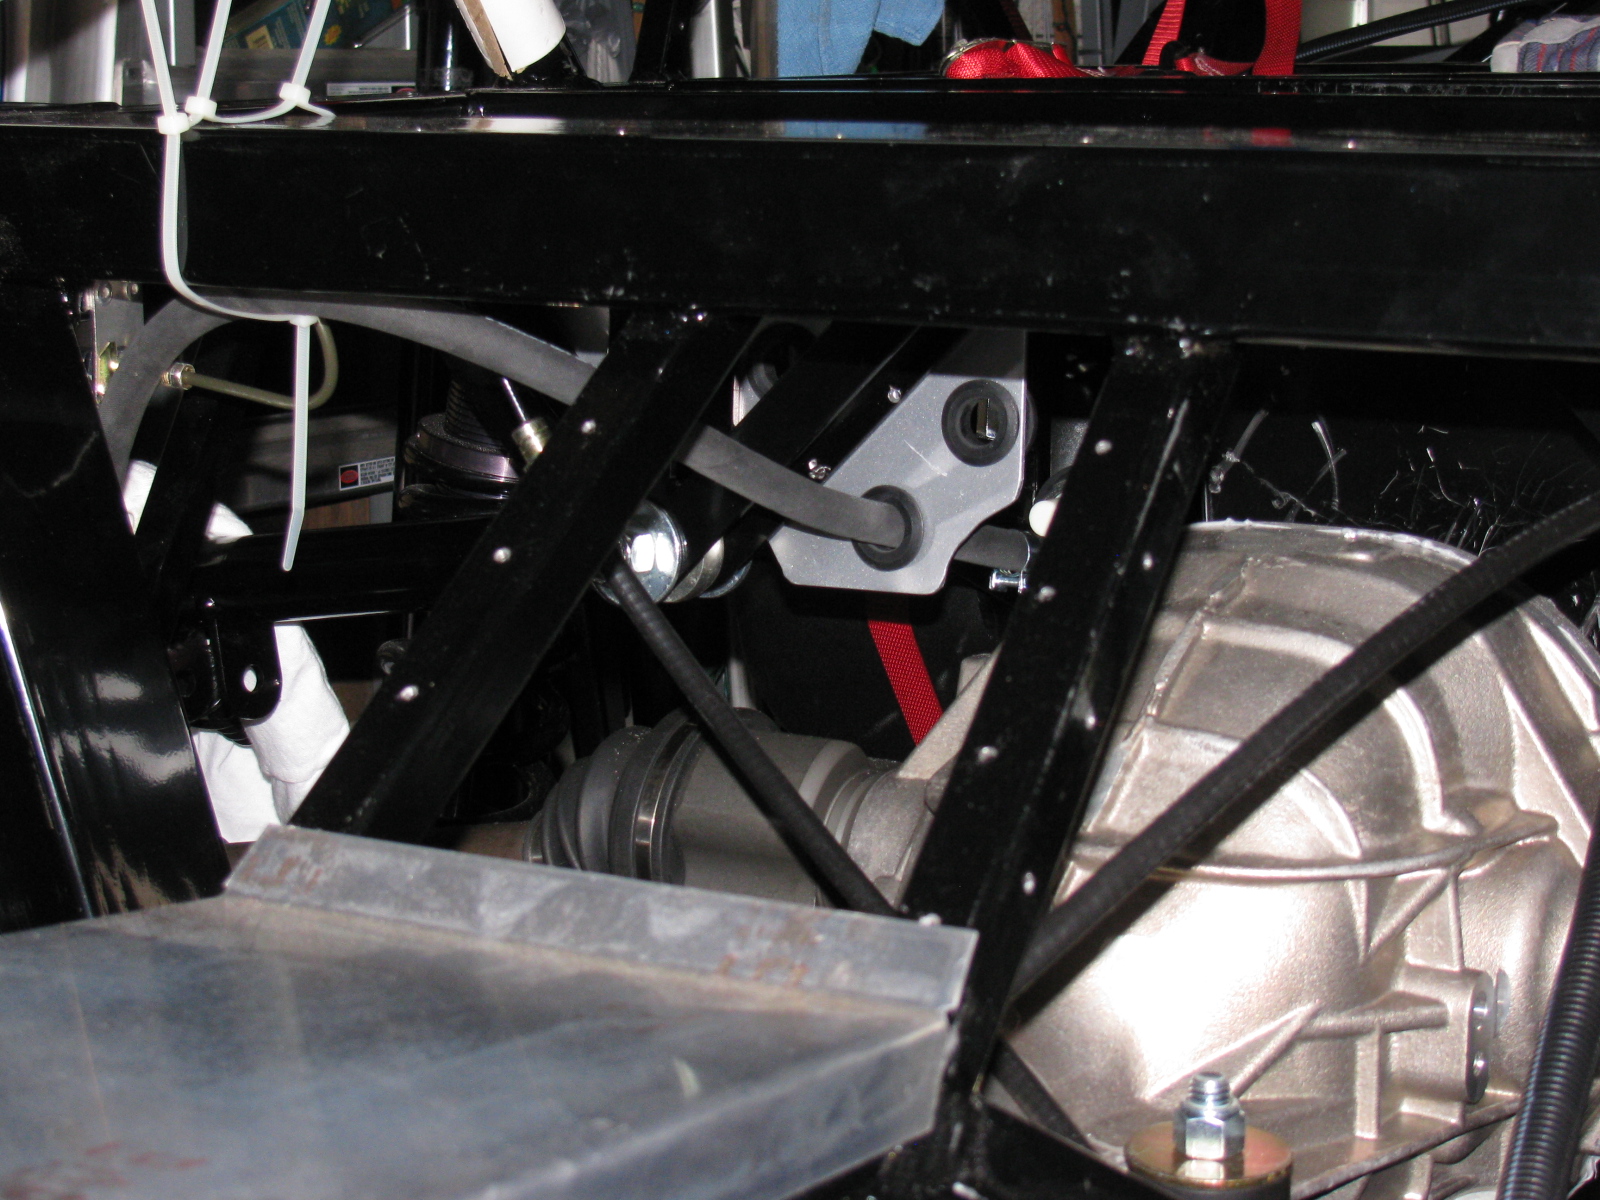
First, I tried mounting the pump on the lower brace, under the IRS pumpkin. But that just did not look right, and it was difficult to access from either above or below the car. Then I tried mounting the pump on the Factory Five Metal battery box, but discovered the battery box blocks access to the fill and drain plugs on the differential.
Here is the final answer, a simple, flat plate of 1/8-inch aluminum. This will help simplify the fuel hose routing, too.

More Fabrication
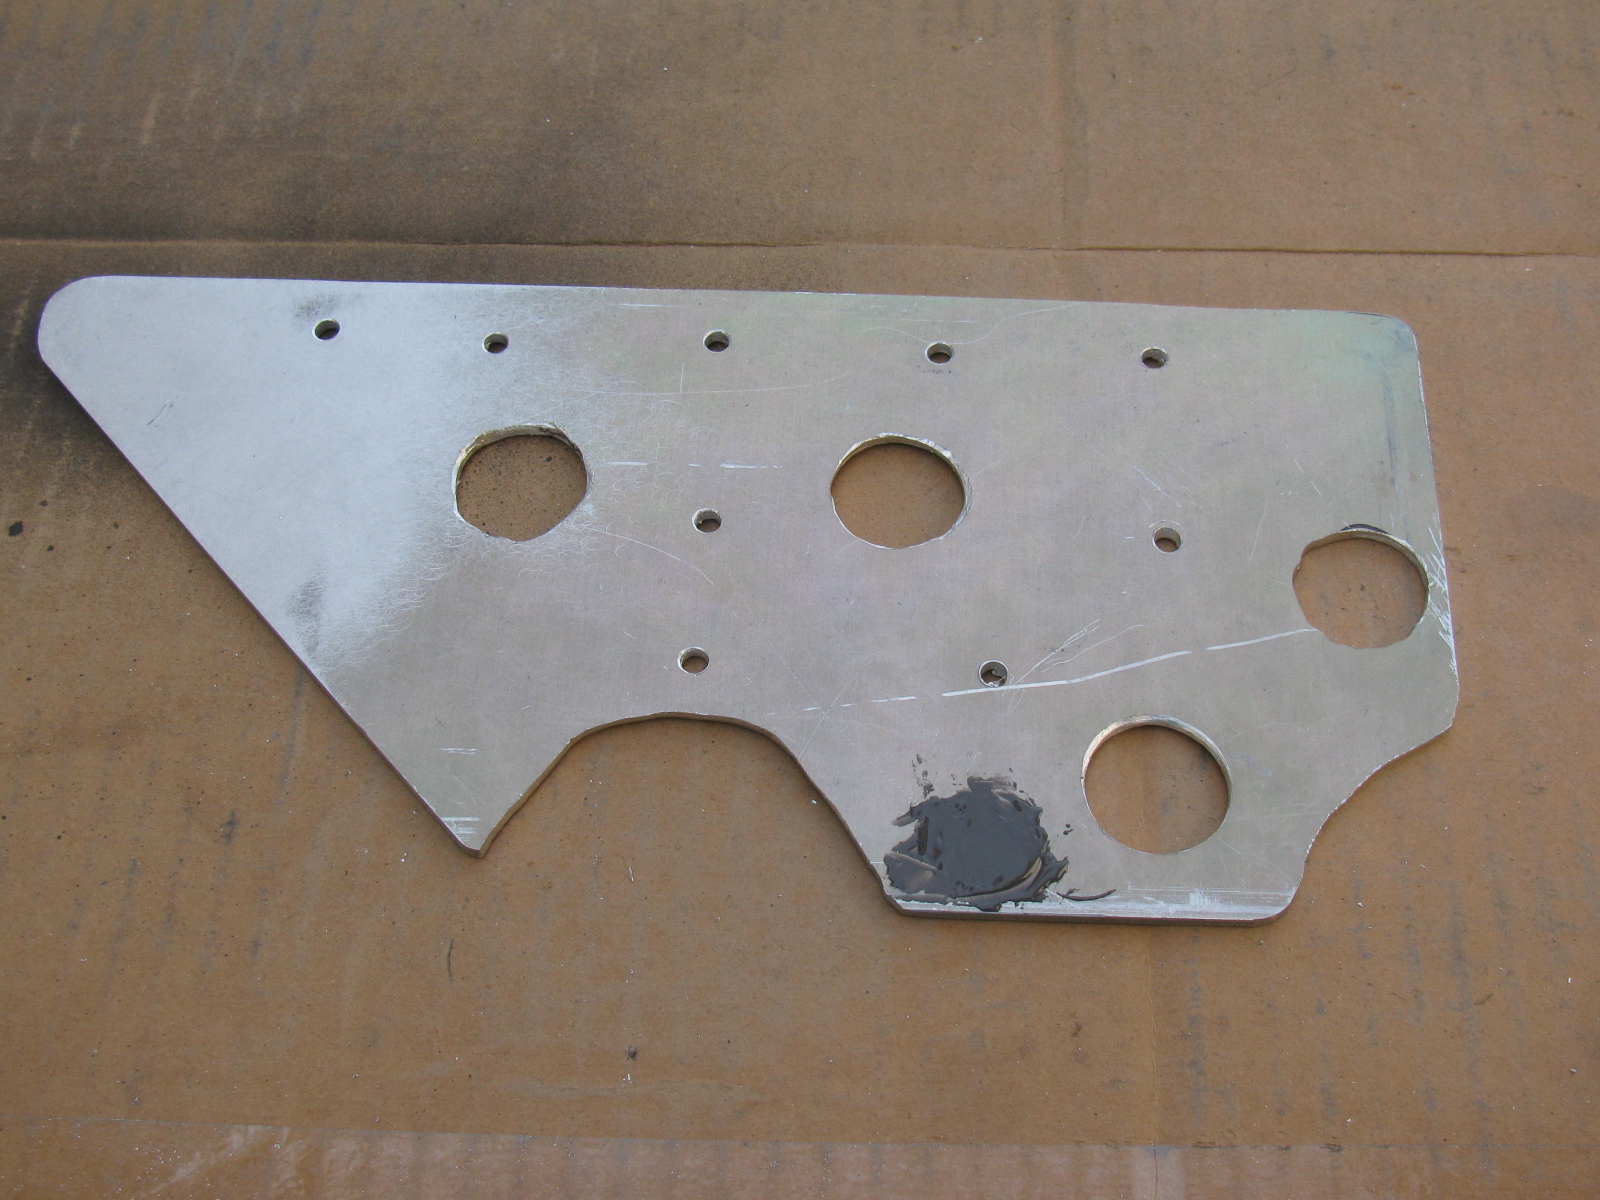
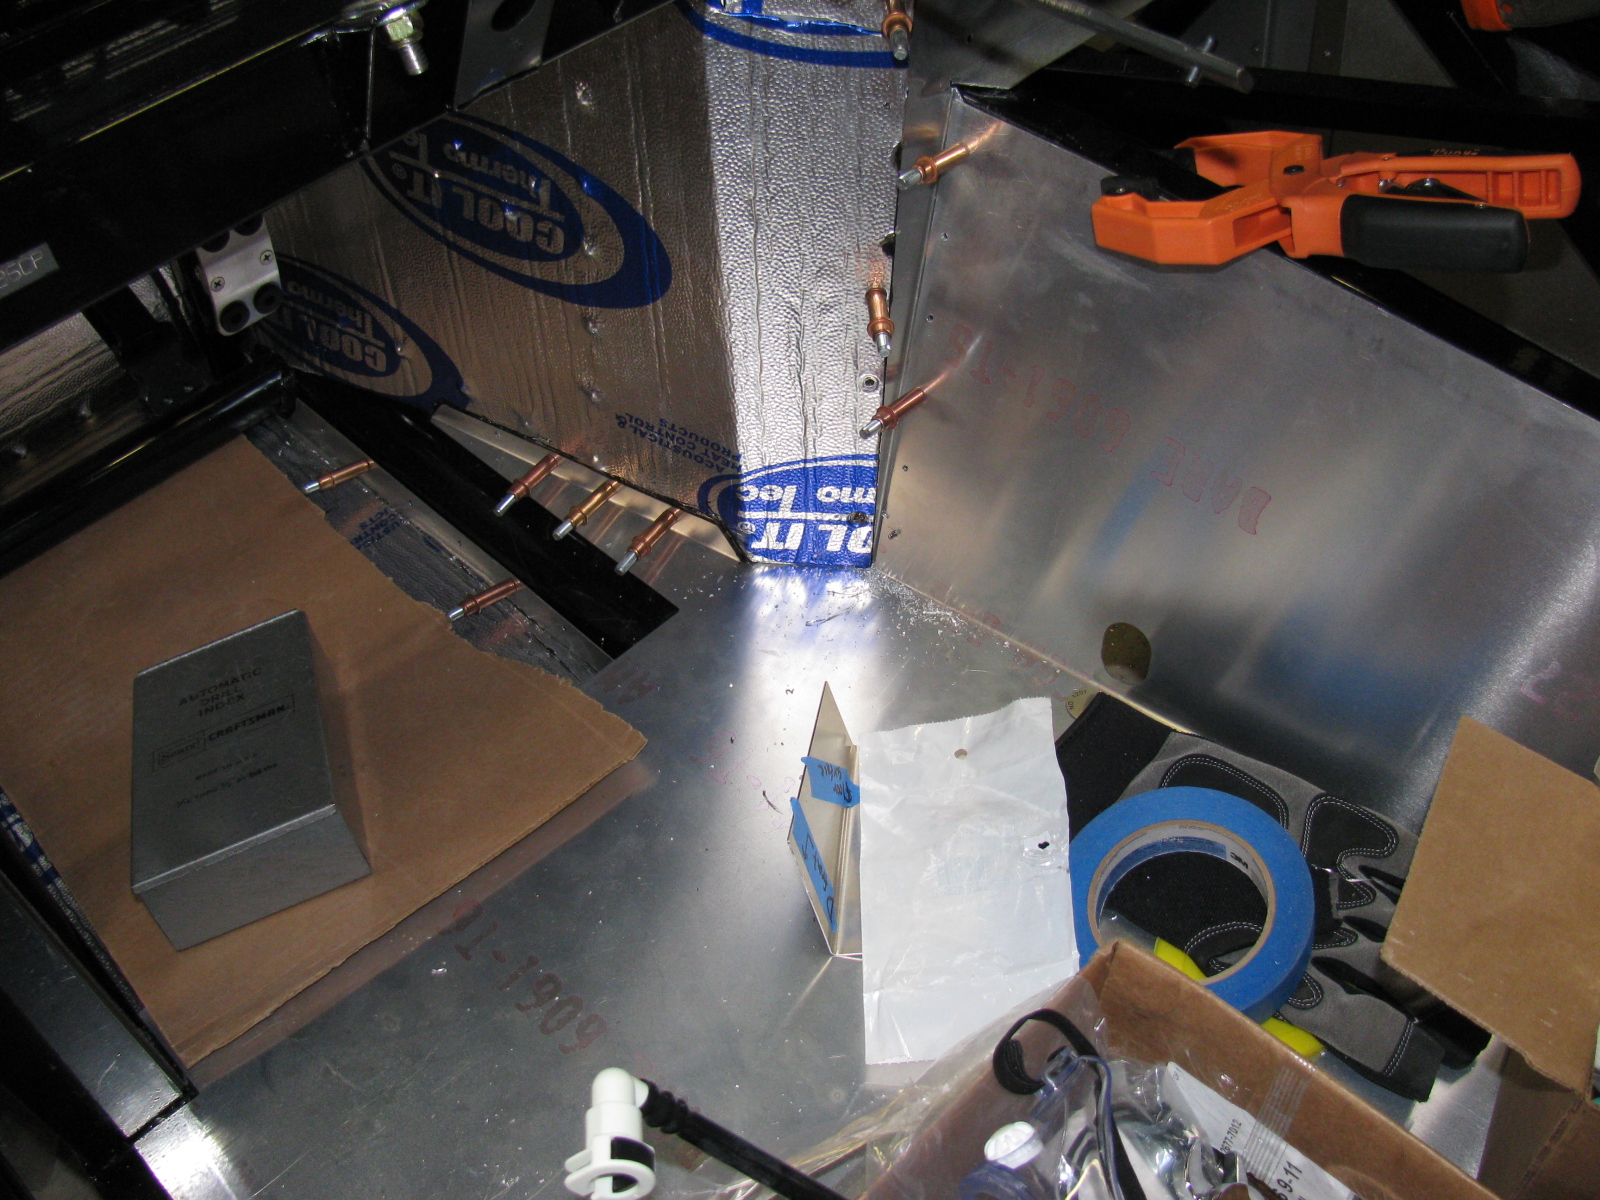
I made a pair of triangular plates to create a bulkhead to hold the e-brake cable and the fuel hoses (one for supply to the engine and one for the return into the tank) on the passenger side of the chassis. An identical plate for the driver side will be used for the other e-brake cable and any wiring harness going to the rear of the car.
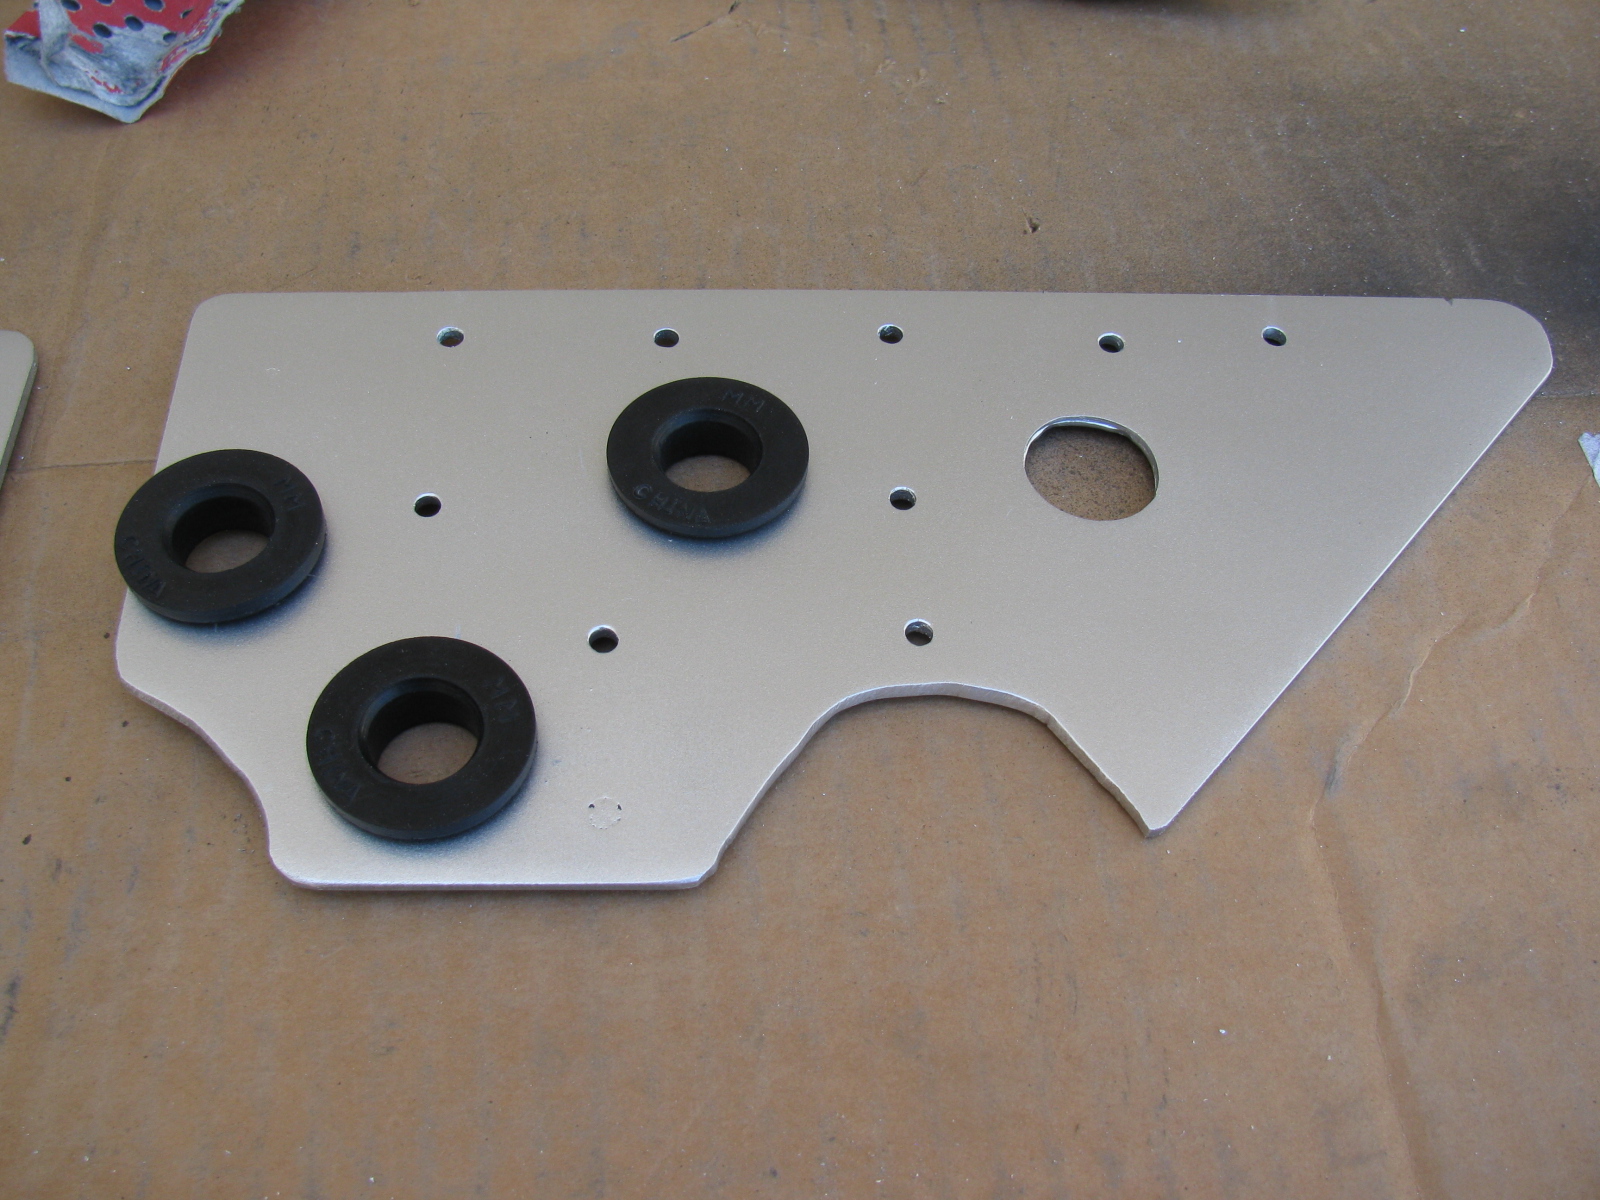
Since the 1/8-inch aluminum plate I am using for these brackets is scrap material, some extra holes are sometimes included in the items I make. When I am not able to re-use existing holes, I patch them with JB Weld or epoxy, then paint the item with high temperature BBQ paint. These brackets are finished in silver.


The large holes are cushioned with a PCV grommet; it is thick and large enough to pass the 3/8-inch fuel lines nicely.
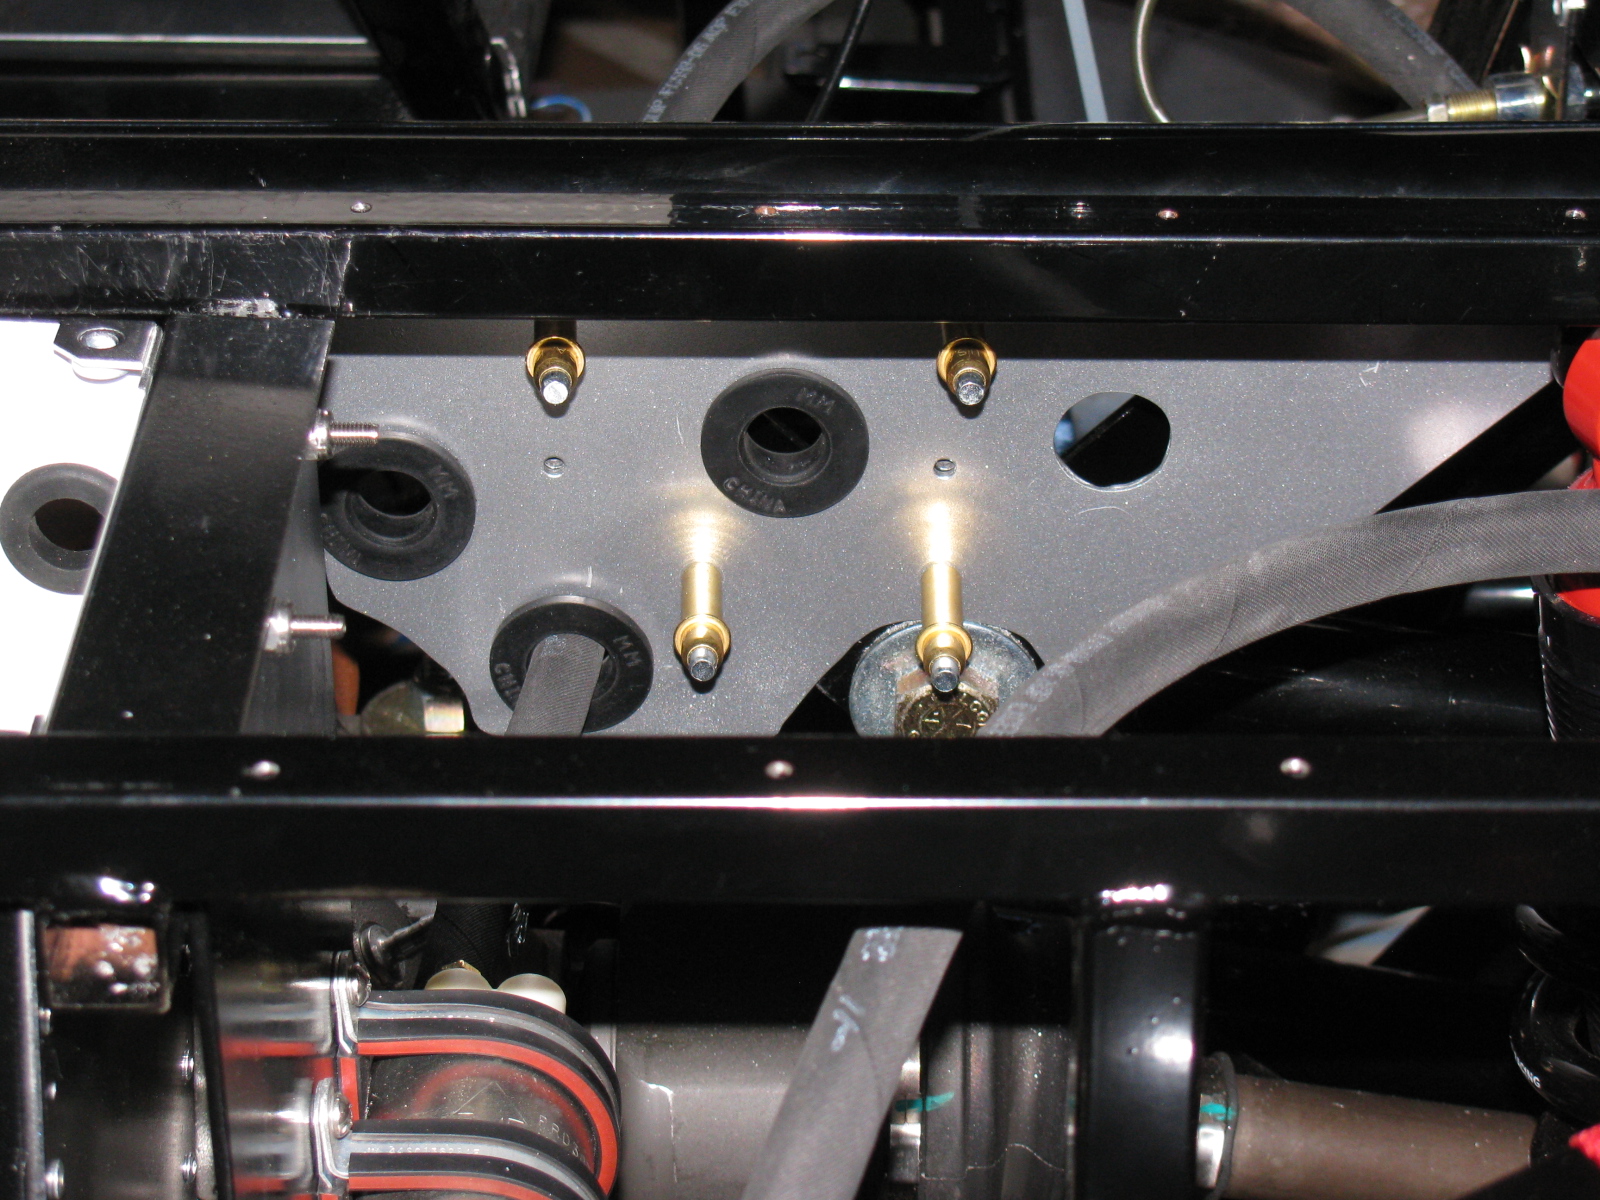
Here are some views of the passenger-side bracket installed with Clecos:


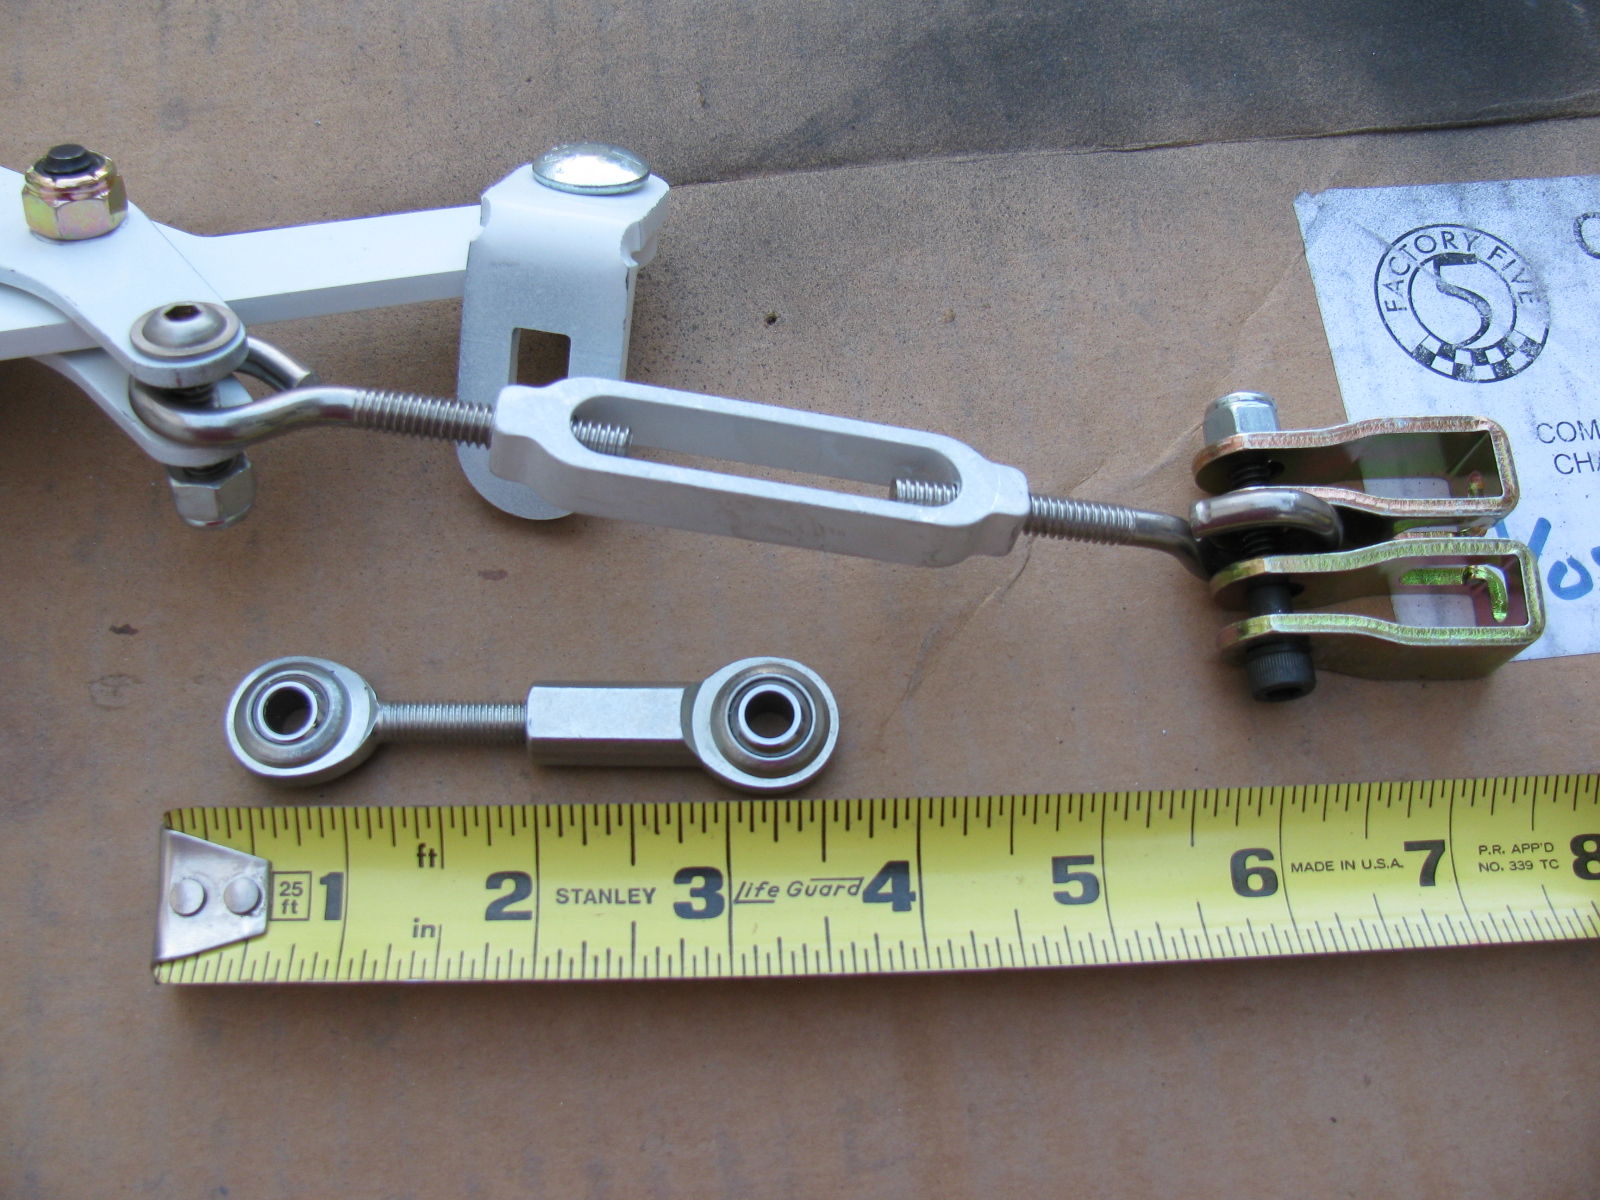
Next, I started laying out the e-brake cables and the complete kit e-brake handle. When I installed the rear brakes, I thought the cables looked too short. And last night I noticed that I am correct – the cables supplied with the IRS brake kit are about four to six inches too short.
I may have a solution to this, based on some Forum postings on this same topic — see the photo below. I do not like the turn buckle from the hardware store, I think I should replace it with a stainless steel clevis six to eight inches long to allow for adjustment. (McMaster-Carr items. . . )

UPDATE: I ordered an e-brake kit from Richard Oben of North Race Cars. (The same place I ordered my air conditioner – yet to be installed). The kit will move the e-brake to a more practical location at the top of the transmission tunnel.
Many builders of the Roadster as well as the Coupe do not like the way the brake cables rub against the big four inch tube. I will make a small Teflon block and mount it to the bottom of the chassis so the cable can slide more easily, and make it look much nicer. More details when I get to that step.
Main Wire Harness
I started laying out the main wire harness. A few weeks ago, I painted the fuse panel with white appliance epoxy paint. This will brighten up the underside of the dash and will prevent corrosion. Based on something I read on the Roadster section of one of the F5R Forums, I added a small hinge to the fuse panel mounting plate. You can see the hinge on the right side of the bracket in this picture:

However, this is bad advice, at least for my Coupe application. This is not a good thing to do for several reasons:
1) It moves the fuse block about a quarter-inch forward into the footbox, and adds strain to several wires in the Ron Francis harness supplied with the Complete Kit.
2) The reason for the hinge was to make it possible to swing the entire panel down for easy servicing. However, this is impossible, since there is not enough slack and the thick harness will not allow the fuse panel to simply “swing down.”
3) The mounting holes must be very close to the edge of the 2-inch rail. Removing the hinge makes a better location for the mounting screws.
After removing the hinge, and mounting the fuse panel per the instructions, I noticed some “squishiness” in the fuse panel, which I do not like. I have not seen this mentioned in any post so I thought I would bring it up here.
The fuse panel is a piece of thin aluminum, laser cut to shape to hold the plastic fuse panel. Three zip screws (the self-tapping hex-head screws that held the cockpit aluminum in place when the kit was shipped) fasten it in place under the driver footbox, near the steering column.
All fine and dandy, but the fourth corner is “floating in space” and flexes easily. I decided to add a small aluminum bracket to make the fuse panel stronger (flex less). I hope the bracket does not get in the way of anything to be mounted later….

The Factory Five Racing Type 65 Coupe is based on the Shelby Cobra Daytona. Only six of them were made.
On January 24, 2014, Daniel Strohl posted an article about this famous and important American racing car. Read the article:
Shelby Cobra Daytona becomes first vehicle on National Historic Vehicle Register

After several weeks, it is good to get back to work on the Factory Five Racing Type 65 Coupe. I finally completed drilling the rivet holes for all cockpit aluminum panels, and added a battery cut-off switch as you can see above.
Here is a hint for builders – there is a fairly large gap in the bottom right corner of the driver’s side floor and the “A” shaped piece that meets the transmission tunnel. I looked at several Coupes and Roadsters and they all have this space. However, by pushing on the A-shaped piece from behind (under the chassis and in the engine bay) – this gap can be closed up nicely. See below. . .


But what about this area, at the rear of the driver’s side door – indicated by a piece of blue masking tape – see that gap? Does something cover this space up or do I need to fabricate a replacement panel? Both sides look the same.

As mentioned in a previous post, I finally decided to mount the external fuel pump under the Factory Five Metal battery box. This is a protected location and is a low point on the chassis.

One problem will be access to the fill and drain holes for the Ford Racing differential. I had to drill out the rivets previously installed and tapped some 1/4-20 holes – this will enable the removal of the battery box when draining and filling the rear end fluid. Not the ideal situation, but I do not see too many alternatives to this arrangement.
My Ford 302 V8 has an MSD Atomic electronic fuel injection system, and I am running both feed and return fuel lines. Here is a picture of the tank end. . .

The fuel line runs from the first filter (right side of the chassis) to the fuel pump, and goes around to the driver side. Then it goes under the rear end to the passenger side of the chassis, where it goes to a second fuel filter mounted under the passenger seat, and finally to the engine.
The same path will be used for the return system. Pretty much standard layout.
Next Build Session
Depending on the weather, I will remove all interior panels and paint the under side with automotive under body paint. It is a rubberized black paint which should deaden some road noise, insulate heat and protect the panels from road debris.
Another item on the next to do list is the wiring harness. Here is a look at the main portion. . .


Nathan’s hot dog wrapped with bacon and dressed with grainy hot mustard and sweet pickle relish. I know – the onions are missing.
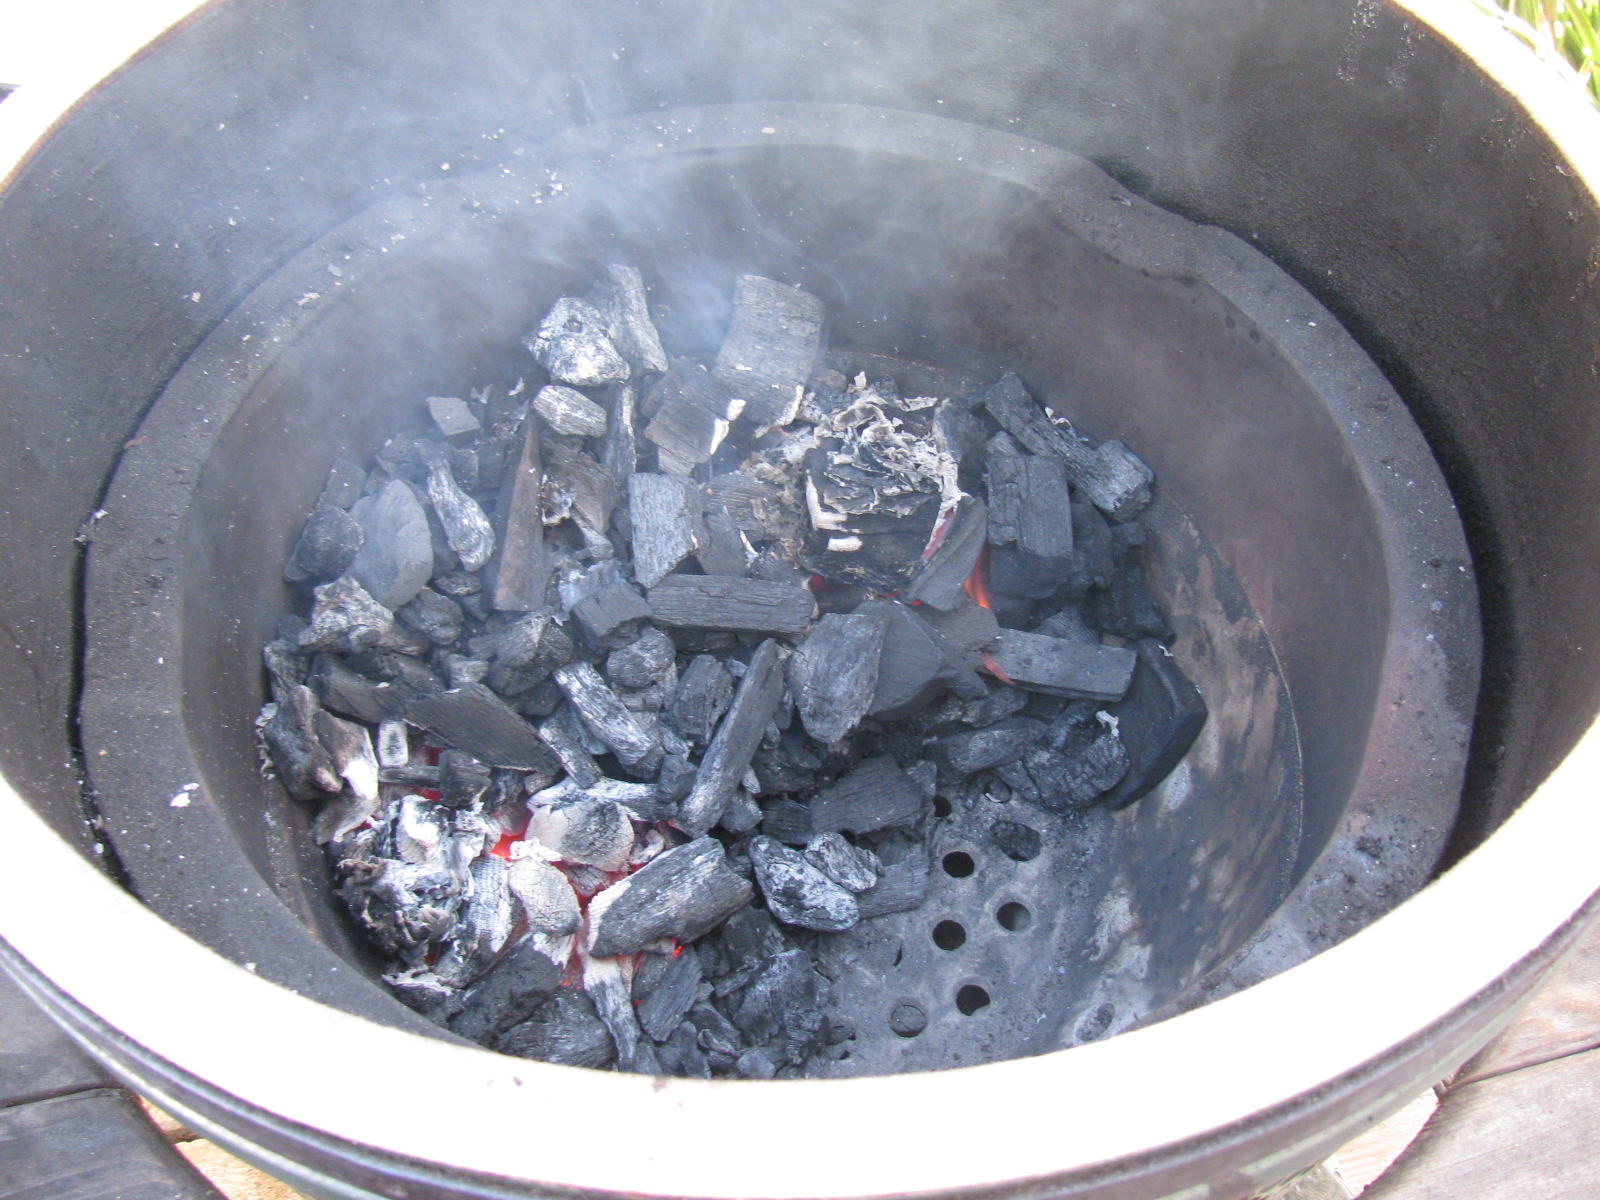
For some reason I had a hankering for a good hot dog. My favorite wieners are the famous Nathan’s. I also had a package of thick-cut bacon in the fridge, so I decided to wrap the wieners with a nice slice to make some Bacon Dogs.
I made a two-zone fire in the BGE, and cooked 4 bacon dogs at a time to cope with the flare-ups.


These were simple and fast and good. I think I need to try replacing the bacon with some Italian prosciutto or cappicola (gabagoul) next time.
And always remember: As Dirty Harry (Clint Eastwood) said in “Sudden Impact” — “Nobody, I mean nobody puts ketchup on a hot dog.”
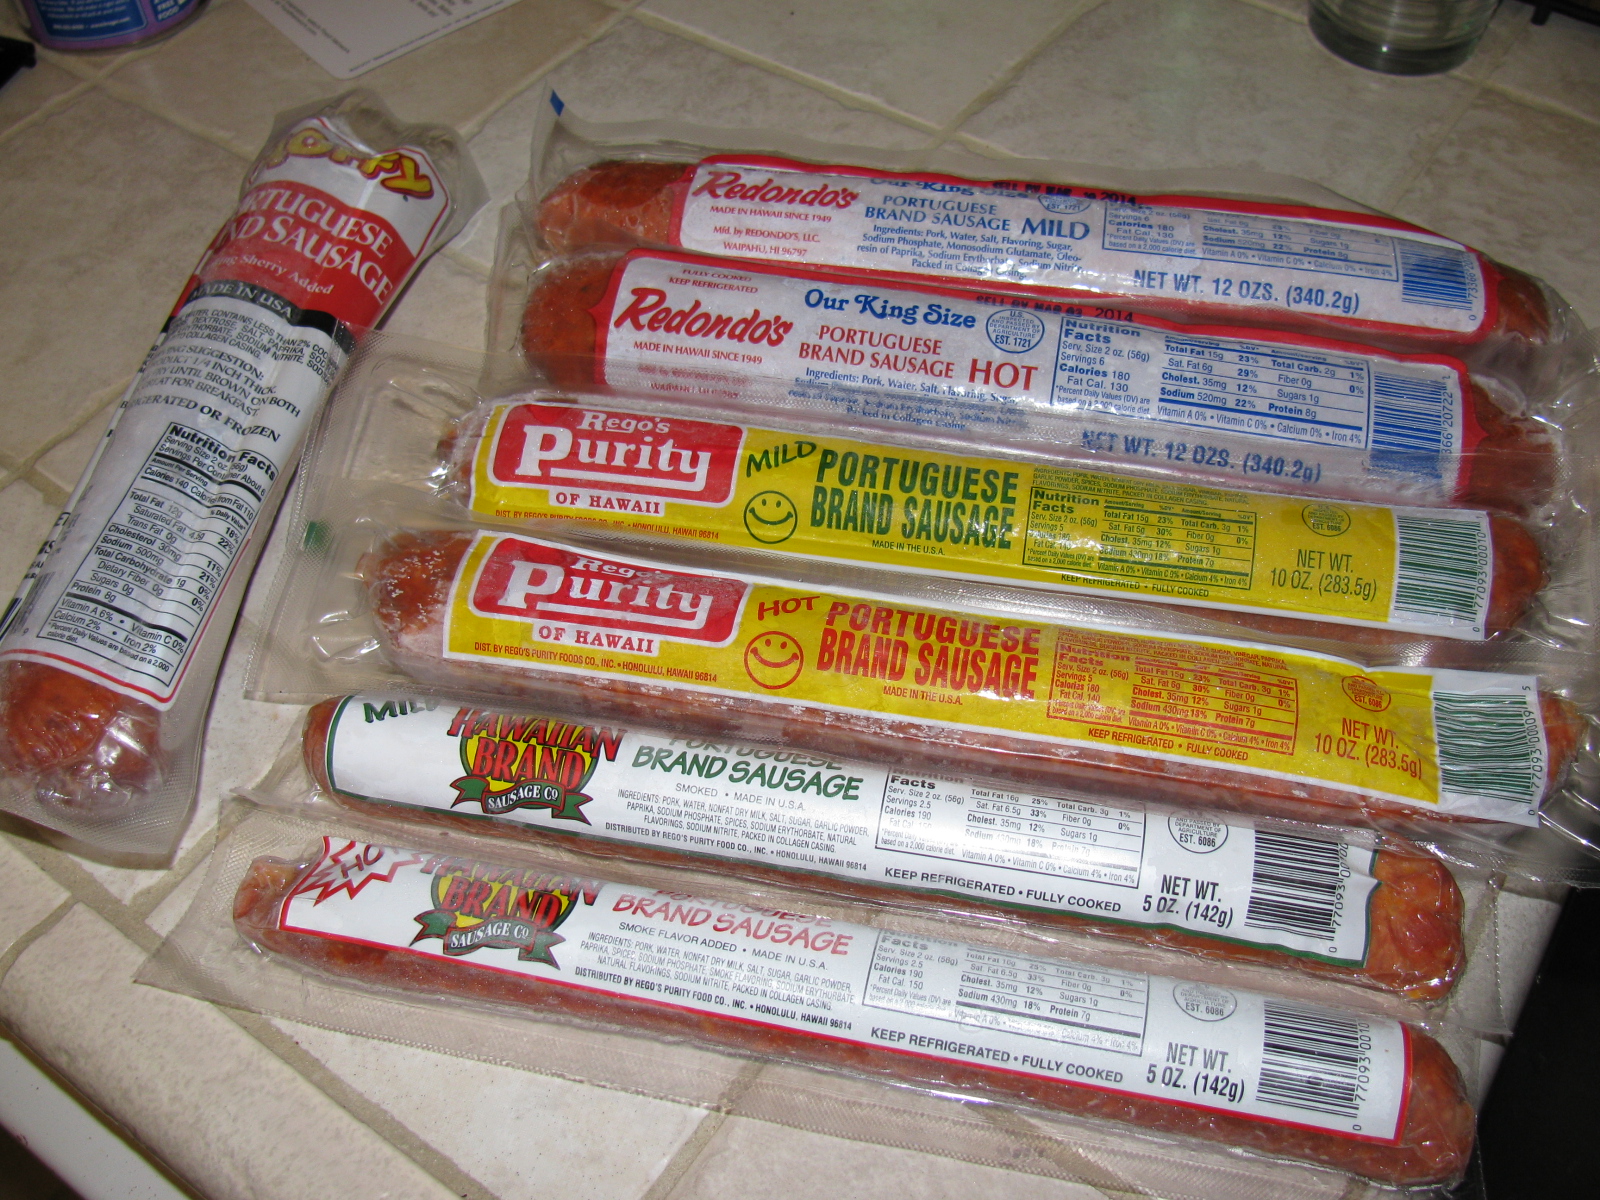
So after making these Bacon Dogs, my mind began to wander at the office today, and I thought about Maui Hot Dogs and Hawaiian Portuguese sausage. So I stopped by the local Marukai market (Costa Mesa, CA) and bought a selection of linguica. I will be doing a comparison of the various sausages at the next cook-out!

UPDATE: Looks like someone already did a Portuguese sausage “shoot-out”
UPDATE: Articles on San Diego’s First Maker Faire:
Inventors Show Off DYI Drones, Robots
Maker Faire Celebrates 100 Faires Around the Globe in 2013
Crowd Deluges San Diego’s First Mini Maker Faire: An Xconomy Slide Show
The First San Diego Mini Maker Faire Takes Off!
A Mini Maker Faire makes its debut in San Diego at the Del Mar Fairgrounds. Despite the sometimes heavy rain, most all of the exhibitors (Makers) showed up. San Diego Mini Maker Faire organizers kept the weather forecast updates on a positive note: “…Forecast: 100% Chance of Great Exhibits” – an excellent promotional phrase.
There were around 5,000 tickets purchased, amazing for a first run in inclement weather. Another positive indicator of interest in San Diego area “Making” is the number of Learn to Solder kits that were made during the event – all 350 of the blinky LED boards were built on Saturday.
The San Diego Not Your Grandpa’s Ham Radio team
Dave WA6CGR (San Bernardino Microwave Society – SBMS)
Dennis W6DQ (SBMS)
Jason W6IEE (SBMS)
Kerry N6IZW (San Diego Microwave Group – SDMG and SBMS)
Walt (SBMS)
Wayne KH6WZ (SBMS)
In addition to visitors from our own radio clubs (Rein W6SZ and his XYL, Larry K6HLH and his XYL, Ed W6OYJ, Michelle W5NYV and Paul KB5MU) many other San Diego area hams stopped by. As in previous exhibits, there is a pattern: Those who have a callsign but are not on the air, those who have callsigns and are active on the FM repeaters but not much else.
But this is one of the reasons I developed the Maker Faire theme called Not Your Grandpa’s Ham Radio – I want to show something new to licensed (active as well as inactive) hams, and I want to expose those not familiar with ham radio to what some of us are doing with twenty-first century technology in our hobby – we are embracing and doing hands-on experiments with microprocessors/microcontrollers, GPS, micro- and millimeter-wave construction techniques and other exotic radio-related technologies. We are having fun while learning new skills and expertise.
I hope this idea spreads to other active ham radio groups in other locations – surely there are other hams like us who are doing something more interesting than just talking to strangers, friends and family, right? If you are a ham radio operator and are involved in doing something interesting, let me know and we should join forces to help each other increase interest and participation in this concept – since – as most all hams know – being a Maker is certainly not a new idea!
Here are some pictures from the San Diego Mini Maker Faire. I have two videos posted on my YouTube channel: Walt’s Radio Wave Demonstration and The Electric Giraffe

Map showing the KH6WZ APRS beacon location. The location is approximate, I had to simulate the GPS coordinates since signals were blocked in the steel and concrete exhibit hall.

Despite the rain, there was a constant crush of people in, near and around the Not Your Grandpa’s Ham Radio booth at the 2013 San Diego Mini Maker Faire

Not Your Grandpa’s Ham Radio at the San Diego Mini Maker Faire – We were lucky there was a no-show next to us, so we combined the empty space with ours at the end of an aisle – good show!

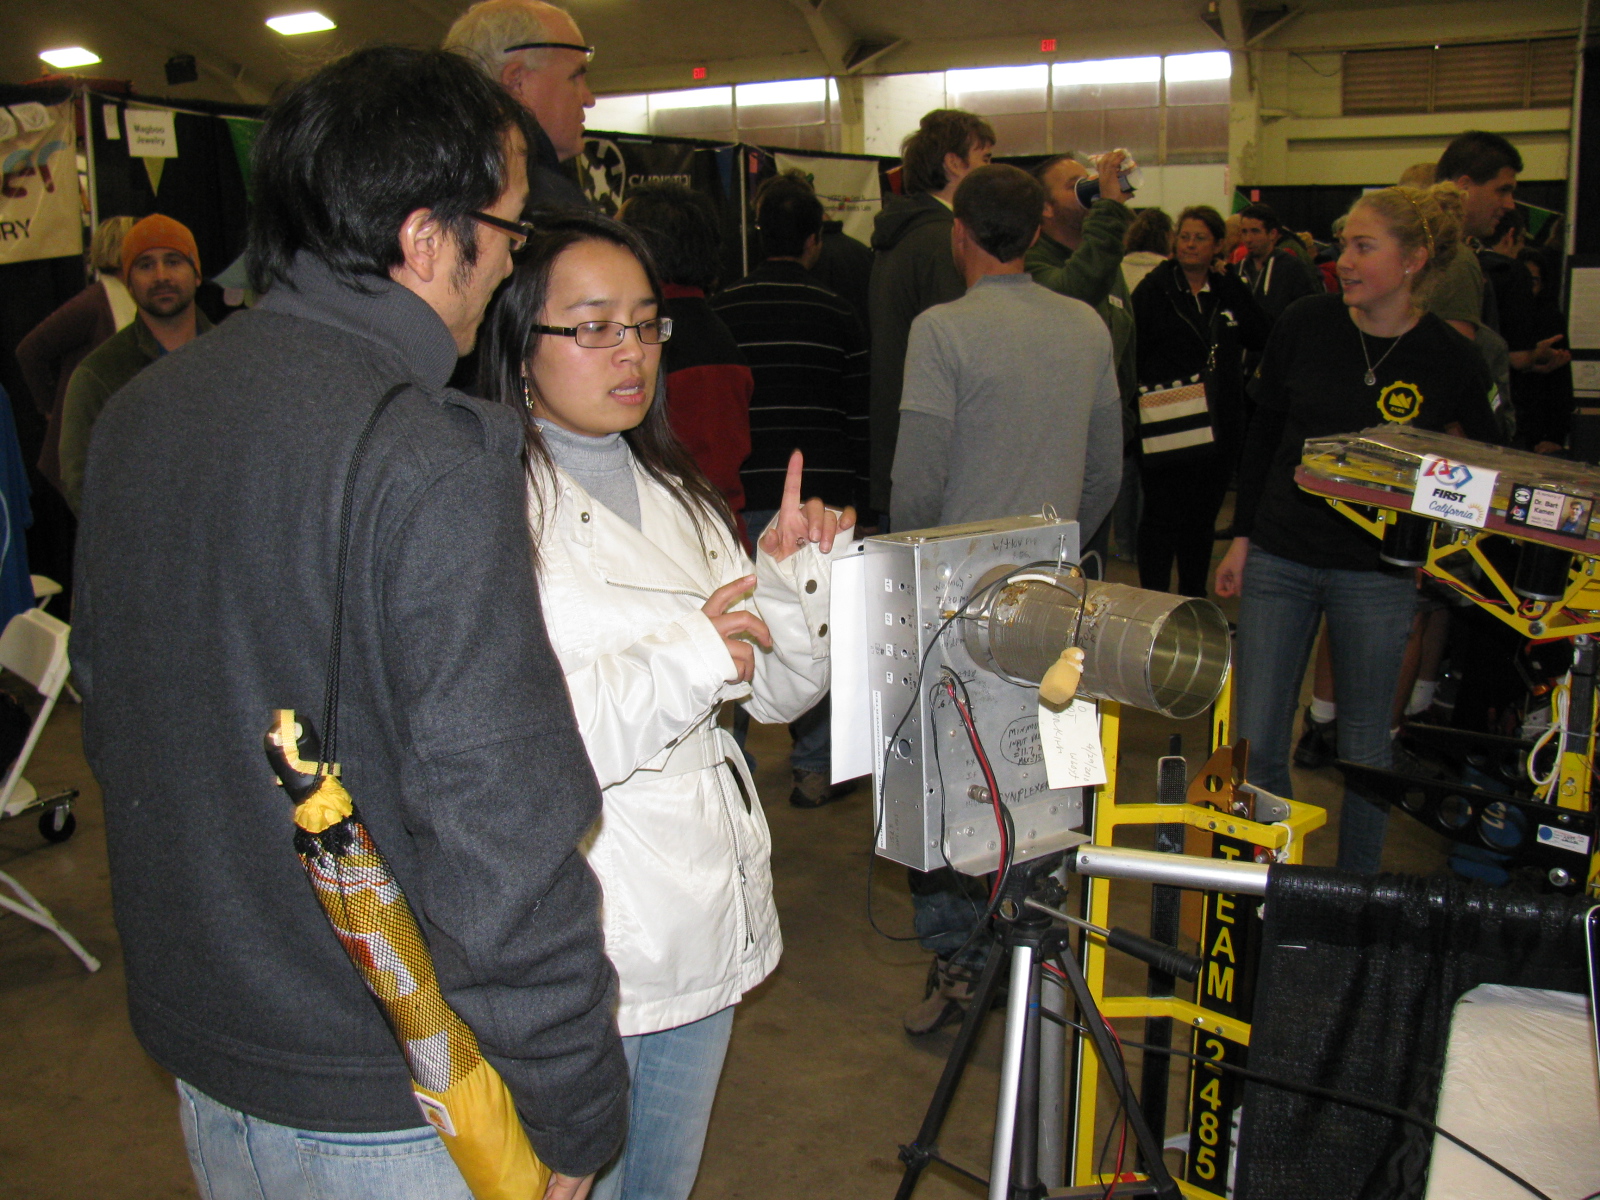
A visitor (striped shirt and black hat) tries some of the hands-on microwave physics demonstrations made by Walt

Dennis brought his 10 GHz / 24 GHz dual band station with software defined radio and notebook computer. The “waterfall” display is used to visually indicate very weak to very strong signals across the receive band. The digital signal processing in this system can improve signal reception

Two more projects by Dennis – On the left, a transmit/receive sequencer, used to turn on or turn off circuit modules (or functions) in a specific order. To the right is a circuit under construction/proof of concept receive system using direct synthesis.

Jason W6IEE brought his airplane IFF detector. I will get a better description of his display in a later update.

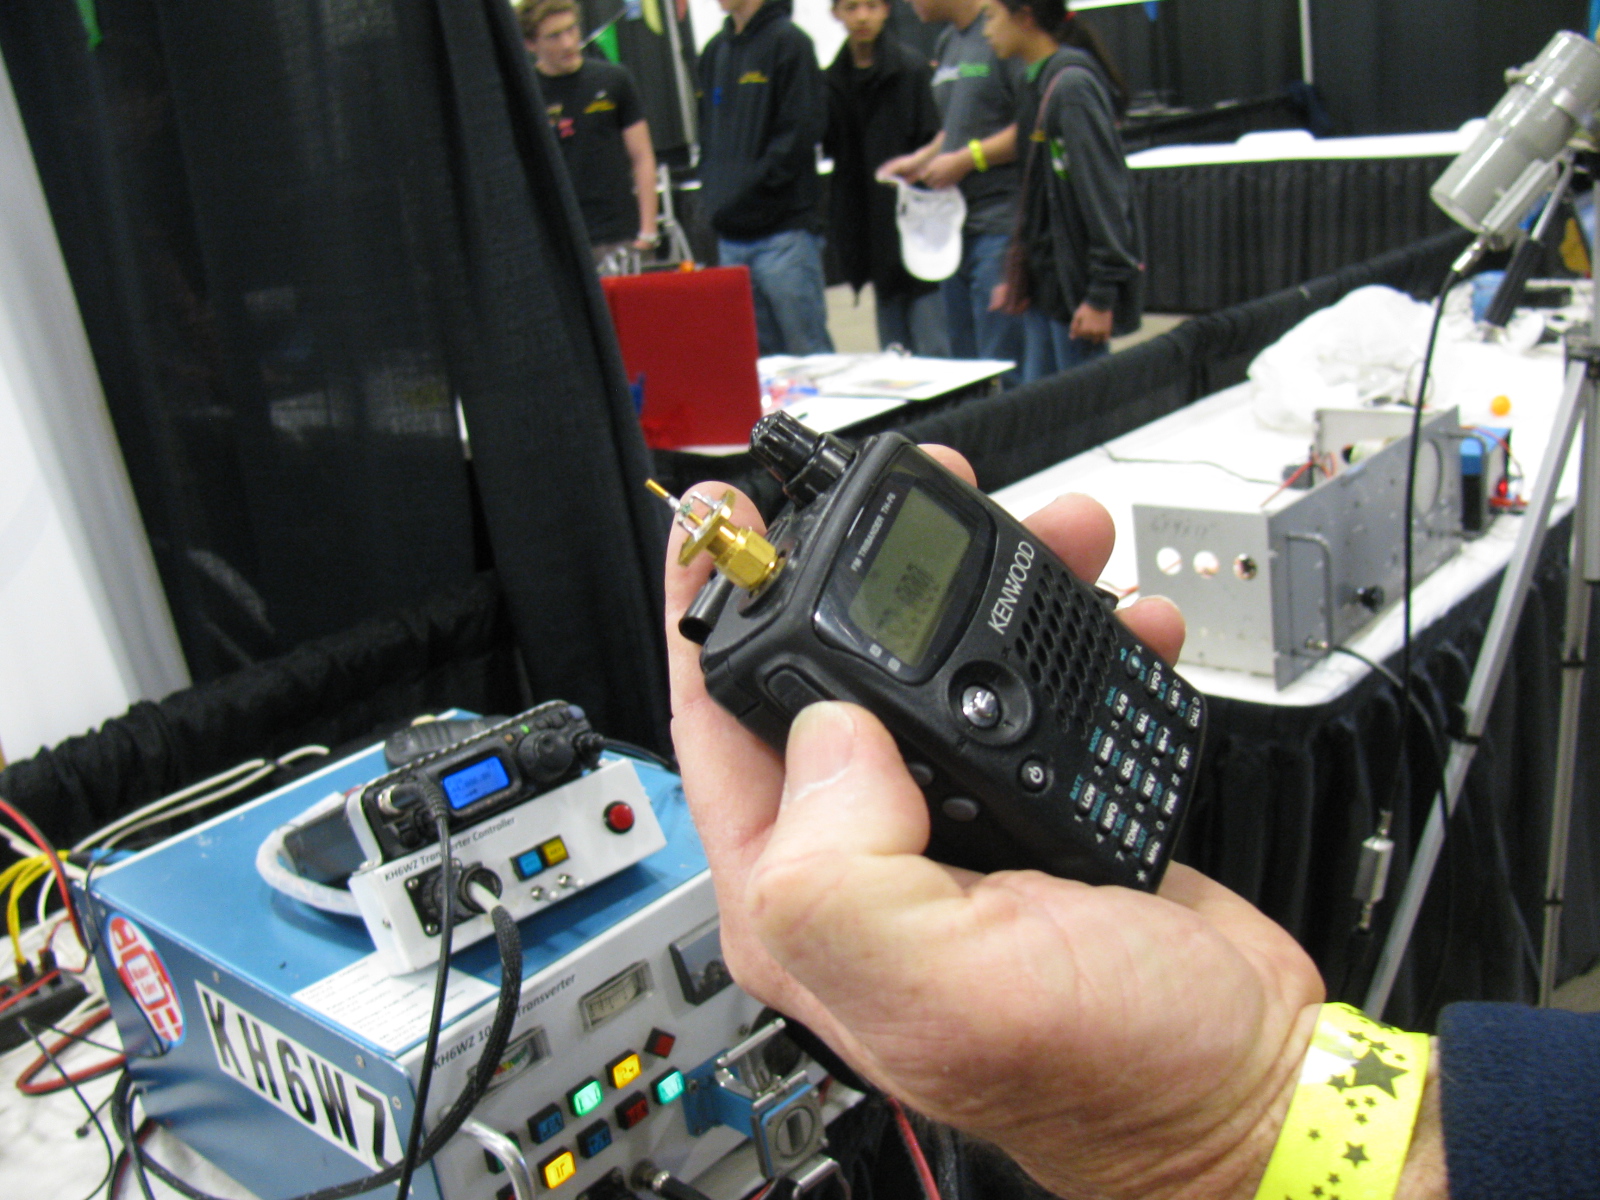
Here’s one of Kerry’s gadgets – a surplus QualComm microwave diode being used to generate a wideband microwave signal. Intended to be used to detect a microwave signal to verify transmitter operation, it can also transmit a signal for voice communication – in this case, to my 10 GHz transverter system shown in the background.

Here are three of my projects. On the far left, is a microwave field strength detector, this is used to demonstrate vertical or horizontal polarization, the KH6WZ unit in the middle is an APRS beacon, transmitting GPS coordinates (this unit generated and transmitted the GPS coordinates used to generate the location on the APRS locator map at the top of this page) and at the far right is my distance record-setting 10 GHz microwave transmitter-receiver system.

Visitor’s to Not Your Grandpa’s Ham Radio at the San Diego event were able to see some vintage 1960s microwave ham radio units – like this “Synplexer” built by Ed Munn W6OYJ. A pair of these units were on display so we could demonstrate full duplex wide band communication on 2.4 GHz (2400 MHz)

Here’s a closer look at the Synplexer

Who’s that?

It’s great to see young ladies get excited about technical things. There’s a San Diego area high school program that includes a robotics class and competition

Quadcopters seem to be trendy with Makers. Maybe this is where Jeffery Bezos got that idea for small package delivery?

MakerPlace – a place where fellow Makers can gather and make, share and borrow tools and ideas to make things. Funny, it sounds like what a good and active ham radio club should be

Russell – the Electric Giraffe at the 2013 San Diego Mini Maker Faire. Russell and its builder Lindsay, are San Diego residents

The Electric Giraffe – This image may give you some idea of Russell’s size – this is the “down” position, with head lowered for crowd interaction
Links to More Information
Amateur Radio General Information
CQ Amateur Radio Magazine
American Radio Relay League (ARRL)
Polaplexer for 2.3GHz (2300 MHz) – a Vintage Microwave Transceiver
Another Polaplexer Article
APRS – Automatic Packet Reporting System -Beacons
Byonics – I Use TinyTrak Beacon Kits
Microwave Ham Radio Clubs in Southern California
San Bernardino Microwave Society (SBMS)
Microwave Group of San Diego / San Diego Microwave Group
San Diego Area Radio Clubs
Go here and search for ham radio clubs in your area
Russell the Electric Giraffe


