Archive for the ‘big green egg’ Tag
-
-
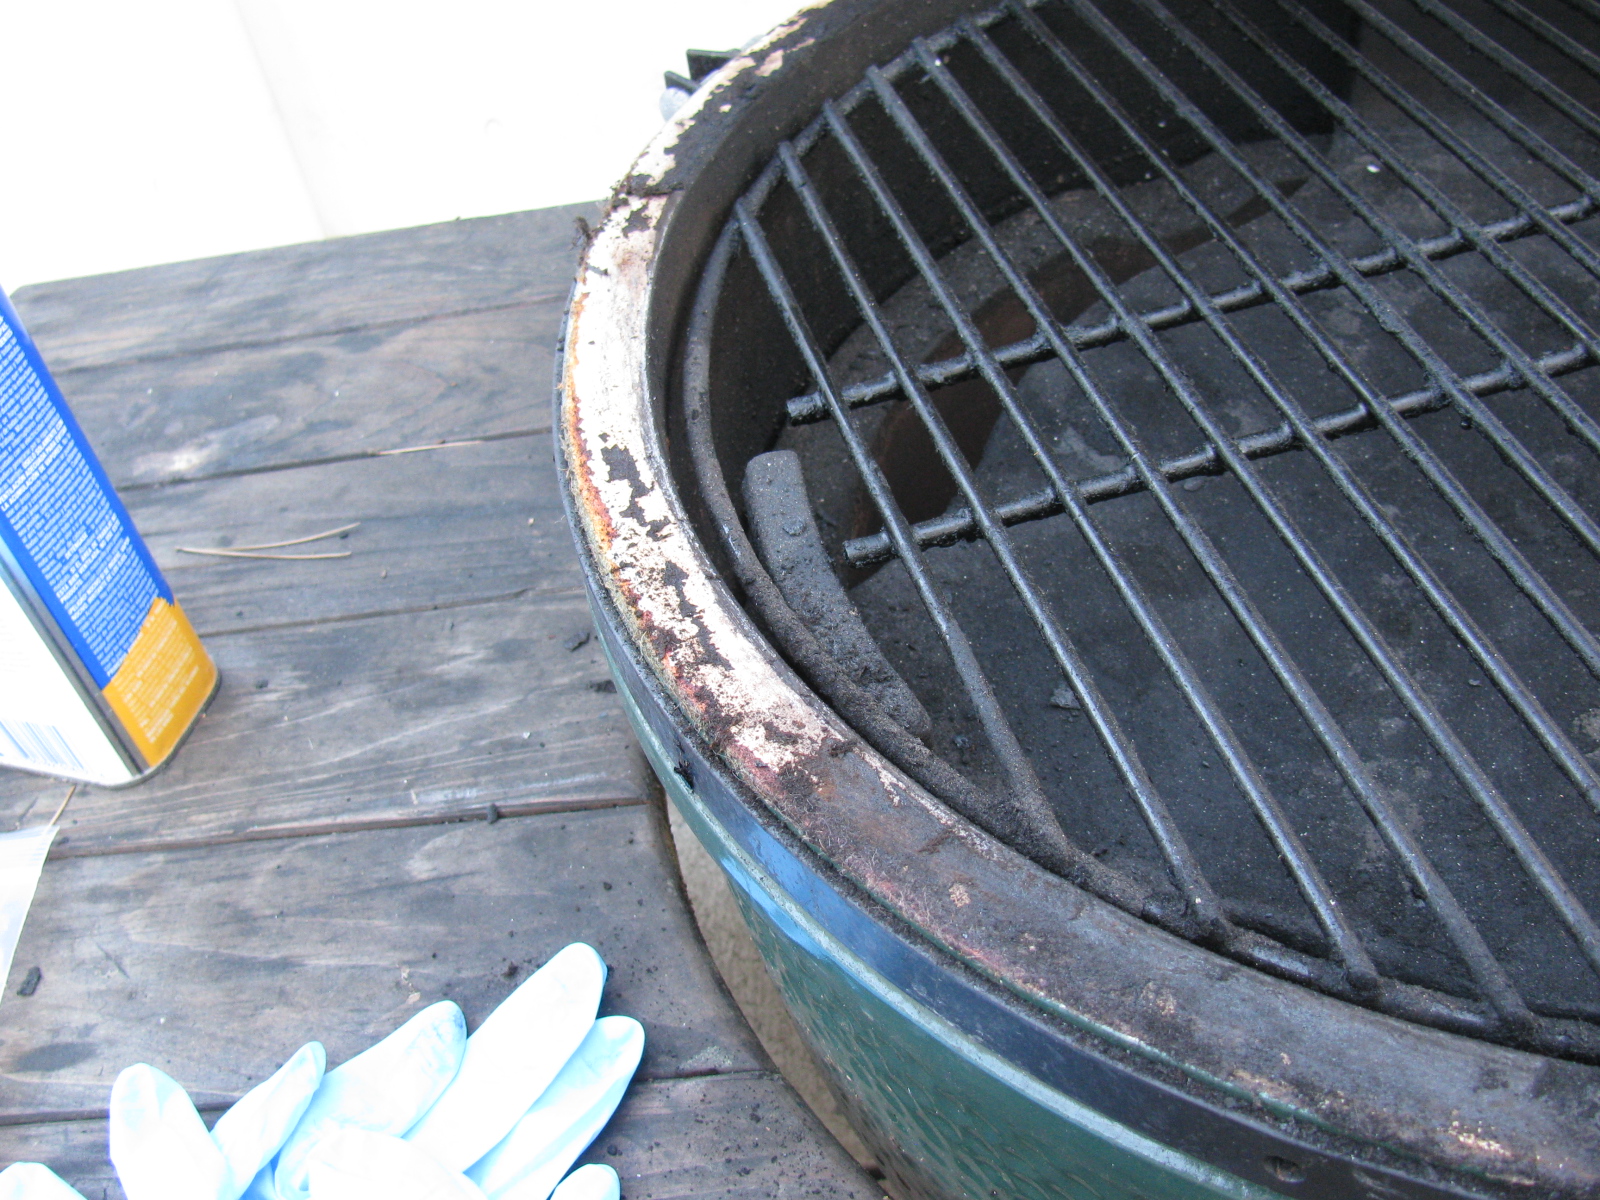
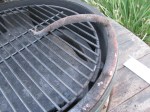
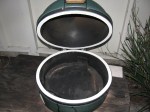
The gasket on my Big Green Egg finally wore out. After three years, the gasket hardened and had a few “bald” spots.
-
-
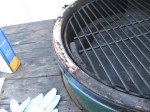
Rather than working upside down, I removed the lid portion of the BGE from the hinge assembly.
-
-
The old gasket was scraped off to bare ceramic. Acetone was used to de-grease and clean the surfaces.
-
-
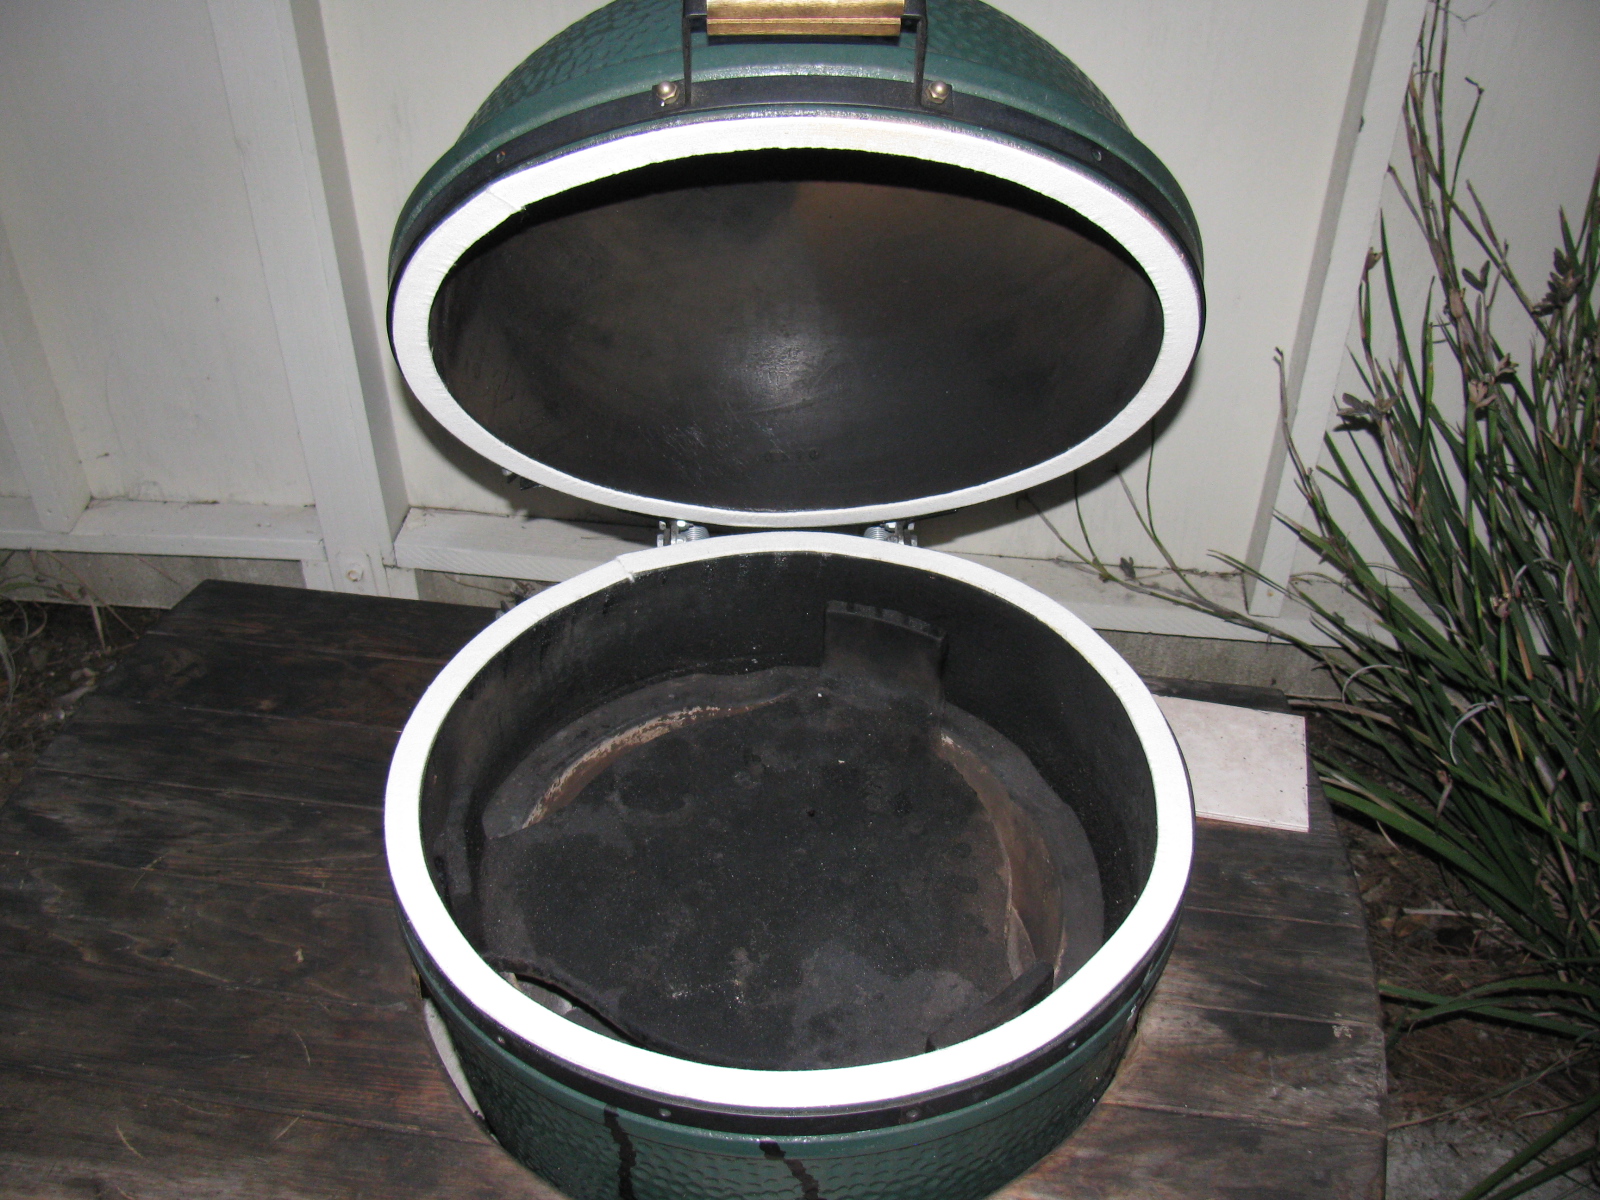
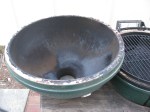
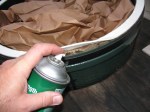
New gasket in place. Easily done in a few minutes.
-
-
3M super strength adhesive (a spray-on contact cement) was used to fasten the gasket to the bottom and top rim. Butcher paper was used to help limit over-spray going into the interior of the BGE.
-
-
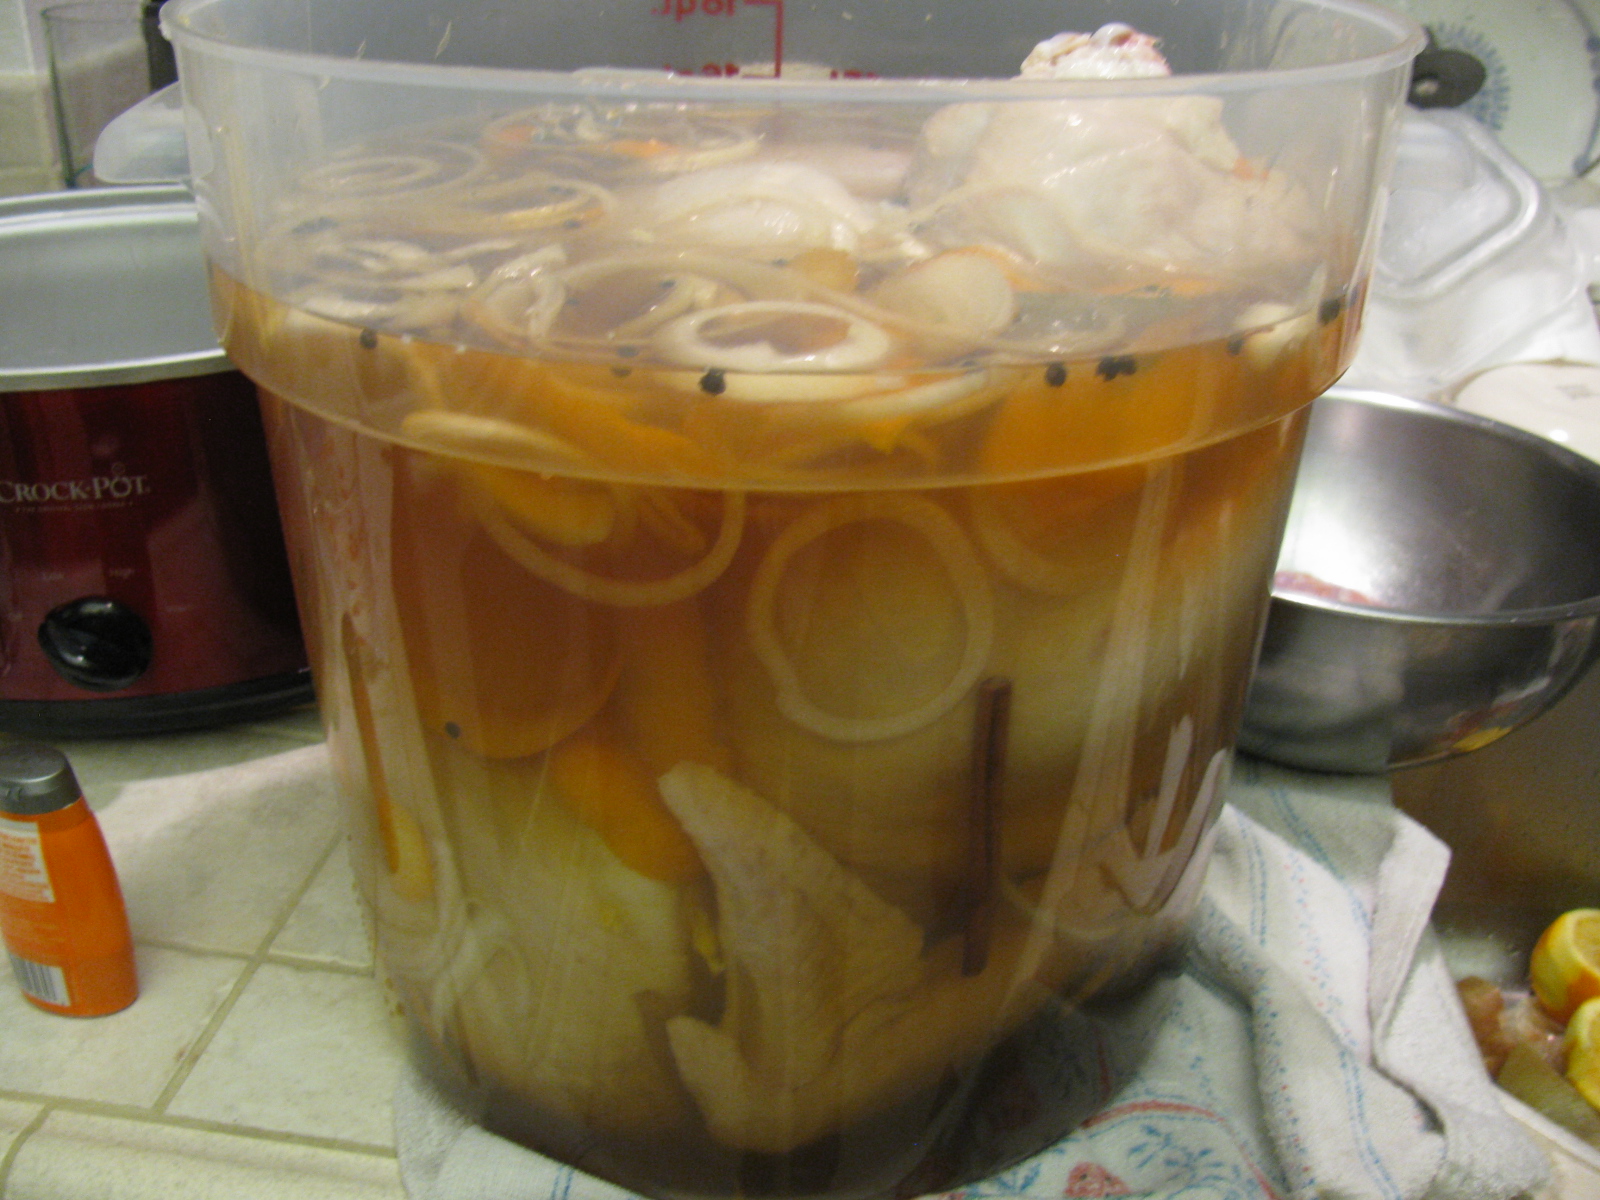
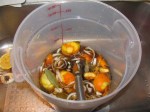
My secret for a juicy and tasty turkey: Brining. I use the Orange Brine recipe from Primal Grill, Season 3. (Orange-Brined Turkey Breast)
-
-
The 20-lb hen swimming in the orange brine. I started late, it is best to soak the turkey for at least 24 hours – I brined for only 12 hours – but it was still moist and tasty!
-

-
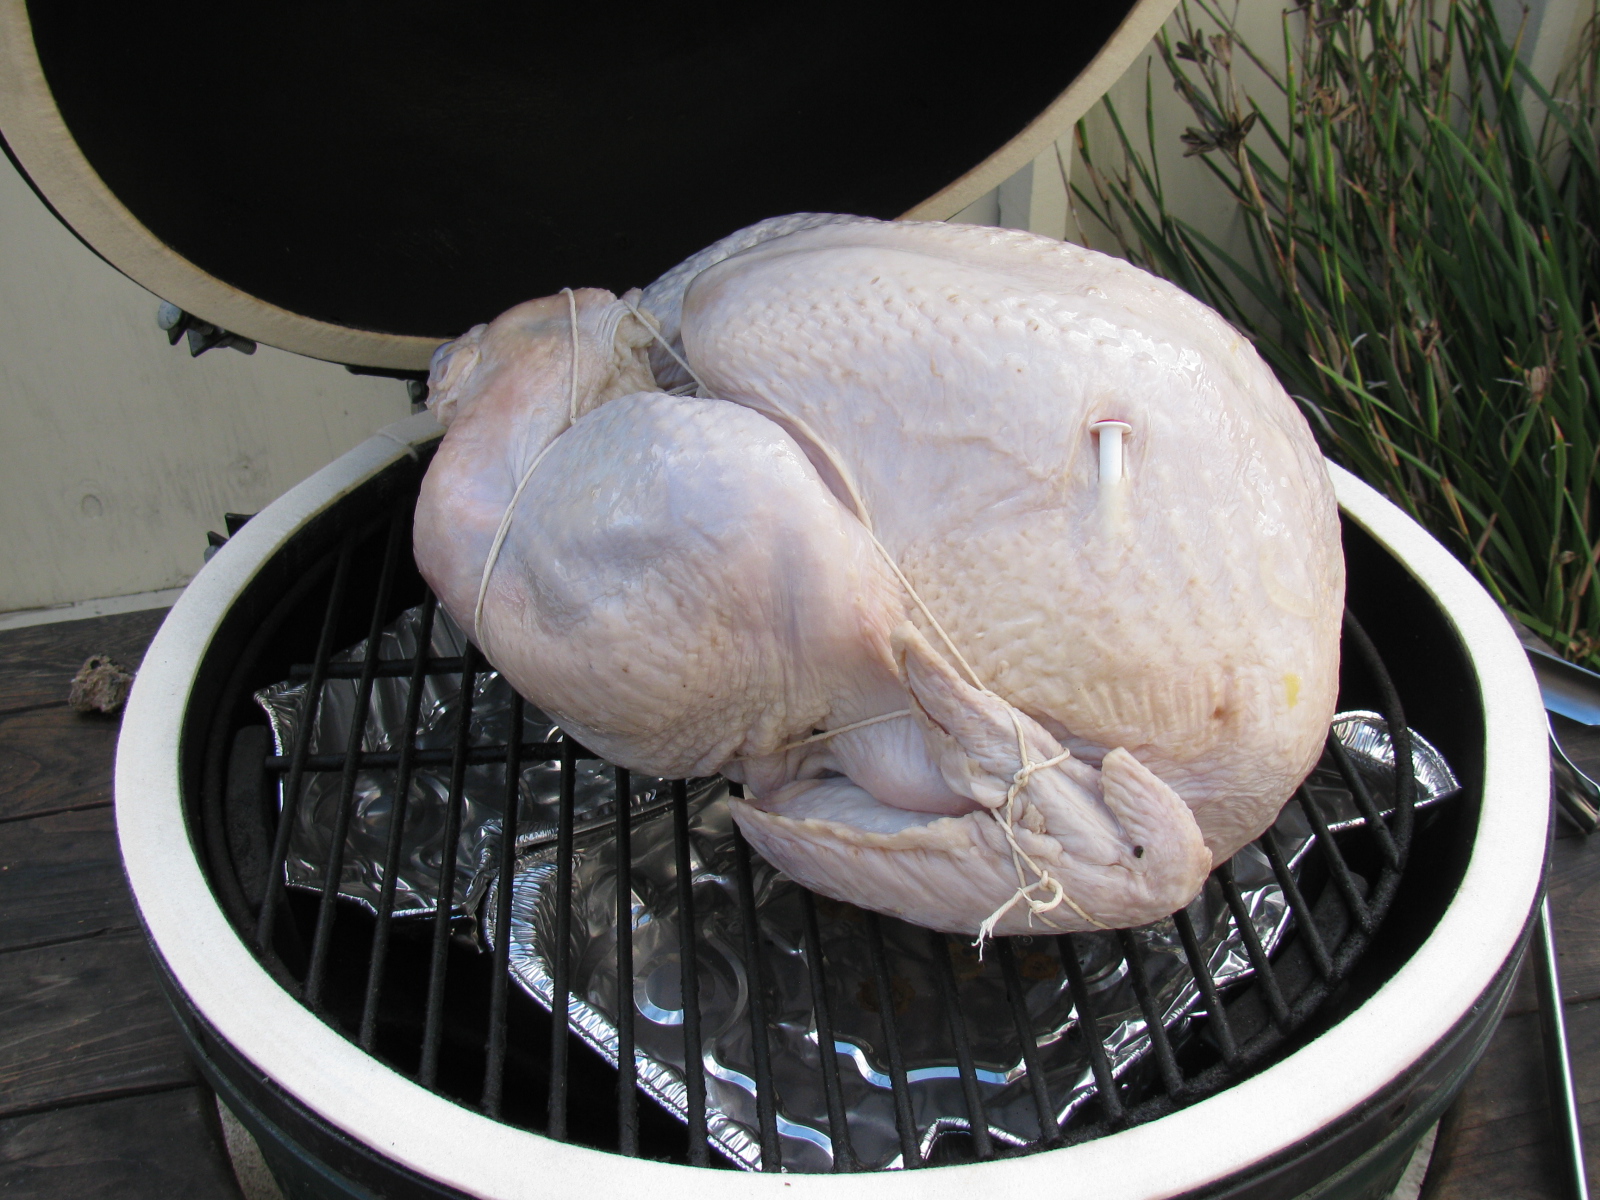
The BGE is set up for indirect grilling, and a drip pan is placed underneath. Unfortunately, this set up usually burns the drippings – will try using a traditional roasting pan to catch the juices next time. Not this bird has one of those pop-up doneness indicators – I usually ignore those and test for actual internal temperature.
-

-
Pop-up indicator says this is done, however, it is not. Total roasting time at 325 degrees F was 3.5 hours.
-
-
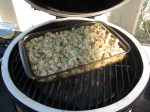
After the turkey was finished, there was plenty of heat and lump charcoal, so I decided to cook the stuffing in the BGE, too.
For the last several weeks I have seen a pile of colorful winter squash at the local grocery store, and wanted to roast some in my Big Green Egg. So I finally tried this, using a recipe from food.com. It is simple to make and very tasty when smoke-roasted on the BGE.
The original recipe can be found here.
Here are some pictures of how I did my Sunday dinner. . .

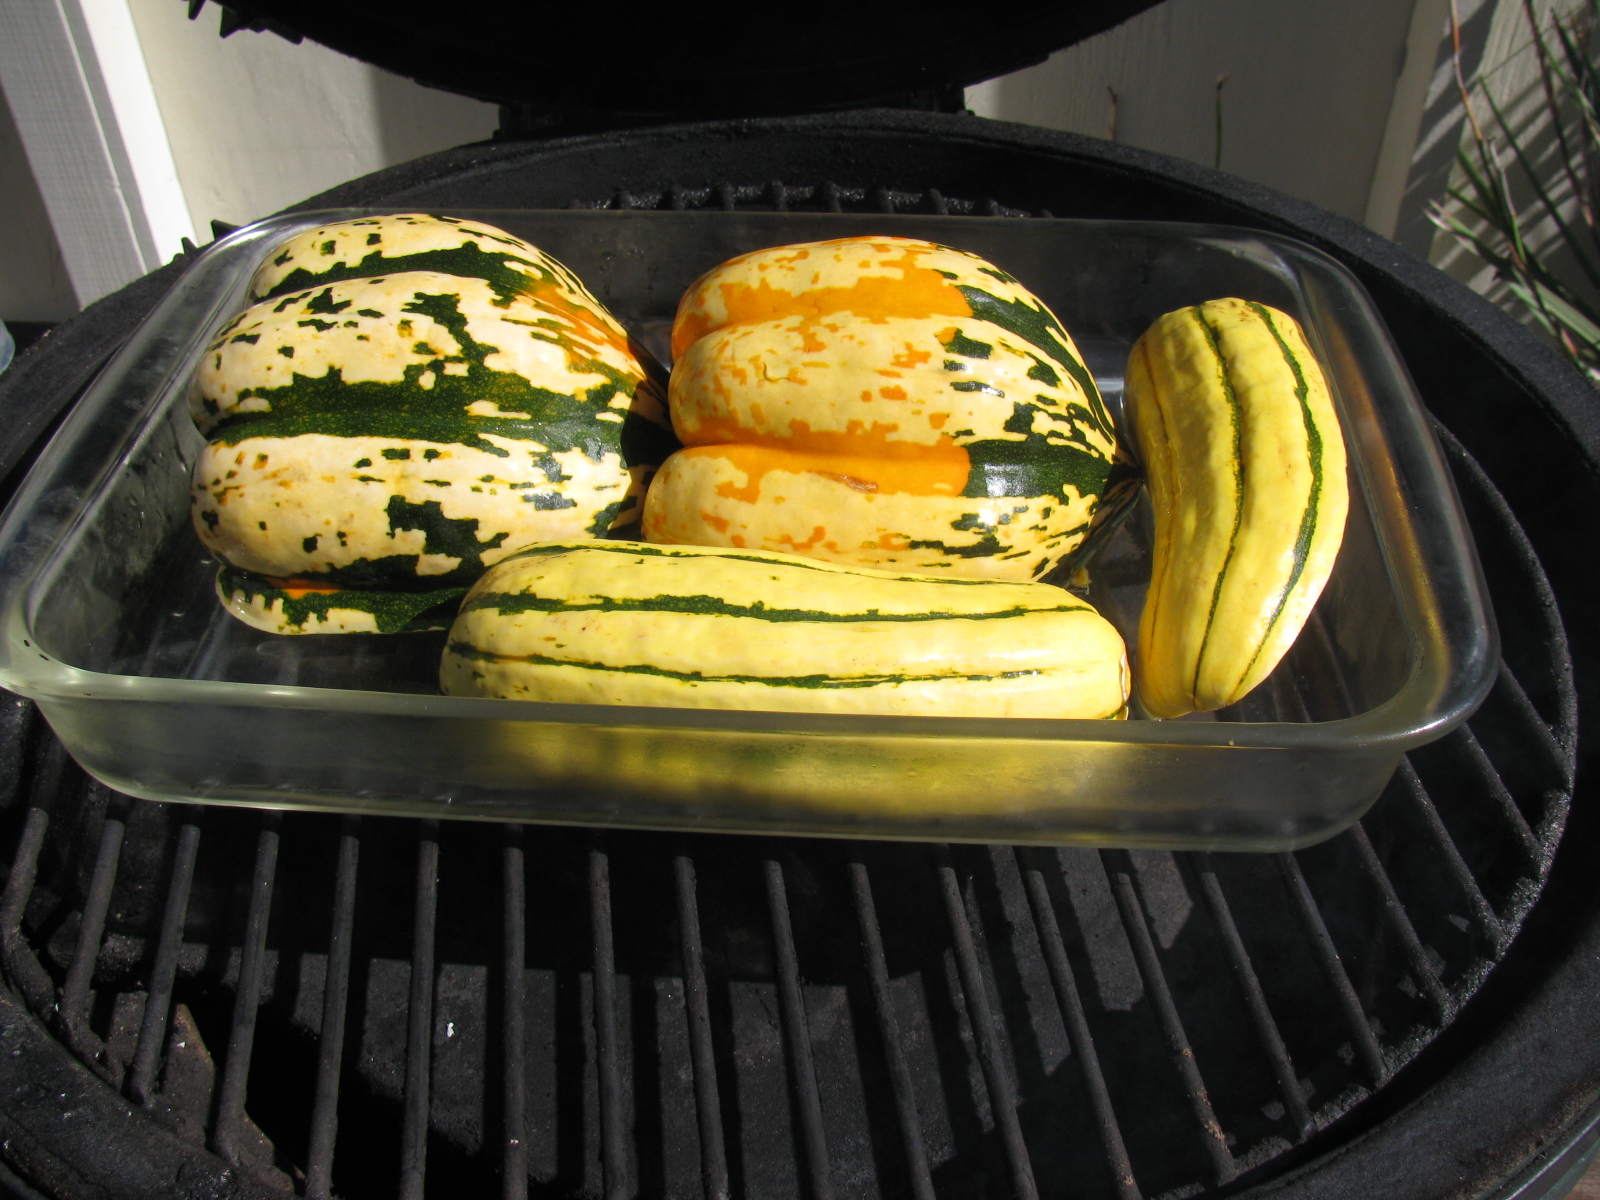
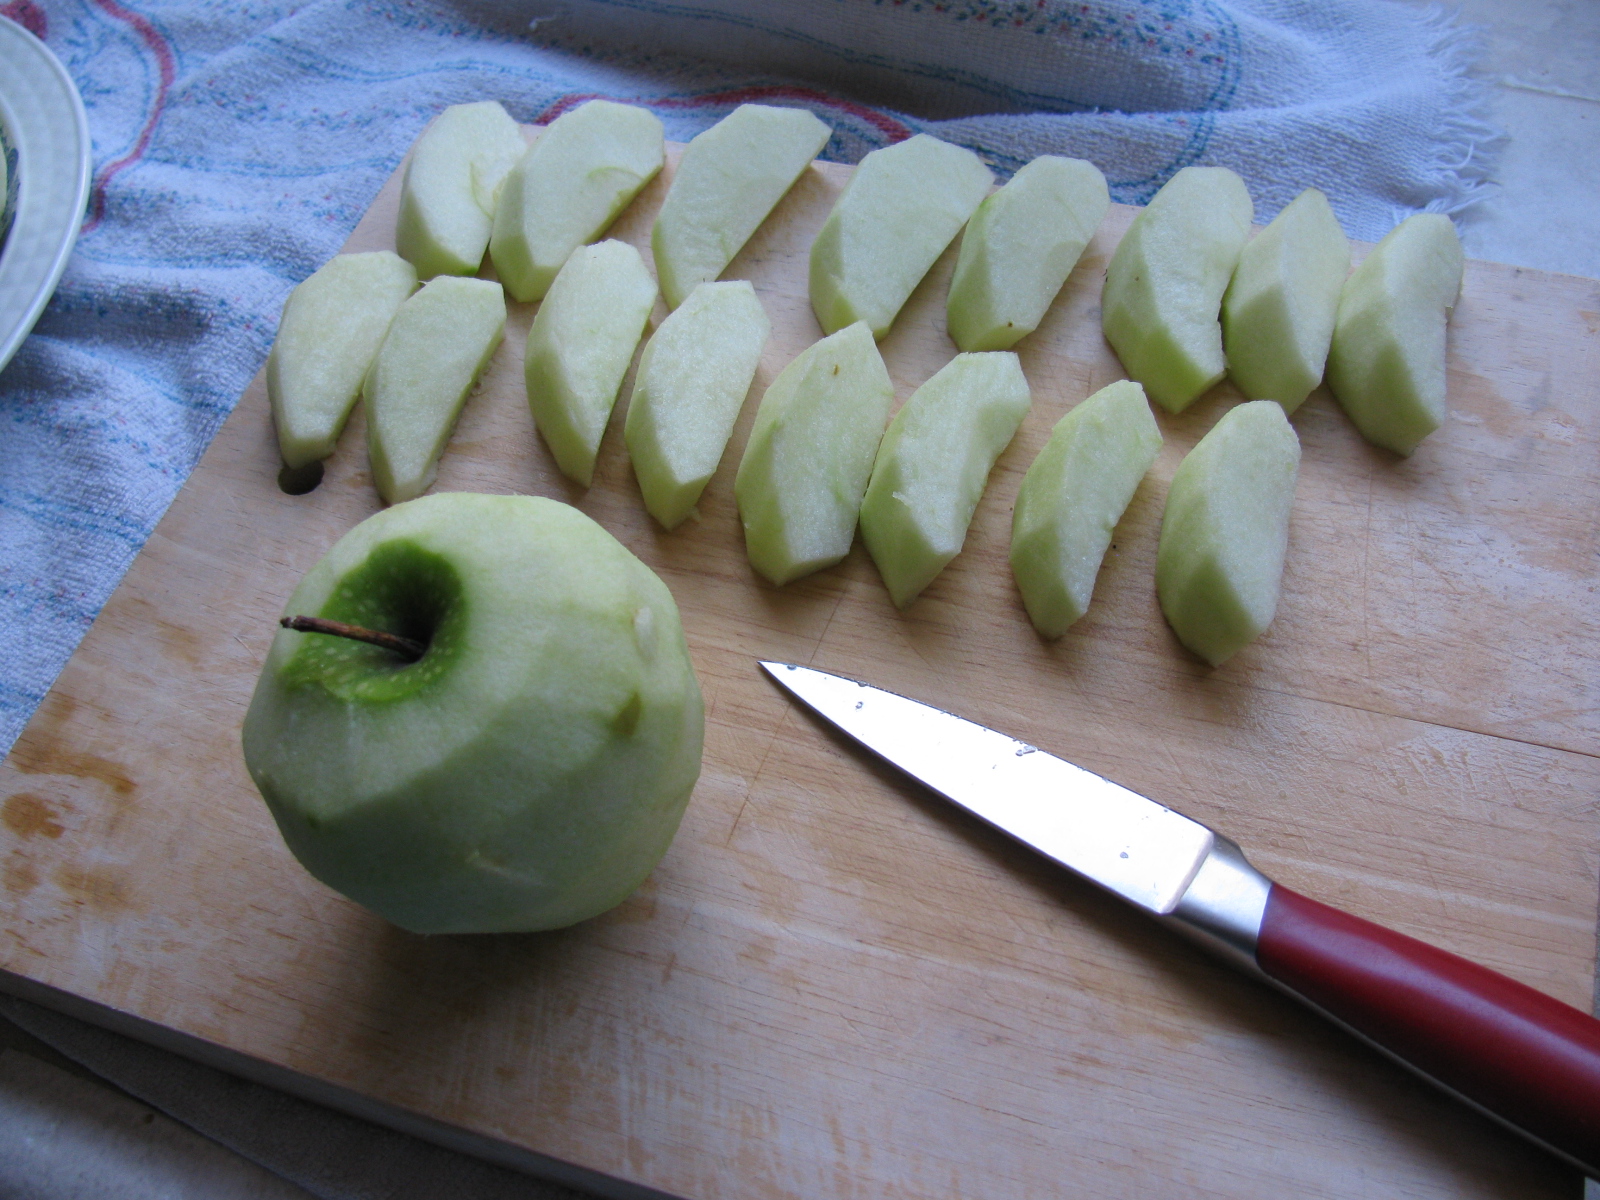
Two types of winter squash

Squash cut length-wise, seeds removed and placed in a Pyrex baking dish with some boiling water. Bake/roast for about 35 minutes at 350 to 375 degrees F.

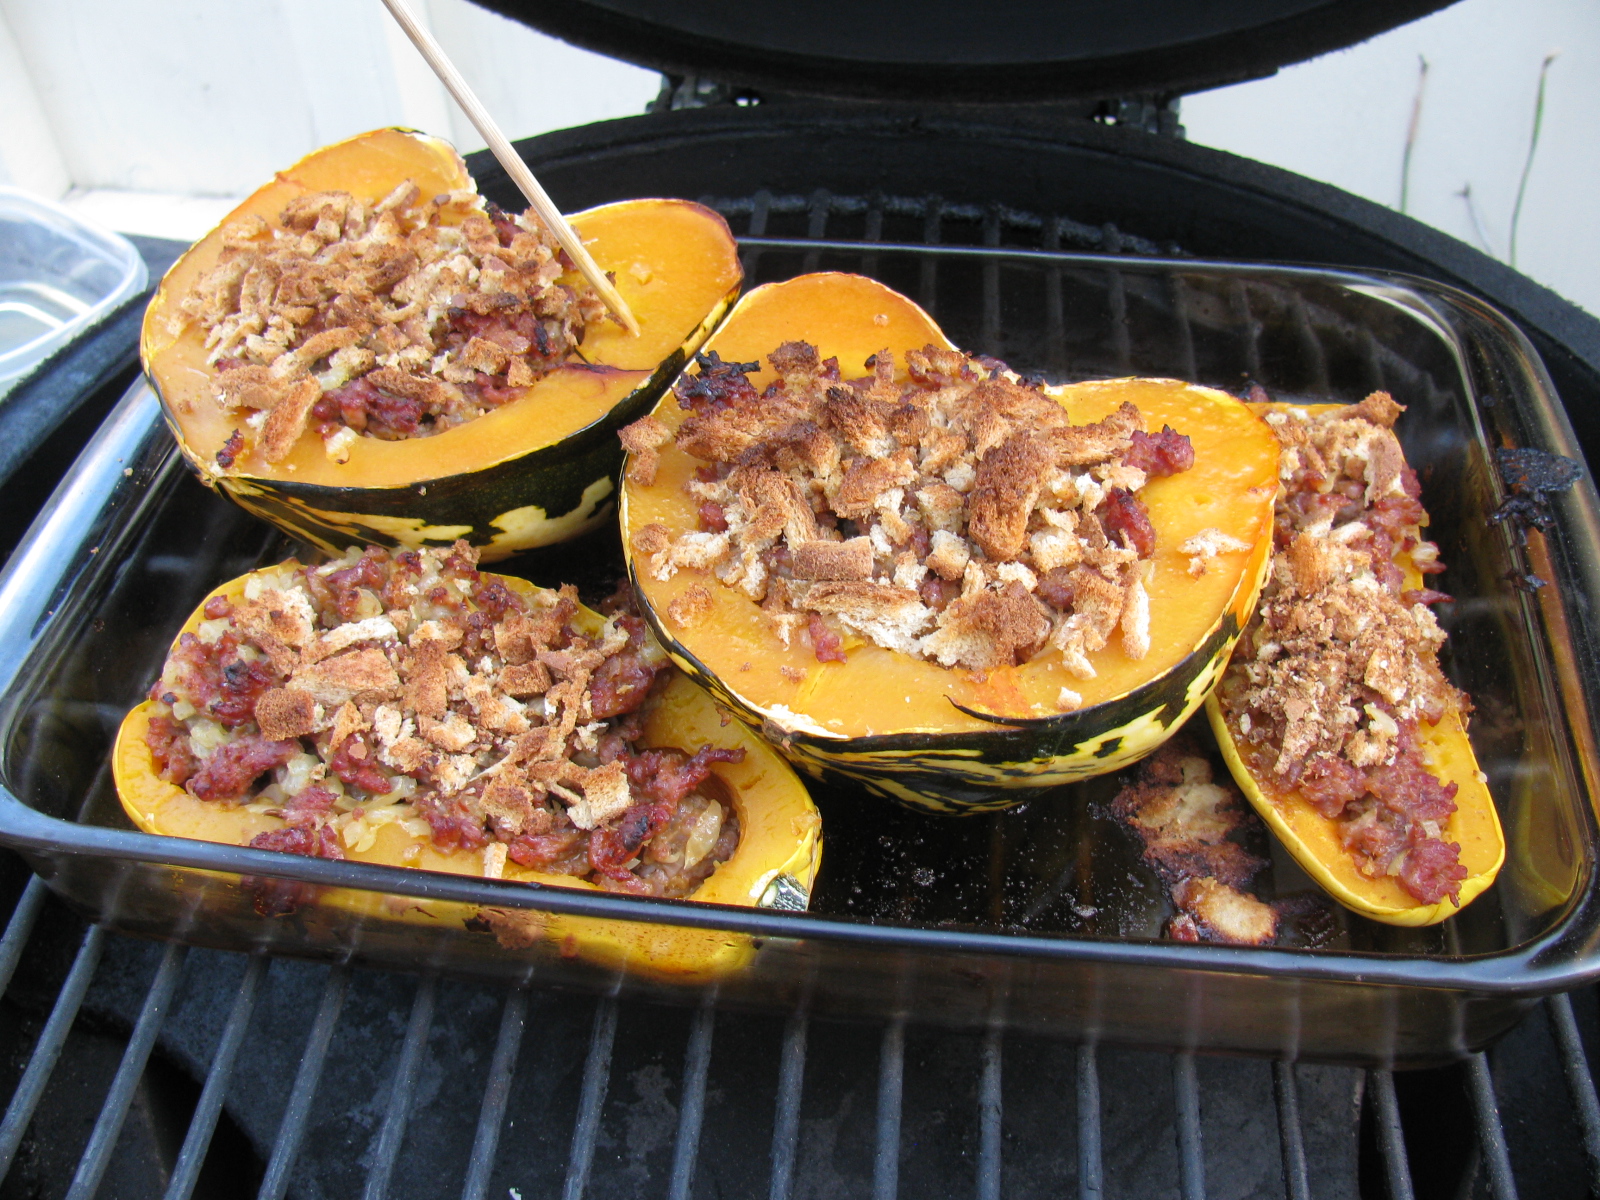
Remove the squash and stuff with (cooked) sausage, onion and bread crumb mixture. . .

Back on the grill and continue baking for another 20 minutes – or until done. Poke the squash with a skewer or fork to verify doneness.

Stuffed squash 1 – done.

Stuffed squash 2 done.
The smoke flavor, the tender squash and the pork sausage go very well together – Give this simple recipe a try, it’s mighty tasty!
Early last week, a co-worker bought a falafel plate for lunch. That made me want some all week long. Since do not like to fry foods in my kitchen (too messy) I wanted to try making some on my Big Green Egg.
I searched for a recipe and found this one on a great site called The Shiksa in the Kitchen. It is a traditional recipe, and shows some great pictures of the process, including frying them. I thought this might just work. . . . >>> Click here to see the Shiksa in the Kitchen recipe for traditional falafel.
But it did not turn out as well as I thought. I ate them anyway, but there just was not enough spice. I wanted the cumin and pepper to stand out a lot more. And it was too mushy on the inside – even after almost an hour of baking. I used my recipe for tzaziki sauce. >>> Click here for an interesting beef recipe and the yogurt-dill-cucumber sauce called tzaziki on the BGE forum.
Here are some pictures of this edible but failed attempt. . .
-

-
Traditional falafel mixture.
-

-
Falafel on the Big Green Egg Oven!
-

-
Falafel balls – about 2 tablespoons placed on a non-stick pizza pan.
-

-
Big Green Egg with Platesetter, “legs down,” and Big Green Egg Pizza Stone.
-

-
About 50 minutes at 350 degrees F. Nice and brown, but still mushy on the inside – too moist.
-

-
Falafel balls in pita bread, with tzaziki sauce.
Just a few seconds ago, I found this oven baked version for falafel on a site called Cookie and Kate: I might try this falafel recipe next time I fire up the BGE.

Getting the Big Green Egg up to temperature (250 degrees F). Hickory chips were added.
A recap of my first few cooks with a Big Green Egg ceramic cooker. Click the link >>>> A Barbecue Summer

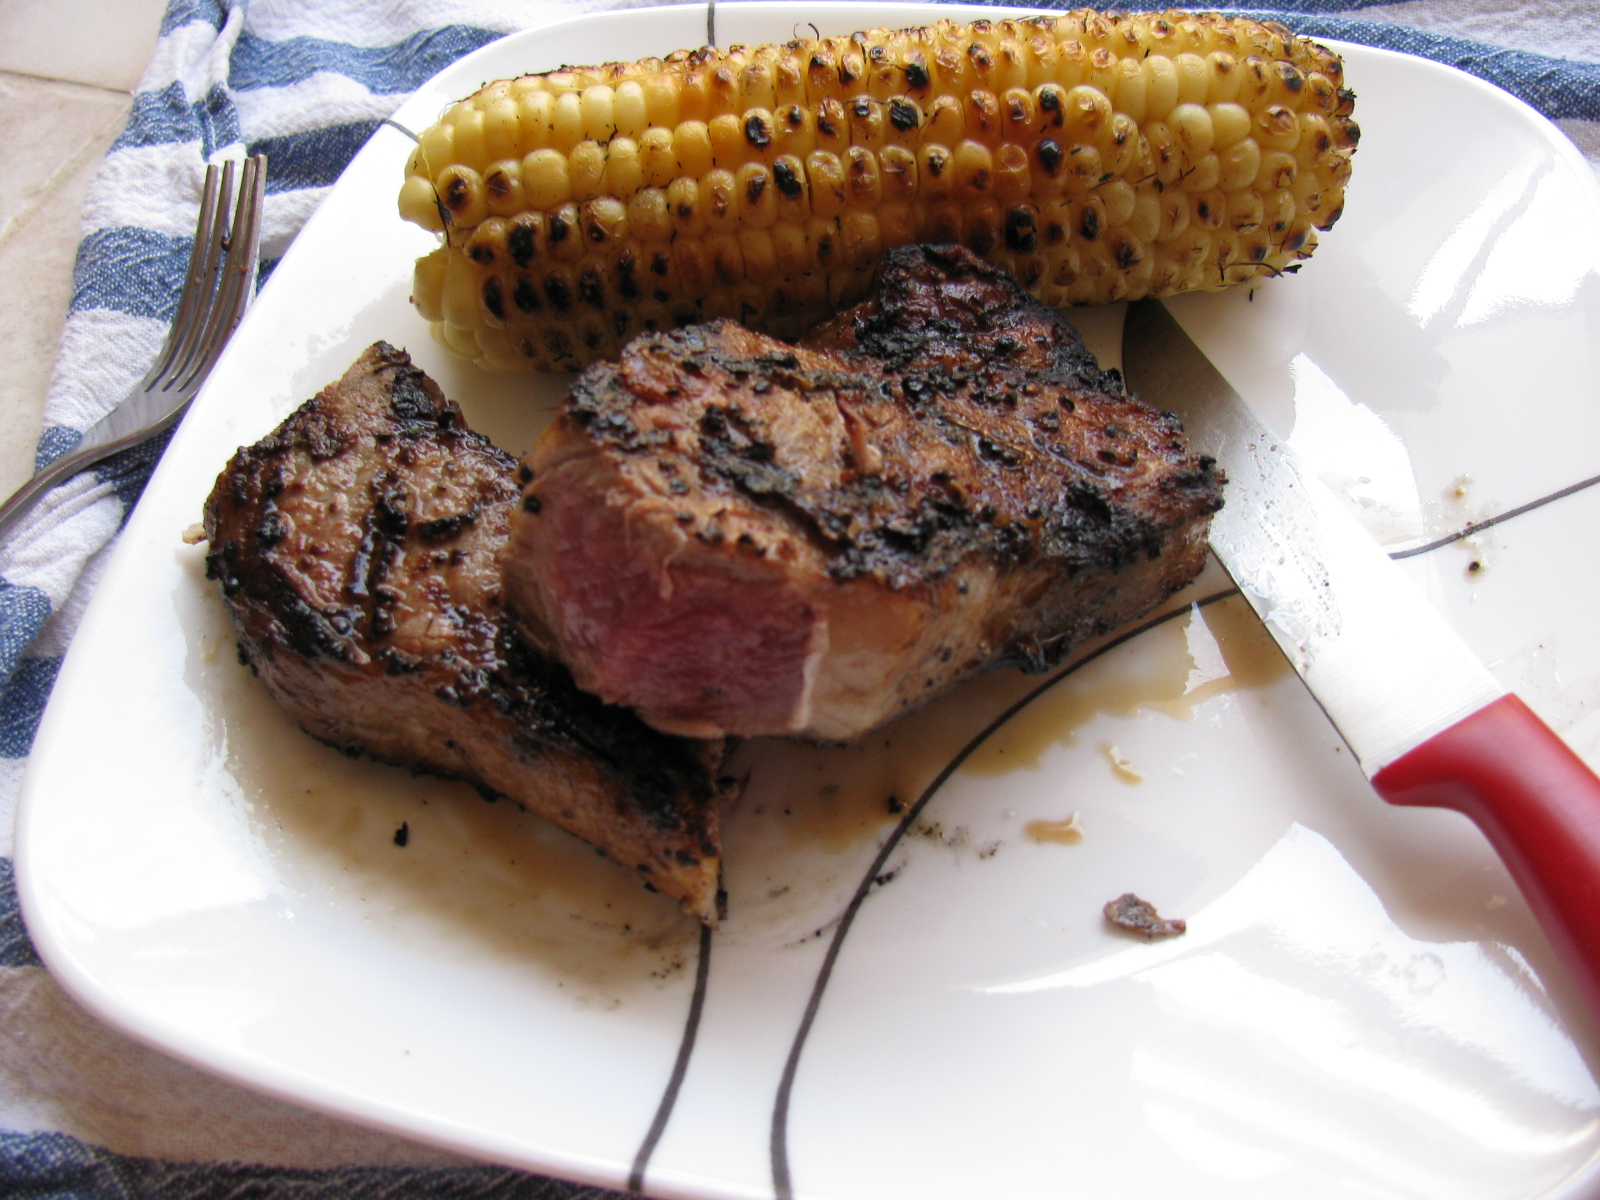
Hellfire strip steak with grilled corn on the cob
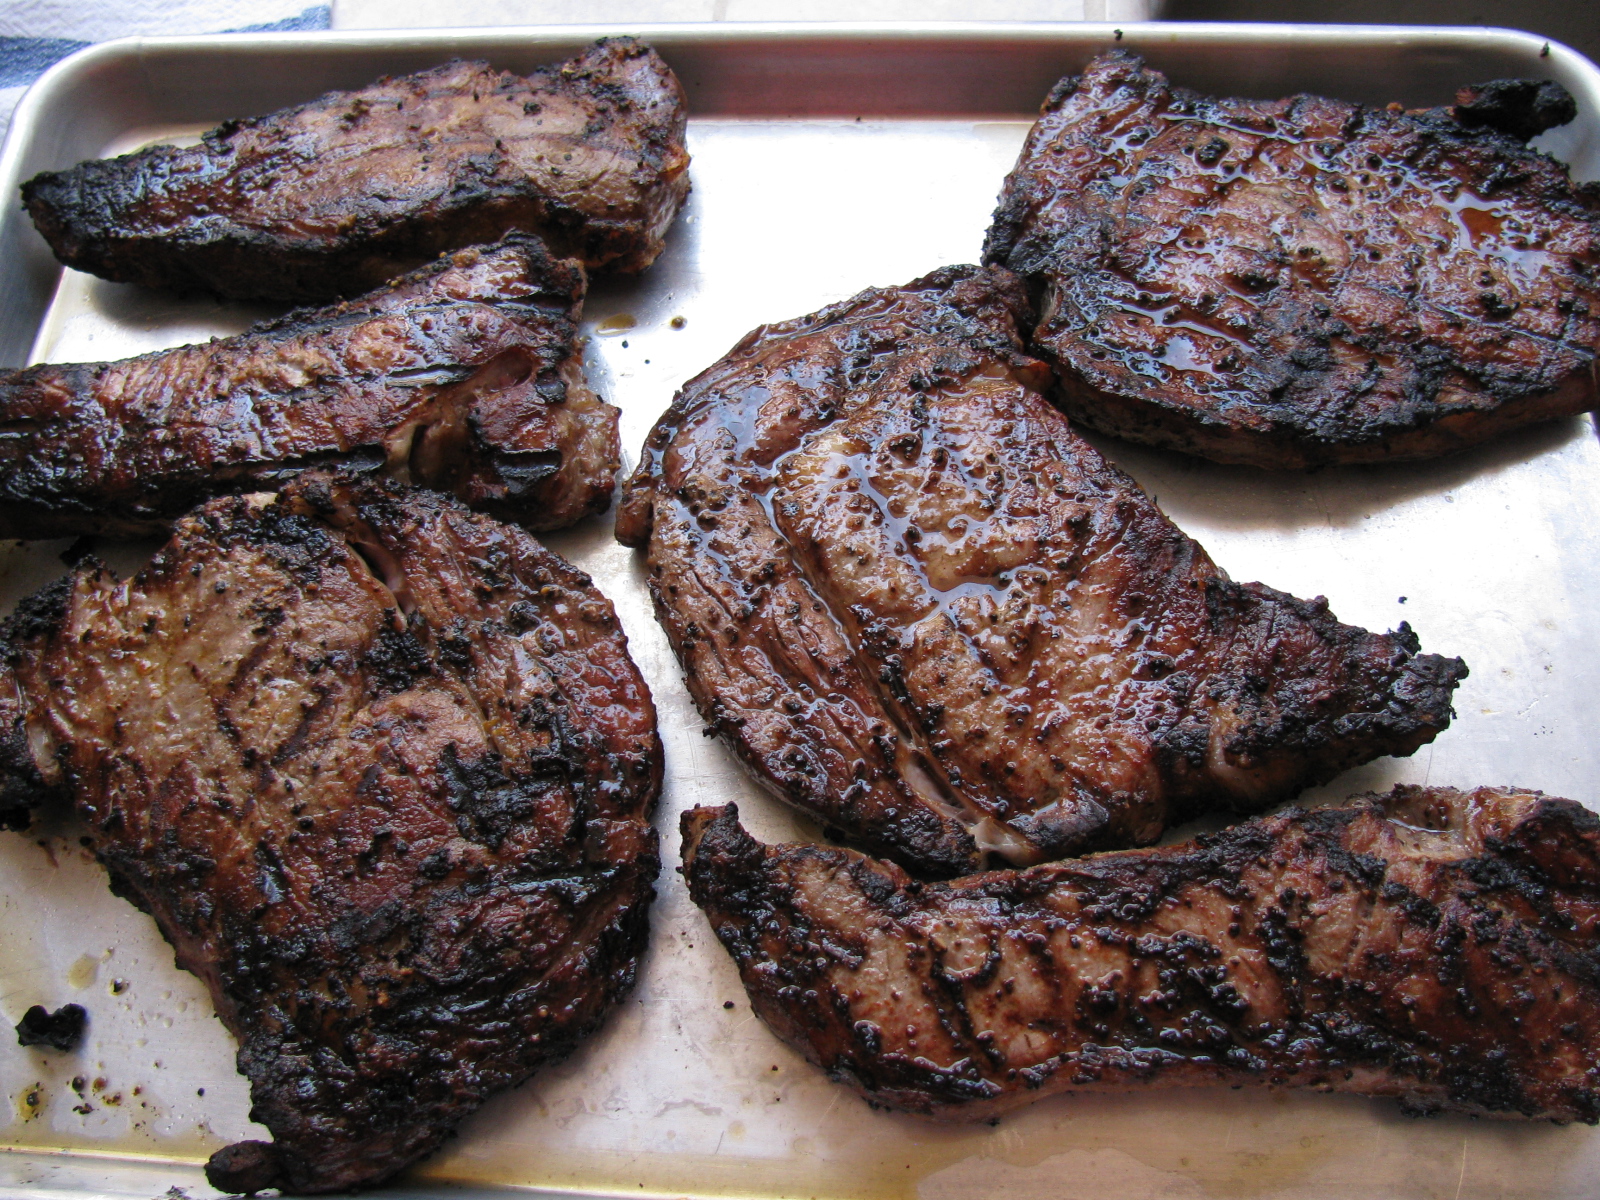
I had several strip and rib eye steaks taking up room in my freezer, and decided this would be a great time to stoke the Big Green Egg and cook ’em. Because anyone can direct grill steaks with the proper seasonings, I decided to do something different, and prepared the steaks using Steven Raichlen’s “Hellfire Steaks” recipe . The original recipe can be found here – and in Raichlen’s book, “How to Grill.”
http://www.primalgrill.org/recipe_details.asp?RecipeID=143&EpisodeID=19
I thought this crust – made of salt, pepper, powdered mustard and Tabasco sauce – would be very spicy, but I found out that this is not the case, and will add more Tabasco if I make this again. Here are some pictures of the steaks and some corn on the cob.


I wanted to try making baked potatoes on the BGE for over a year, and I finally tried it. This is based on the directions by The Naked Whiz, a ceramic cooker expert.
You can go here to see the original recipe. http://www.nakedwhiz.com/bakedpotato.htm
I cut the salt down to one-half cup and scrubbed the potatoes to make sure all traces of dirt were removed from the skin. I used my own “universal rub” for meats instead of the Dizzy Pig rub.
And this made me think about creating a rub for baked potatoes. Something like onion and pepper and garlic – sounds almost like the rub I use for Santa Maria Style tri-tip.
I cooked an entire 5 pound sack of russet potatoes for this trial.
The original procedure said to turn the spuds half-way through the cooking time. I just let them bake on their own and did not turn them.
Naked Whiz says to bake the potatoes for one hour – My potatoes took one hour plus 10 minutes. If you try this, test for doneness using a skewer – it should easily push into the potato.
These were excellent – the texture is very good. The skin has a smoky flavor, which could be another area to play with – add hickory chips next time? More baked potato experiments are in order.
Here are some pictures. . .


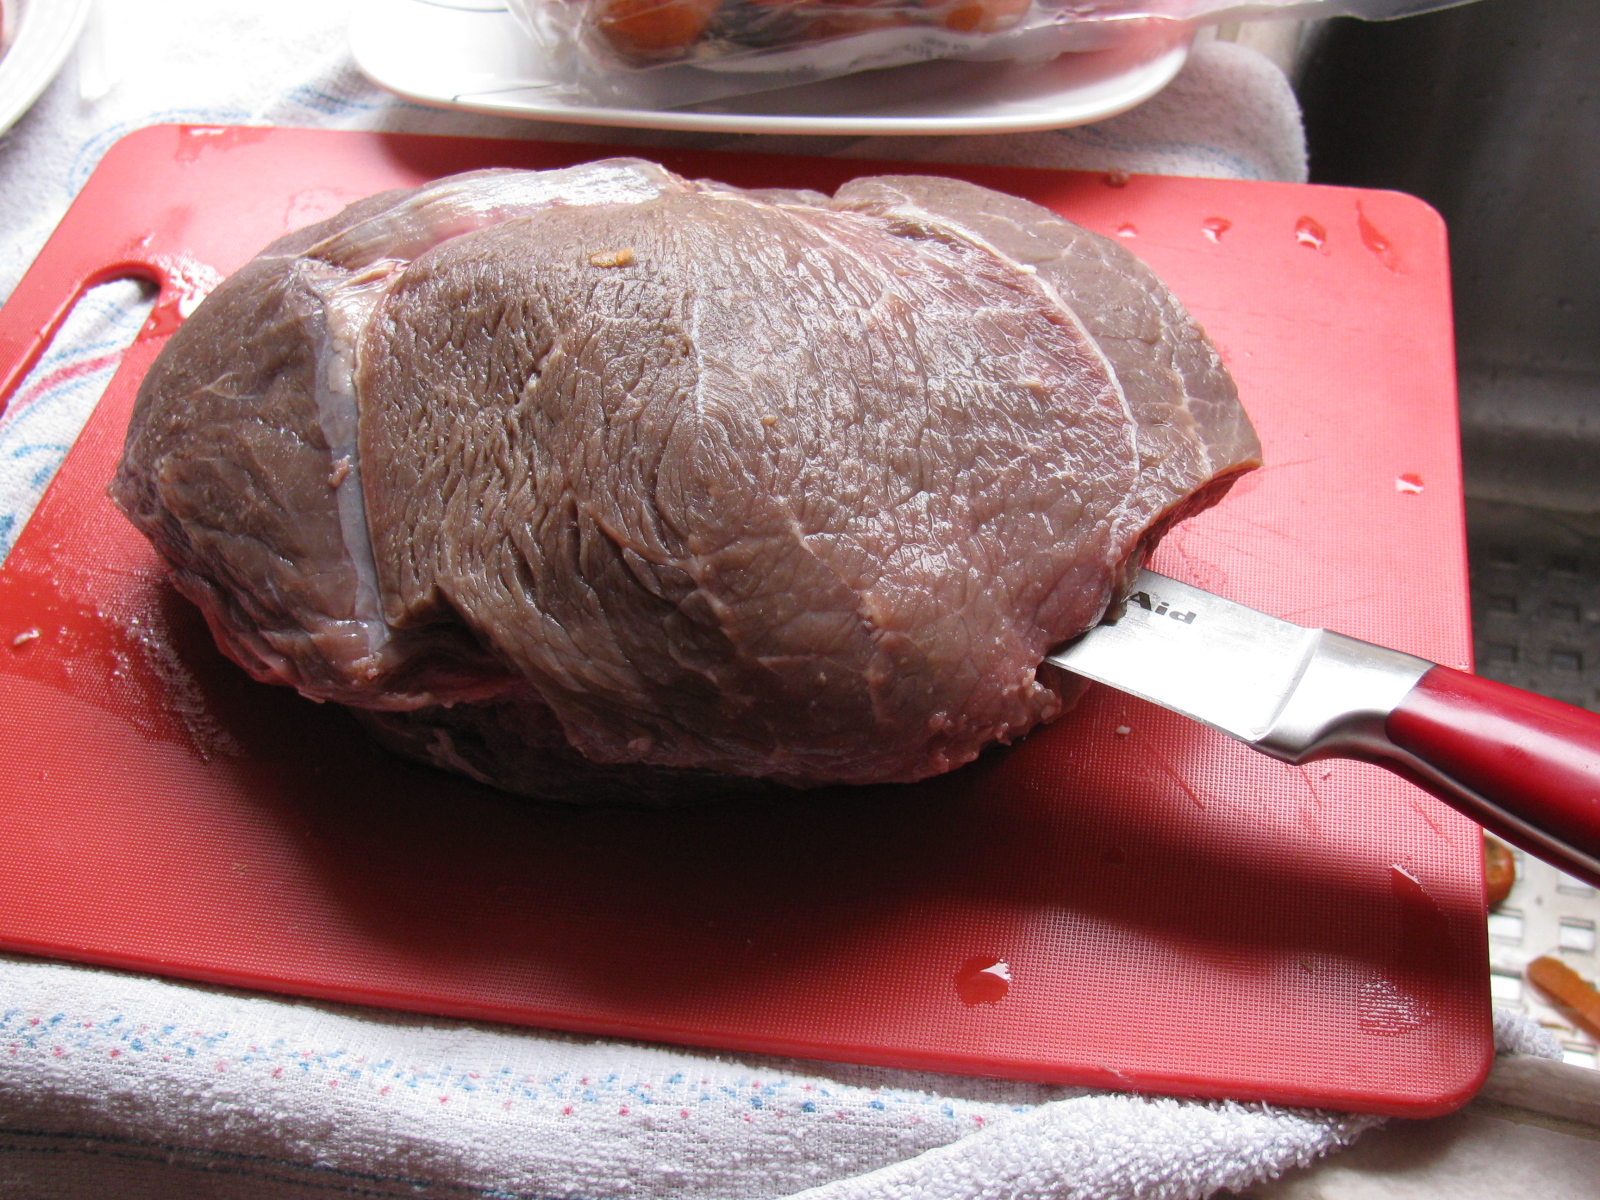
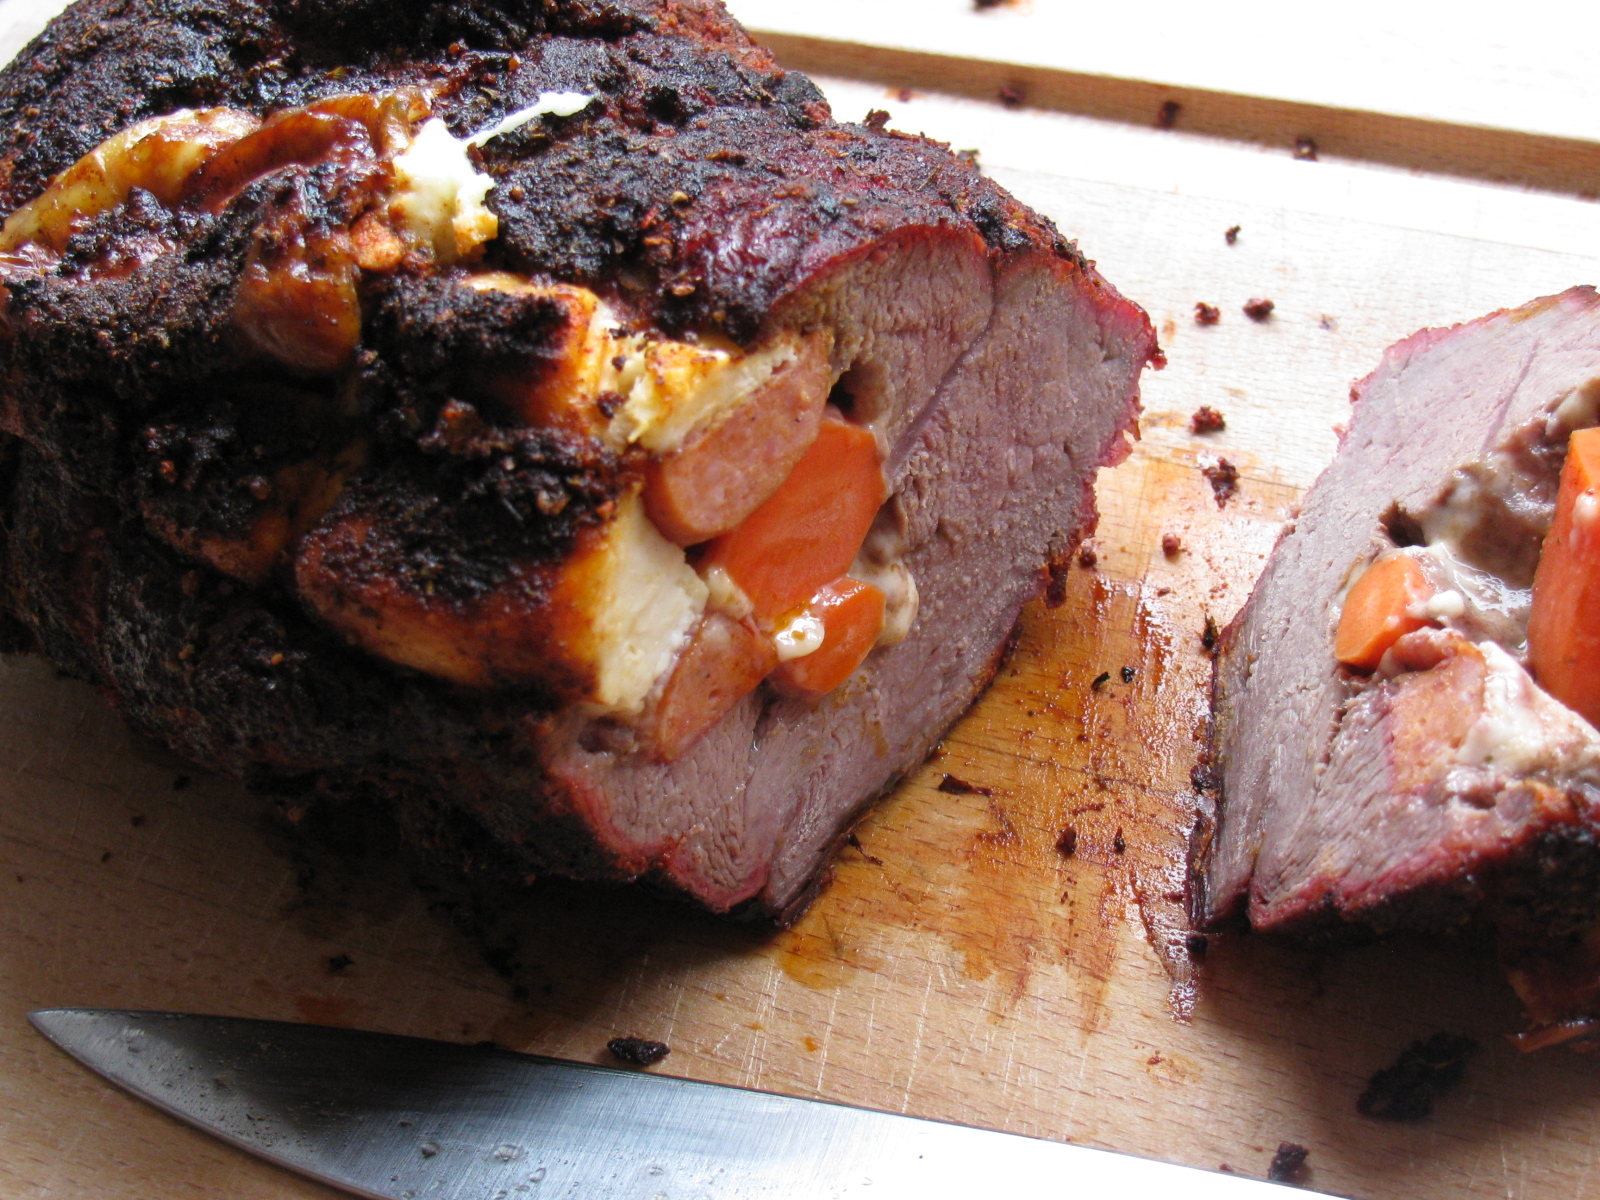
It’s been a while since I made something special on the Big Green Egg, so I decided to take out a four-pound rib roast taking up space in my freezer. This recipe is from Steven Raichlen’s Primal Grill, Season 2, and originally uses the rotisserie on a gas grill. However, since the Big Green Egg does not need (nor can it fit) a rotisserie, I used the indirect method, using the Platesetter.
I substituted the romano cheese with some habanero jack cheese, since it was on sale, and I thought some hotness would taste good with the beef. For the sausage, I used some Louisana hot links, the same sausages I use when I make matambre.
In Raichlen’s version, you poke a knife through the roast, then stuff the stuffing items in. After almost poking my hand with the knife, I decided to butterfly cut the roast, add the stuffing, and roll it, just like a matambre. Much easier.
Here is a link to Raichlen’s version – click here.
Here are some pictures for your enjoyment. . . .


. . . and a BBQ Dessert Experiment
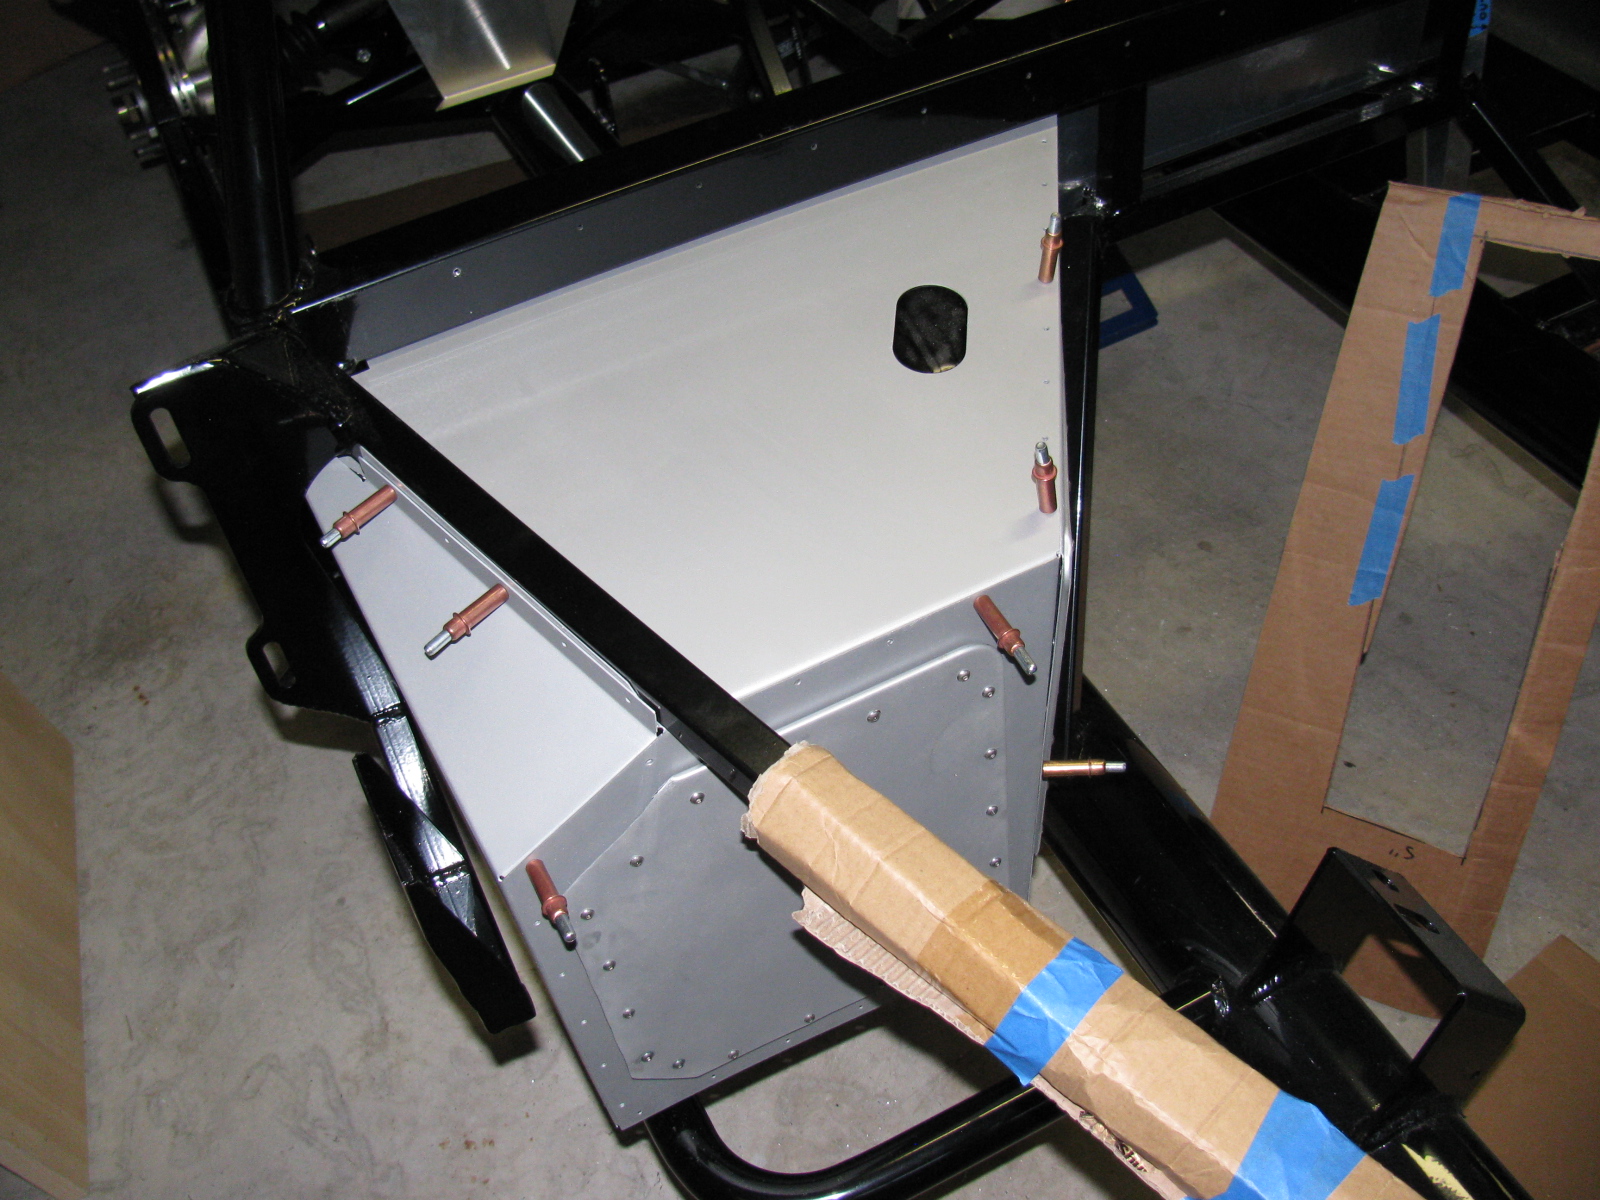
Work on the passenger and driver side foot boxes continues on the Factory Five Racing Type 65 Coupe.
I painted the engine side of the panels with silver BBQ paint, and left the interior side un-painted, since all panels will be covered with Cool-It heat and sound barrier. Panels that face the exterior of the car – like the foot box floors and the trunk area, will be painted with RustOleum truck bed liner. It is a textured black finish that will also help reduce sound and noise. Here are some images. ..


On the left is a detail of one of the cookie sheet heat shields, fastened to the firewall with 8-32 riv-nuts. The spacing is about one-quarter-inch. On the right is a view of the top of the heat shield, showing the nicely rolled edge.


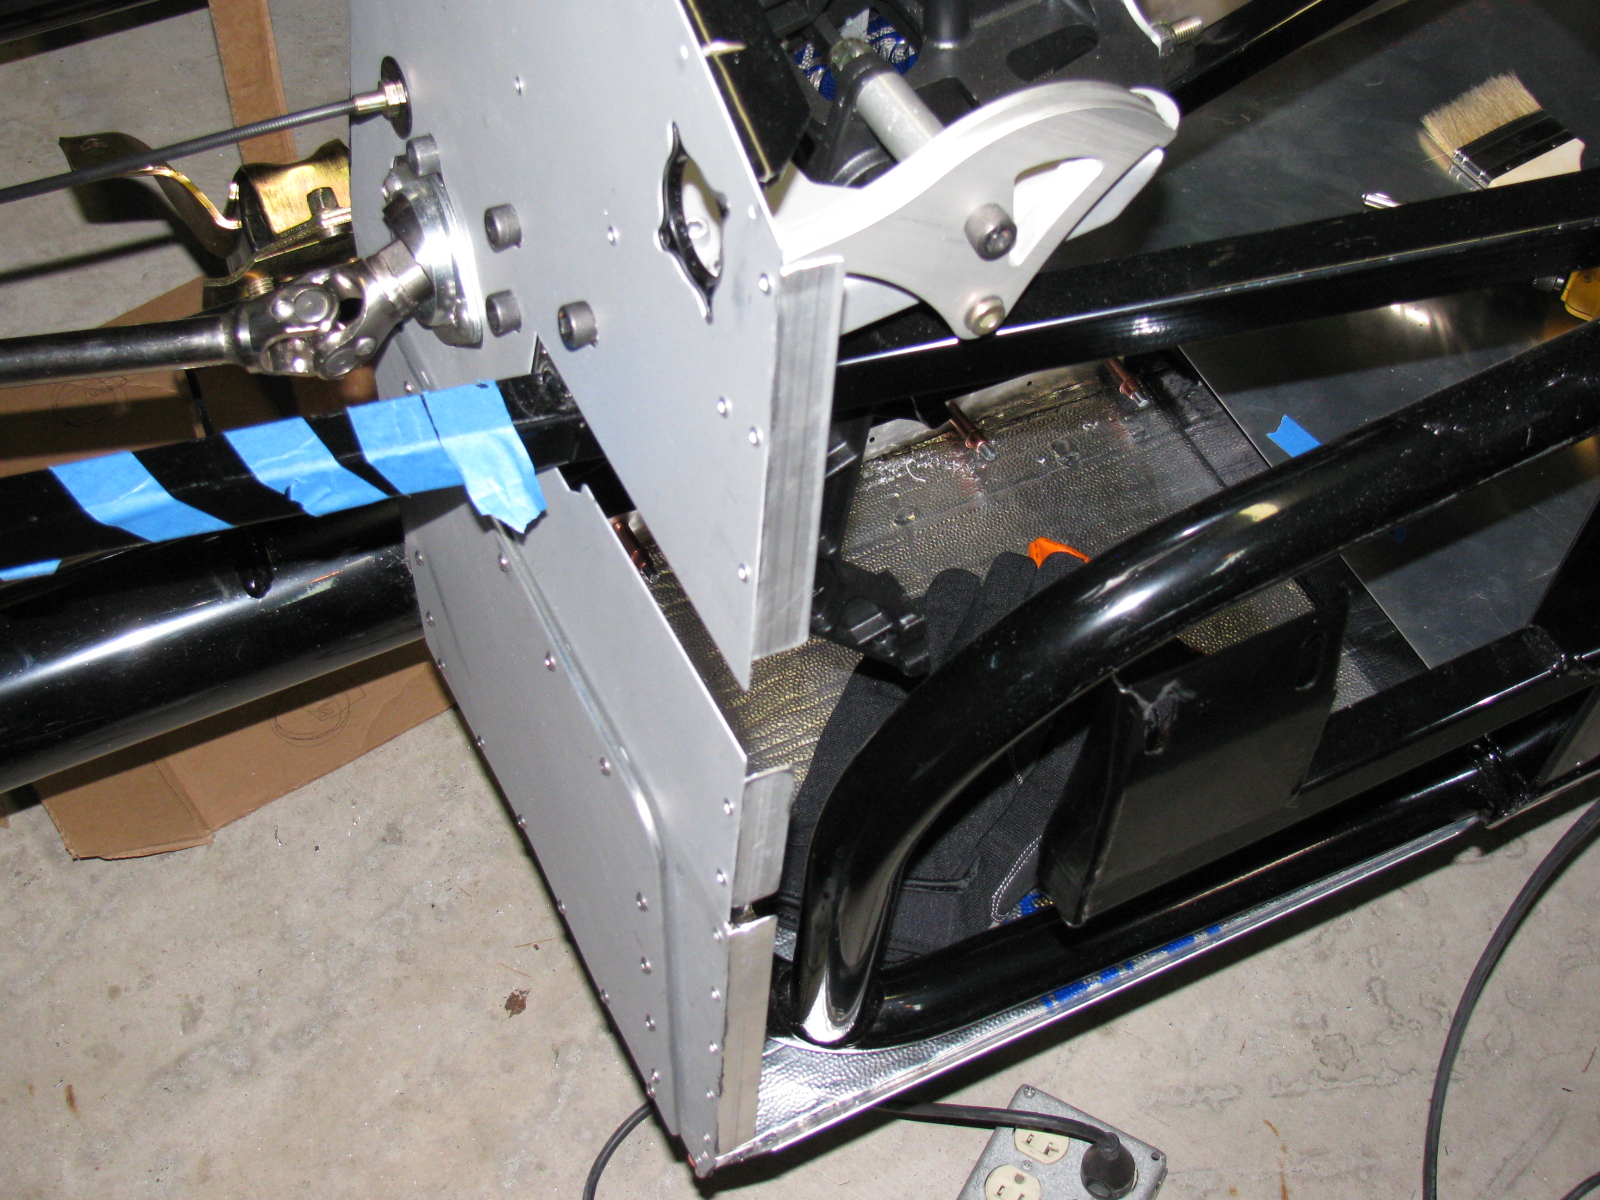
Passenger side foot box appears on the left of the photo above. The photo on the right shows a closer look at the passenger foot box.


Photos above: Passenger foot box, before and after installing the Cool-It mats.


Above left: The top seam on the passenger foot box – this will be either trimmed or a strip of aluminum will be used to cover the mis-match. On the right, I added srtips of aluminum angle to the outer wall of the driver side foor box. This should make the outer wall easier to install.
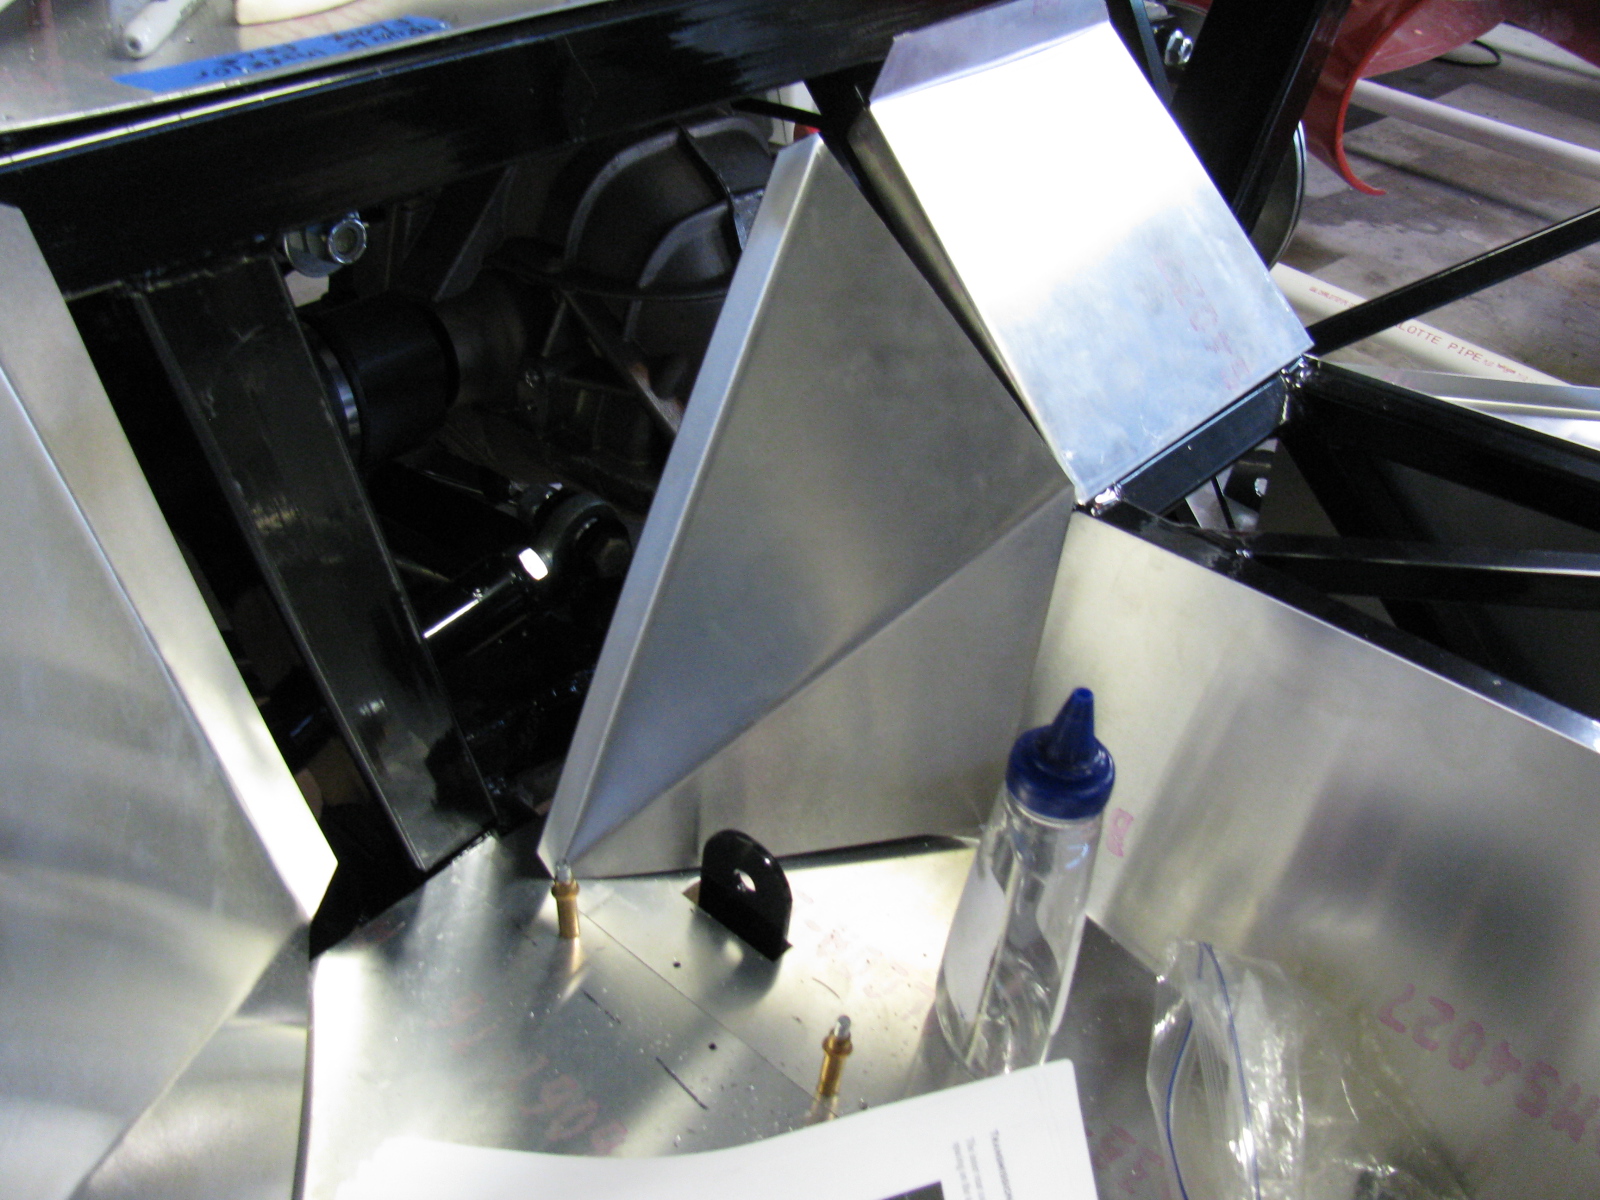
The next series of photos show how the interior panels go into place. The un-finished aluminum is difficult to photograph, I wish the manual would include an exploded view of the panels and how they fit into place. This is a complex jigsaw puzzle, and many of the parts must be flexed, trimmed and pulled into place. Clecos really help. This is one area where the manual offers good advice – the sections fit best when you follow the order outlined in the manual. Although many of the panels are marked with a part number, they do not indicate the orientation of the panel.
The foot box floors were very difficult to fit into place, so I sliced them into sections. If you look carefully you can see the saw kerfs (seams) on the floor panels. I chose the cuts carefully, in order to make sure I would have something solid to rivet to. In the areas without any supporting chassis tubes, I will install strips of aluminum bar stock.
The panels will be permanently attached later with silicone adhesive and rivets – at this stage, the panels are being “dry-fitted” with clecos to make sure everything is properly in place.


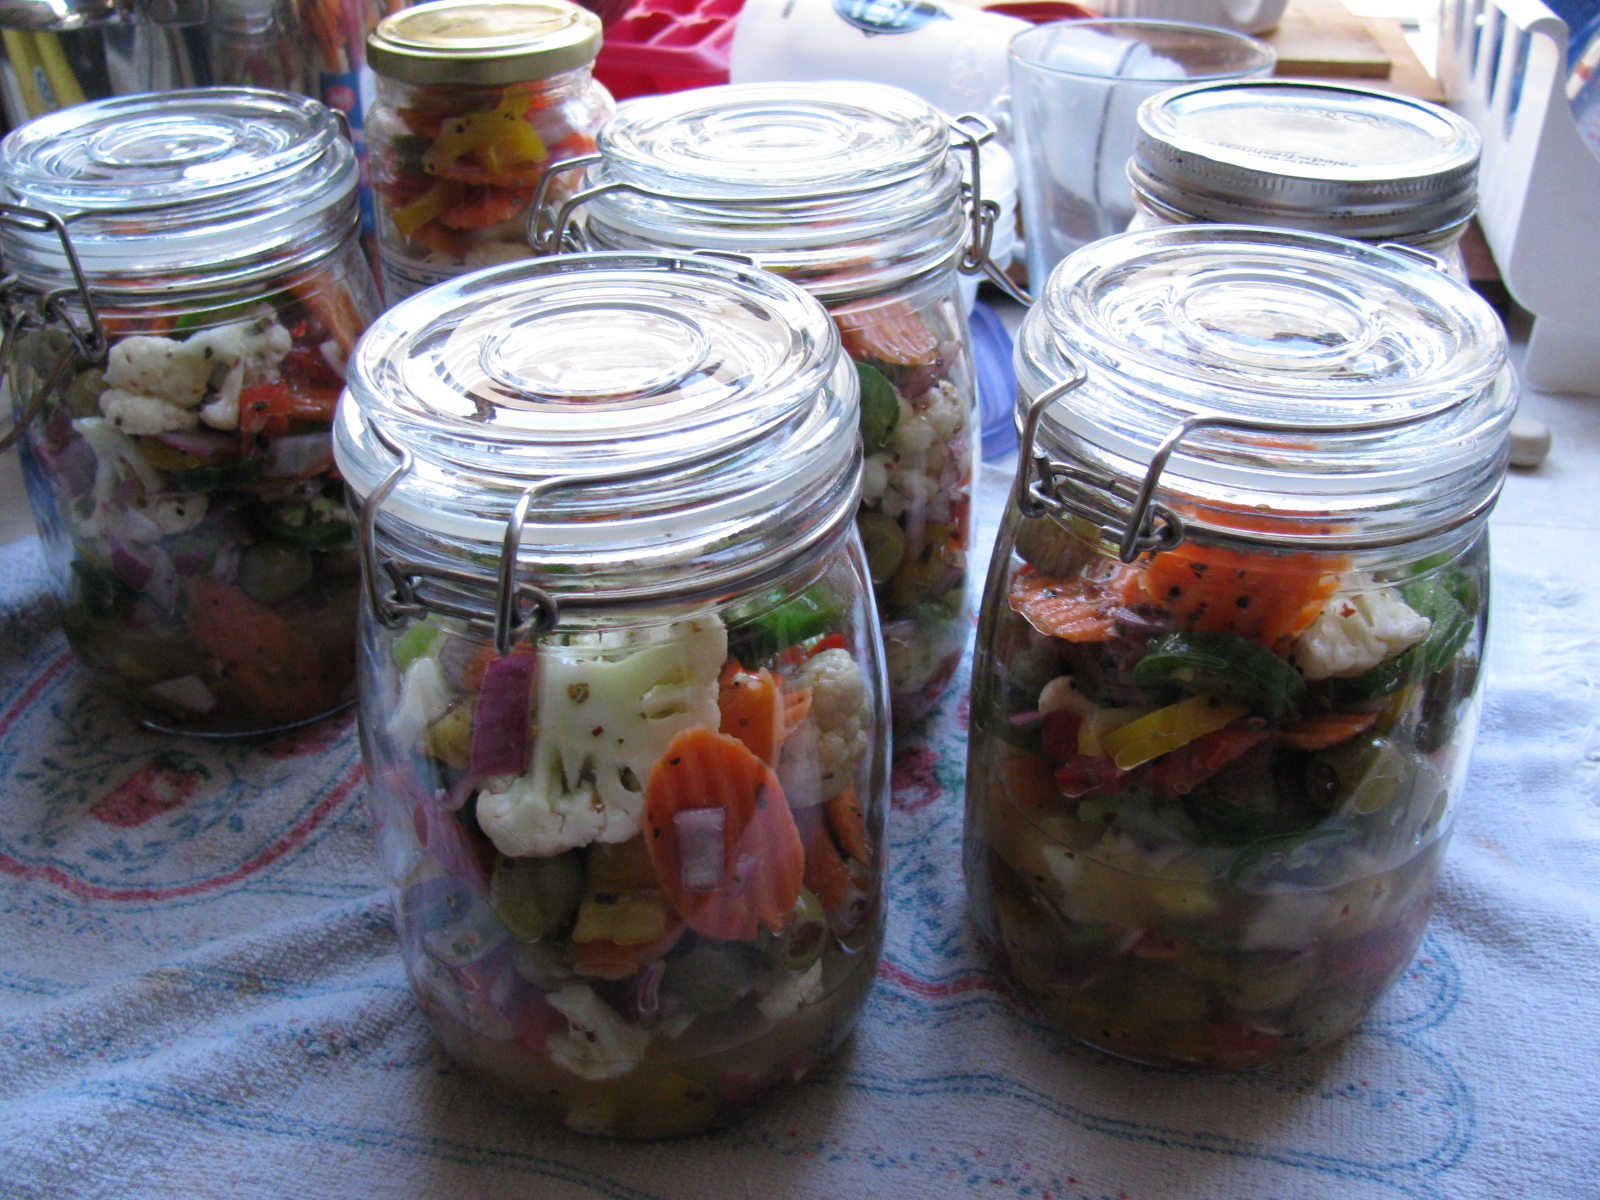
Somewhere during this building session, I made some time to pack my hot giardiniera into jars, and made a few deliveries. . .
I also managed to do some BBQ experiments. This time I baked some apple turn-overs in the Big Green Egg. They turned out OK, but could be better. They are like just-right bites of apple pie. Here are some pictures. . .


The front steering arms came in the day before Thanksgiving. That meant that I could continue building the front suspension. These little cast iron parts were the things holding my progress:

I installed the steering arms without too much drama. Installing the front hubs onto the spindles was another matter. The instruction manual says something about them being a tight fit, and that is true. I did not want to damage anything, so I used a PVC pipe elbow (remember the body dolly? This was a left-over part from that…) to protect the hub, and I used a plastic hammer to pound the hub into place. A few whacks and it slid right in. I hope that I won’t have to remove them someday – they are stuck on really tight.

And yes, a coupler or a T would have made a better anvil, but all I had on-hand was this elbow. Anyway – the hubs are now mounted to the spindles.

Torque spec for the hubs is 225 to 250 lbs/ft. This is a lot. The nut takes a 36mm socket and I bought one earlier (Coin Star money) just for this step. It took a lot of cranking on my 1/2-inch torque wrench to meet that 250 lb mark. I thought I was going to lift the chassis off the jack stands!
Thanksgiving Ribs
Meanwhile, I prepared some Kansas City Style pork spare ribs for Thanksgiving dinner at my sister’s house. I was in a hurry, and forgot to completely trim the ribs (the cartilaginous tips). I did, however, remember to remove the pleura – the silver skin on the back of the ribs.
If you don’t know about removing the skin from spare ribs, then I am sure you may have experienced eating that stuff somewhere. The pleura is the tough membrane that you might see on the back of the ribs. If left on, it blocks the spices and will never get soft after cooking – it is sort of like chewing gum, and ruins the eating experience….
Anyway, they were still very tasty, although I was out of paprika. No one else noticed it missing – but I sure did.

Ribs with a dry rub. I made two racks for Thanksgiving this year.

Smoky goodness.
After Thanksgiving Turkey
Per my tradition, the day after Thanksgiving, I went to the local grocery store and found a good deal on a fresh 12-lb turkey. I decided to try a recipe from Steven Raichlen’s Primal Grill TV show – see Orange Brined Turkey.
Strangely, both the book and the website say this is for turkey breasts. On the DVD, Steven smokes a whole 12-lb turkey. At any rate, I salivated over this since last year, and finally got to try it. Take a look at my version The bird is a hen, just over 12 pounds . . .

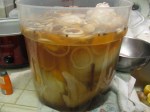
Orange brine for the turkey.

I need a bigger bucket or something for brining the turkey. I turned her (it’s a hen) over in the middle of the night.
Back to Work on the Coupe
Since the turkey had to soak over-night, I went back to the Coupe project. I started to assemble the front disc brakes, when another delay came along: No “supplied grease” for the disc brake slider pins. So I went onto the Factory Five forums and searched on what sort of special grease this might be. I almost skipped this step, but I am glad I did not. Lots of bad things can happen if the brake calipers stopped sliding on the slider pins.
Turns out the grease is special – the grease must be silicone-based, high temperature and must not affect rubber. So I did some more research and found this stuff: Permatex Ultra Disc Brake Caliper Lube Silicone Formula Item #24115. High temperature, silicone based and intended for brake caliper use.
There are some little spring clips that go into the brake housing, and some rubber boots that fit onto the caliper slider pins. The pictures are not too clear and I had to do some fiddling with the parts to make things look right. Here are some pictures that may help other builders. . .

This is the clip that goes into the long slot in the middle of the housing. If you are struggling to get it in, it is probably backwards. Hold it like this and insert it into the housing from the inside. It will just pop into place with a little bit of pressure.

The caliper slider pin boot is easier to install if you “un-curl” it first, like this.

Then you can push the little lip into the shallow groove in the pin. . .

. . . to make it look like this.
Since I was at the car parts store, I also bought a box of disposable gloves and some adhesive for the aluminum panels. There’s a ton of postings on what adhesive to use on the Factory Five Racing car projects. Many different adhesives are mentioned. But there was one build gallery that I found, and I am going to use the product they used – it is Permatex Ultra Black RTV silicone gasket maker, Item #24105. This is what Kirkham Motorsports uses in their projects, so I figure it would be acceptable in my Coupe build. Kirkham has an online assembly manual posted, it basically follows David Kirkham building one of his cars: Kirkham Motorsports Assembly Manual.
What Good is a Sale on Something When It’s Out of Stock?
Since I was running about getting the grease and other stuff, I decided to go tool shopping. A local hardware store chain had a 50 percent off sale on Makita and Milwaukee power tools this weekend – I thought this was the perfect time to go get that right angle drill I wanted. I got to the store, only to find no Makita or Milwaukee right angle drills available. I went to two stores and wasted half of my day looking for the thing. I decided to look for an alternative to the right angle drill – how about a right angle drive attachment? I did not find one of those, either. So I left the hardware store empty-handed – I think this was the first time that ever happened!
Back to the Turkey
After an overnight soak, the turkey is ready for the smoker.
Getting the Big Green Egg up to temperature (250 degrees F). Hickory chips were added.


I can never resist peeking. Orange brined turkey, after the first hour.

After the 2nd hour. I rubbed the turkey with butter and continued to smoke.

After 4 hours. Almost done.

Total time in the smoker: About 5 hours. Temperature in the thigh 170 degrees F. After a 15 minute rest, time to carve!


Yes, this is as tender and juicy as it looks. The mayo-mustard-triple sec dressing that is part of this recipe is very good. I think I will try this with lemons next time.
So not much work completed on the Coupe today, but the holiday weekend is not quite over. I hope to complete the front end tomorrow.
Someone asked me where my BBQ information and pictures are on this site. I have not posted any of my BBQ projects lately, but here is something from the archives. This is a pair of tri-tip roasts on my Big Green Egg ceramic cooker. This was my first cook using a new Maverick wireless thermometer. It allows me to roam around the house and yard while monitoring the grate as well as the meat temperature. It includes a low- and high-temperature warning. One unit stays with the cooker, and the other unit has a wire belt clip and looks like a cell phone.
Here is a picture of the setup:

Beef tri-tip smoke-roasting on the Big Green Egg. The wires you see in the picture are for the Maverick remote thermometer. One probe goes into the item being cooked, and the other probe monitors the grill temperature. The remote unit has a digital display for timing and high- or low-temperature.
And here is one of the roasts being sliced:

Santa Maria Style Beef Tri-Tip – amazingly juicy and tender.