I should have done more homework on this part of the build process, since Factory Five Racing tells us they do not include the fuel system. This makes sense since it will depend on the engine. I have a 302 with an MSD Atomic EFI system, and it came with the (external) fuel pump and filters.
So now I have to figure out how to get from the fuel tank output tube to the first fuel filter, then to the pump and then to the EFI unit. I decided to install a return fuel line, based on the information in the MSD instructions, I hope this extra effort will be worth it.
I will make access holes and hatches for the fuel pump and filter, as well the rear suspension components and tali lights – this should make maintenance and repair easier.
Here are some pictures of the work done today.

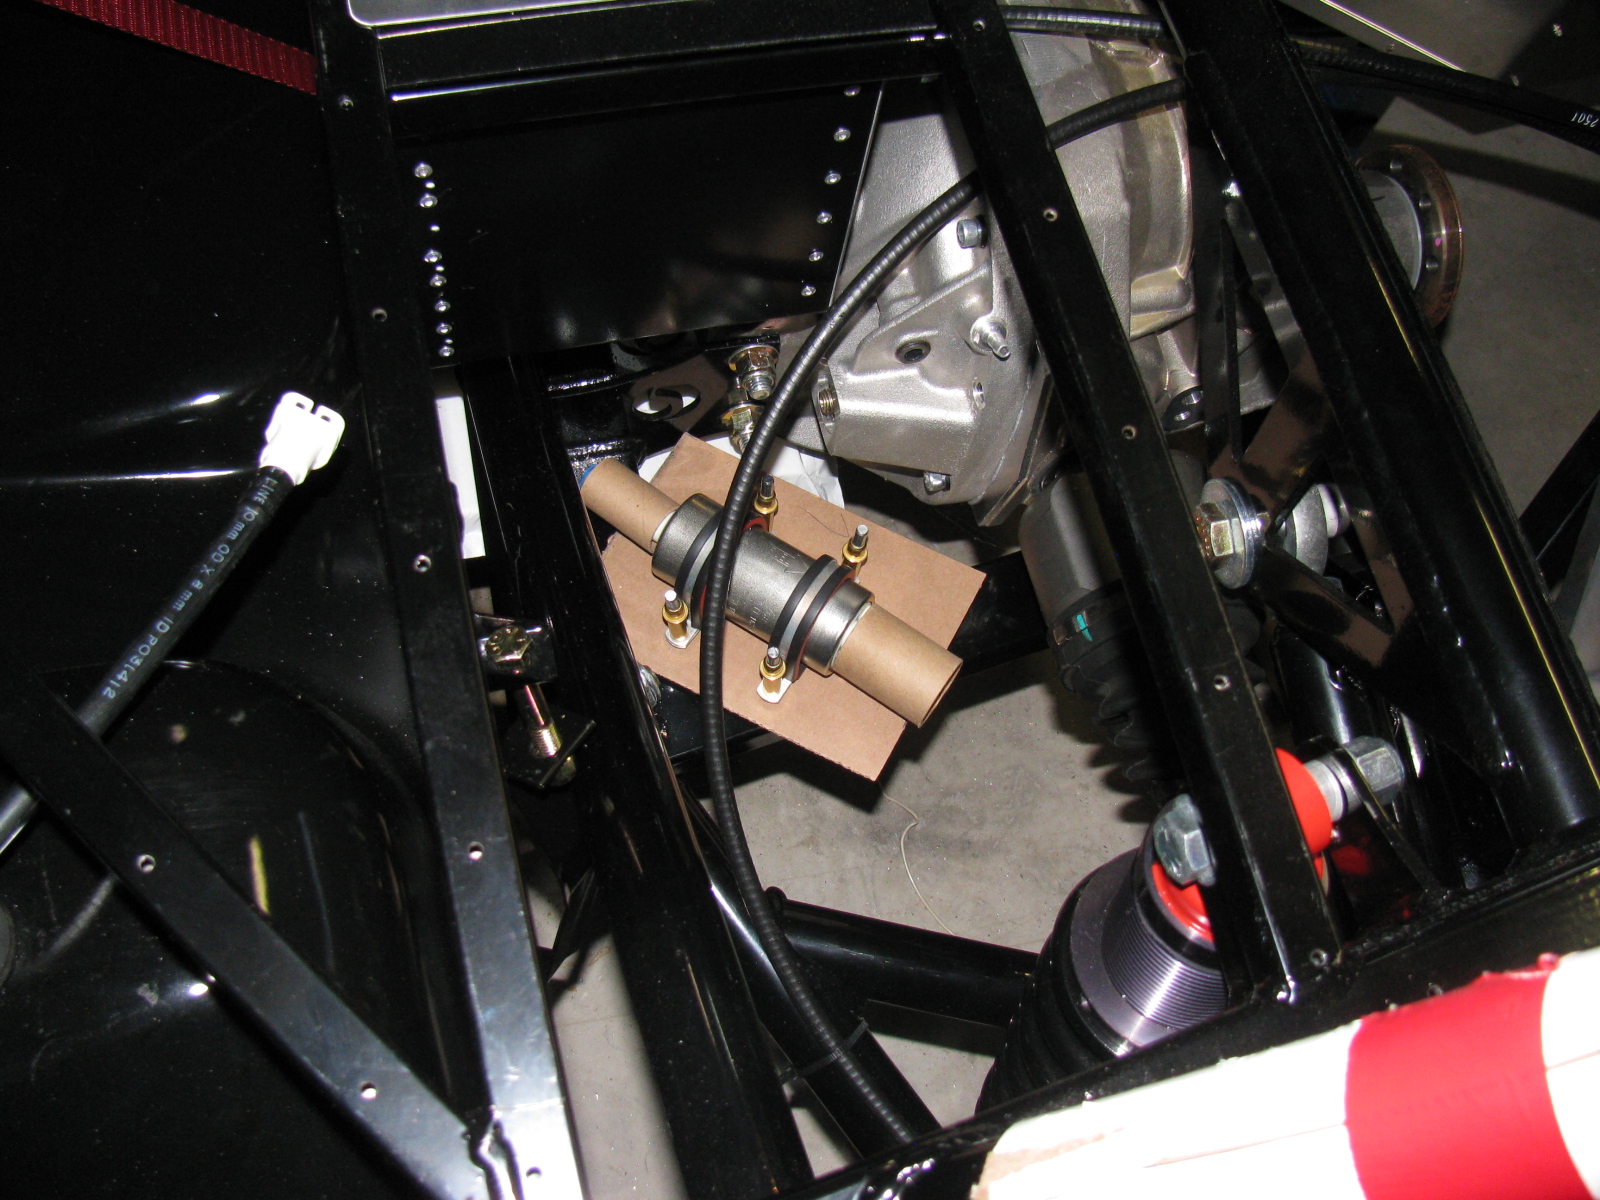
Type 65 Coupe fuel pump possible location. This is the external pump that came with the MSD Atomic EFI kit. The first fuel filter will mount to the battery box.

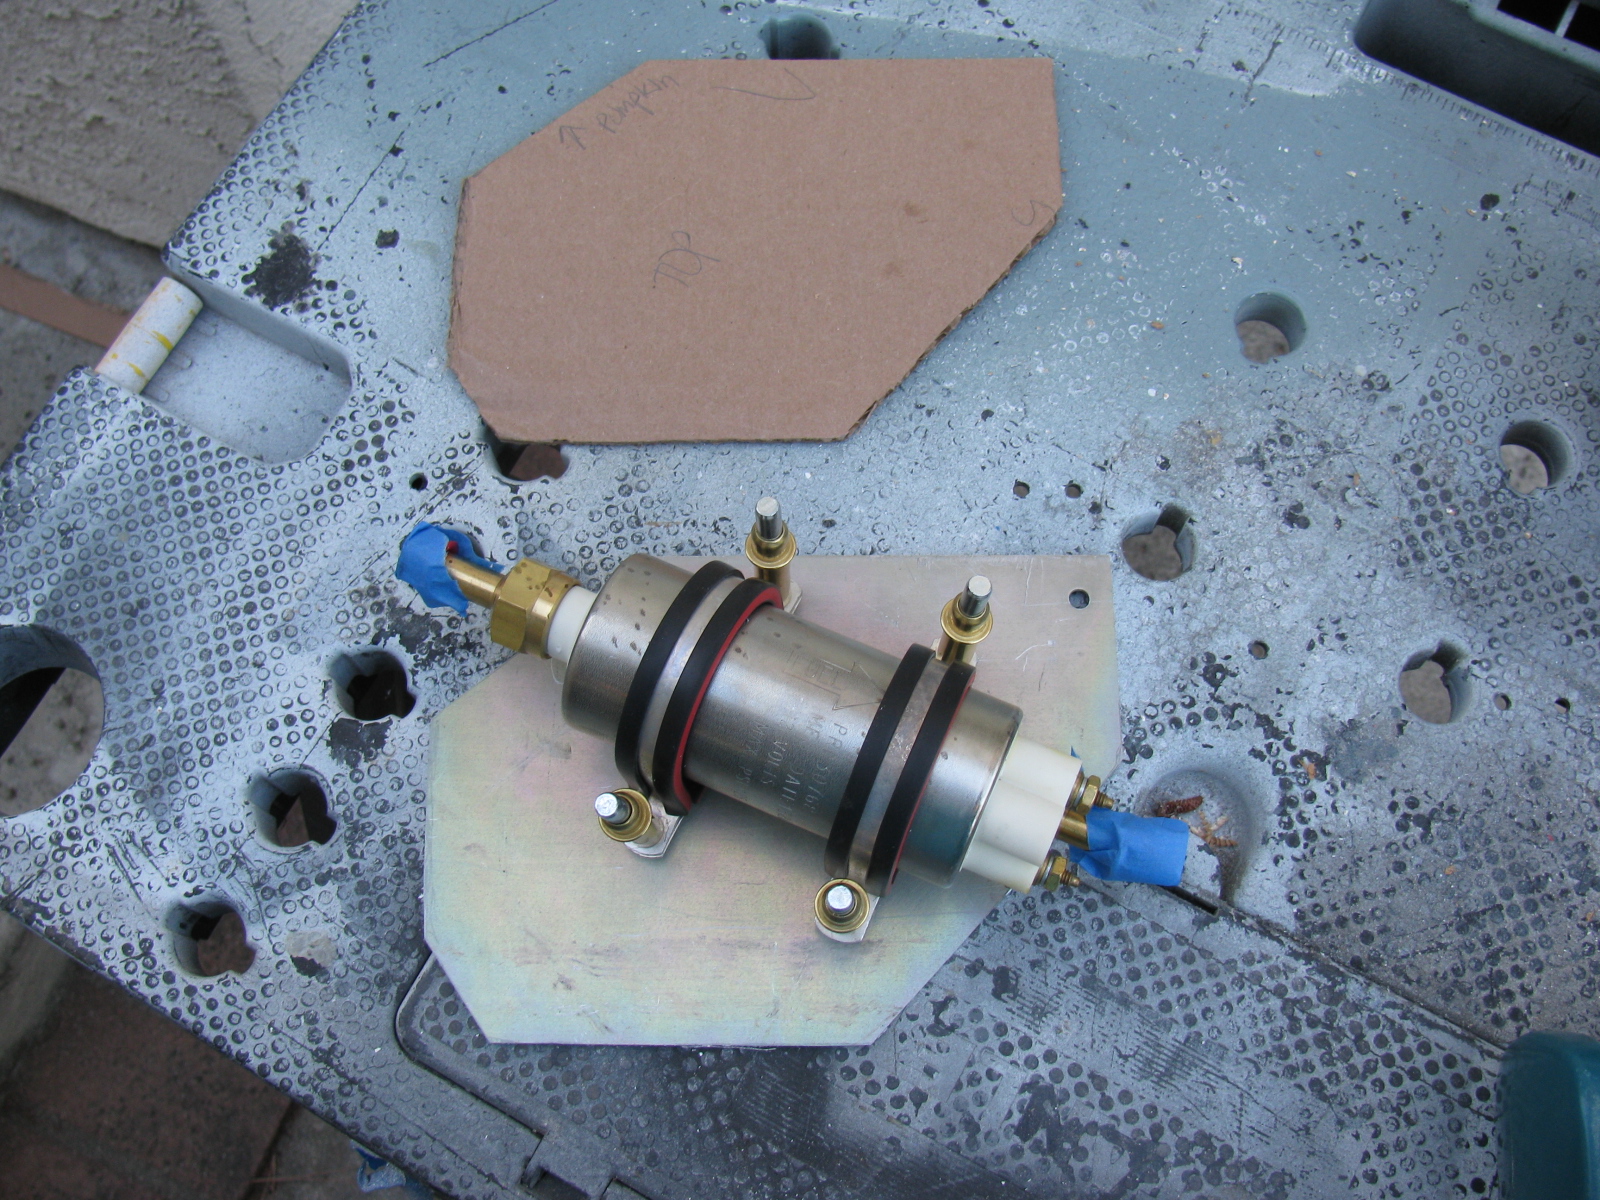
Using CAD – cardboard aided design, the fuel pump mounting plate is taking shape.

Here is the fuel pump in its possible location.

The cardboard template is transferred to aluminum. The mounting plate is almost a quarter-inch thick, so it will be nice and sturdy. This piece will be drilled and painted later.
By the way – the fuel tank is still not in its final location – the right side mounting bolts are not long enough. I may just get a length of all-thread and make my own bolt for that side. The left side seems to be OK. Next on the “To Do” list is fill and bleed the brake system.
An article in Fleets and Fuels says, “…30 compressed natural gas-fueled trucks for Saddle Creek in Texas (and one in Louisiana), and 55 liquefied natural gas-fueled trucks for Blu in Utah and Georgia…”
Read the complete story here.
I really like the photo of the CNG truck being fueled – you can see the Agility Fuel Systems Fuel Management Module (FMM) in the picture. . .
Click here to see what I mean. . .
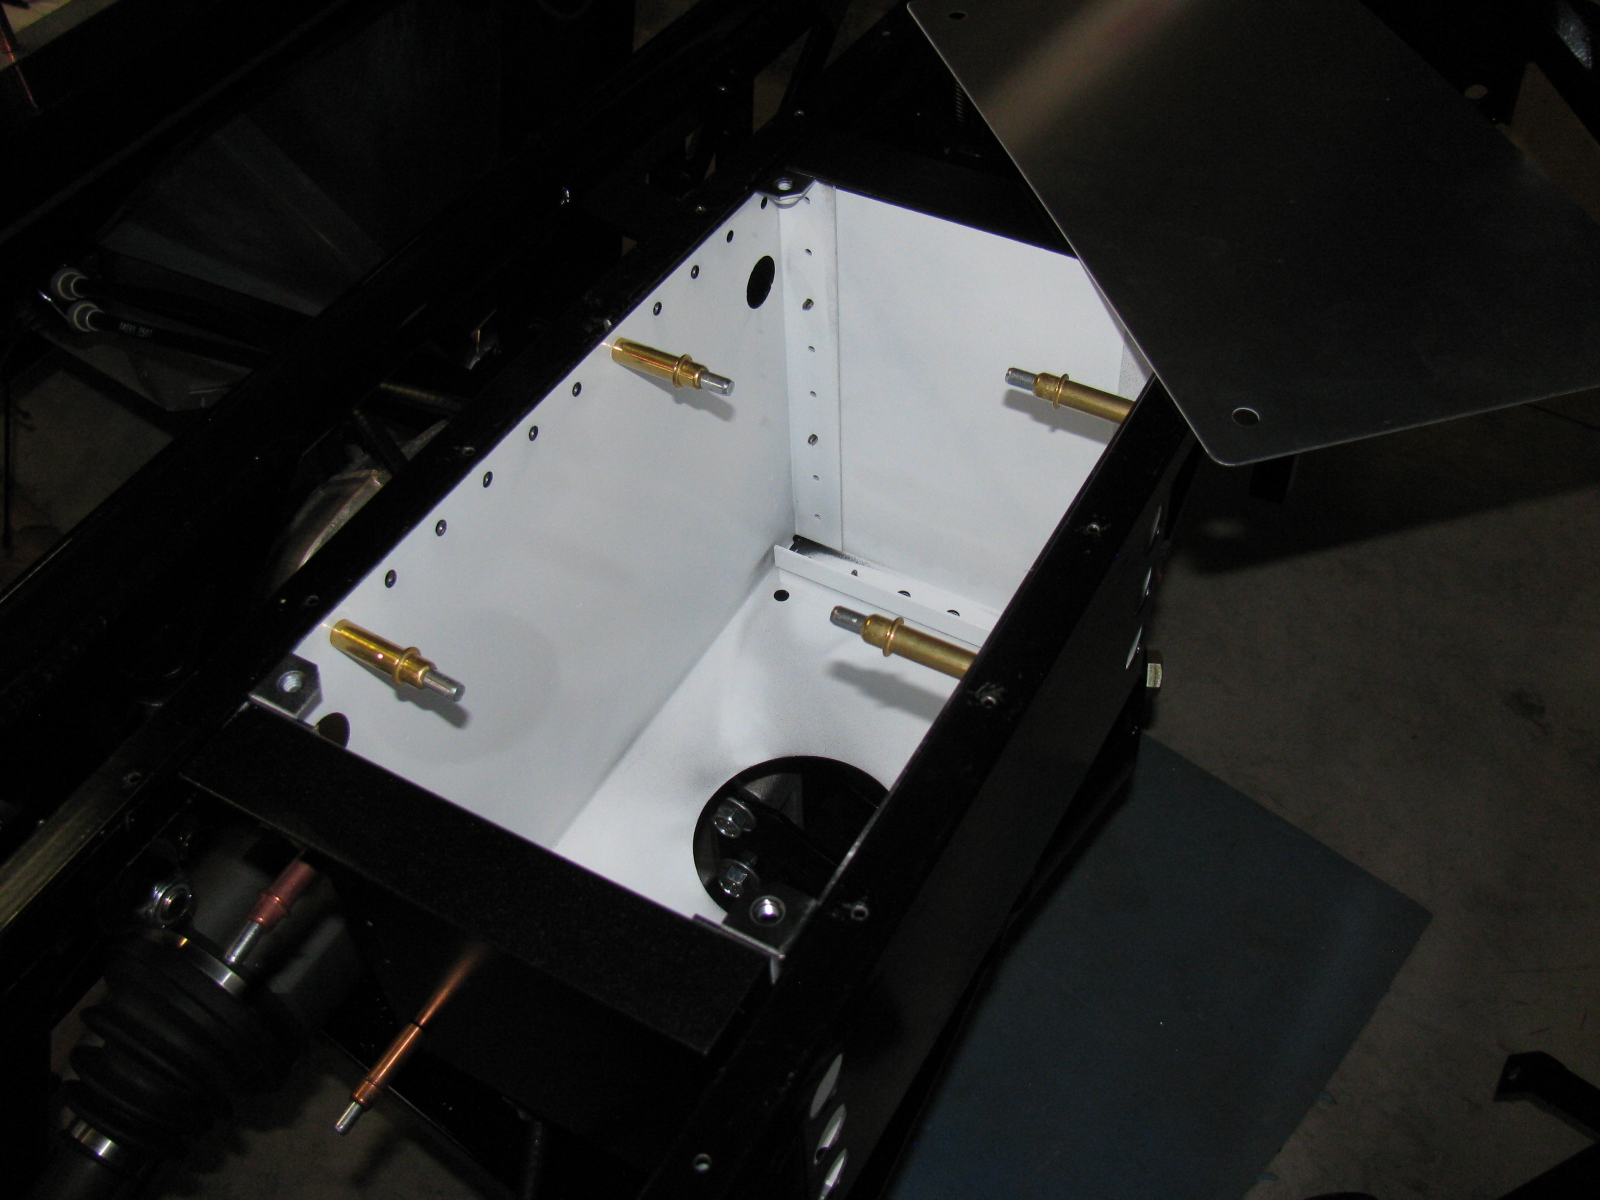
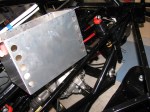
I painted and installed the slightly modified battery box from FFMetal this past weekend. Just to be different, I decided to paint the box white on the inside and black on the outside.
As you recall from my previous Coupe update, the battery box fits very tightly into the chassis – and I figured out a way to install the battery box without scratching up the paint – the trick is to install and build the box piece-by-piece into the chassis space. In other words, do not assemble the battery box and then mount it into the chassis – instead, build the box into the chassis.
NOTE: By building the battery box into the chassis, adjusting one side of the box inward (as described in my previous battery box notes) may not be necessary. Try a dry-fit before you drill the side of the box to change the dimension slightly.
This is actually easy to do, but difficult to explain. Here are some pictures of the freshly-painted battery box installation:

FFMetal battery box for the Type 65 Coupe – the individual parts are inserted into the frame one piece at a time, Cleco-ed into place, and then riveted. (Left side view.)

A close-up of the small cut needed on the left side of the battery box. This cut-out does not interfere with the battery – but the battery clamp bar may have to be moved, depending on where terminals, vents or filler caps are on the battery.

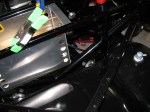
Another view of the two-tone battery box. I like the white interior, it makes it look nice and clean. Of course, a lid will cover everything later. . .

Another view. . .

The battery box with the supplied cover in place. Since I moved one side inwards, one cover screw does not line up properly. This does not bother me too much – I will install a small piano hinge at the upper side of the battery box, and the bottom two screws will hold the cover in place.
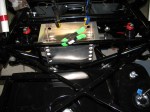
When the trunk floor panels are installed, I will make a cut-out to access the battery compartment. The instruction sheet shows how to make the cut-out in the floor panel, but I will make the cut-out with an easier technique that woodworkers use: A router and pattern bit. I will show how this is done when I get to that stage.
I may make a small finger-hole on the cover so it will be easier to open. Insulation and carpet will cover the entire trunk area later.
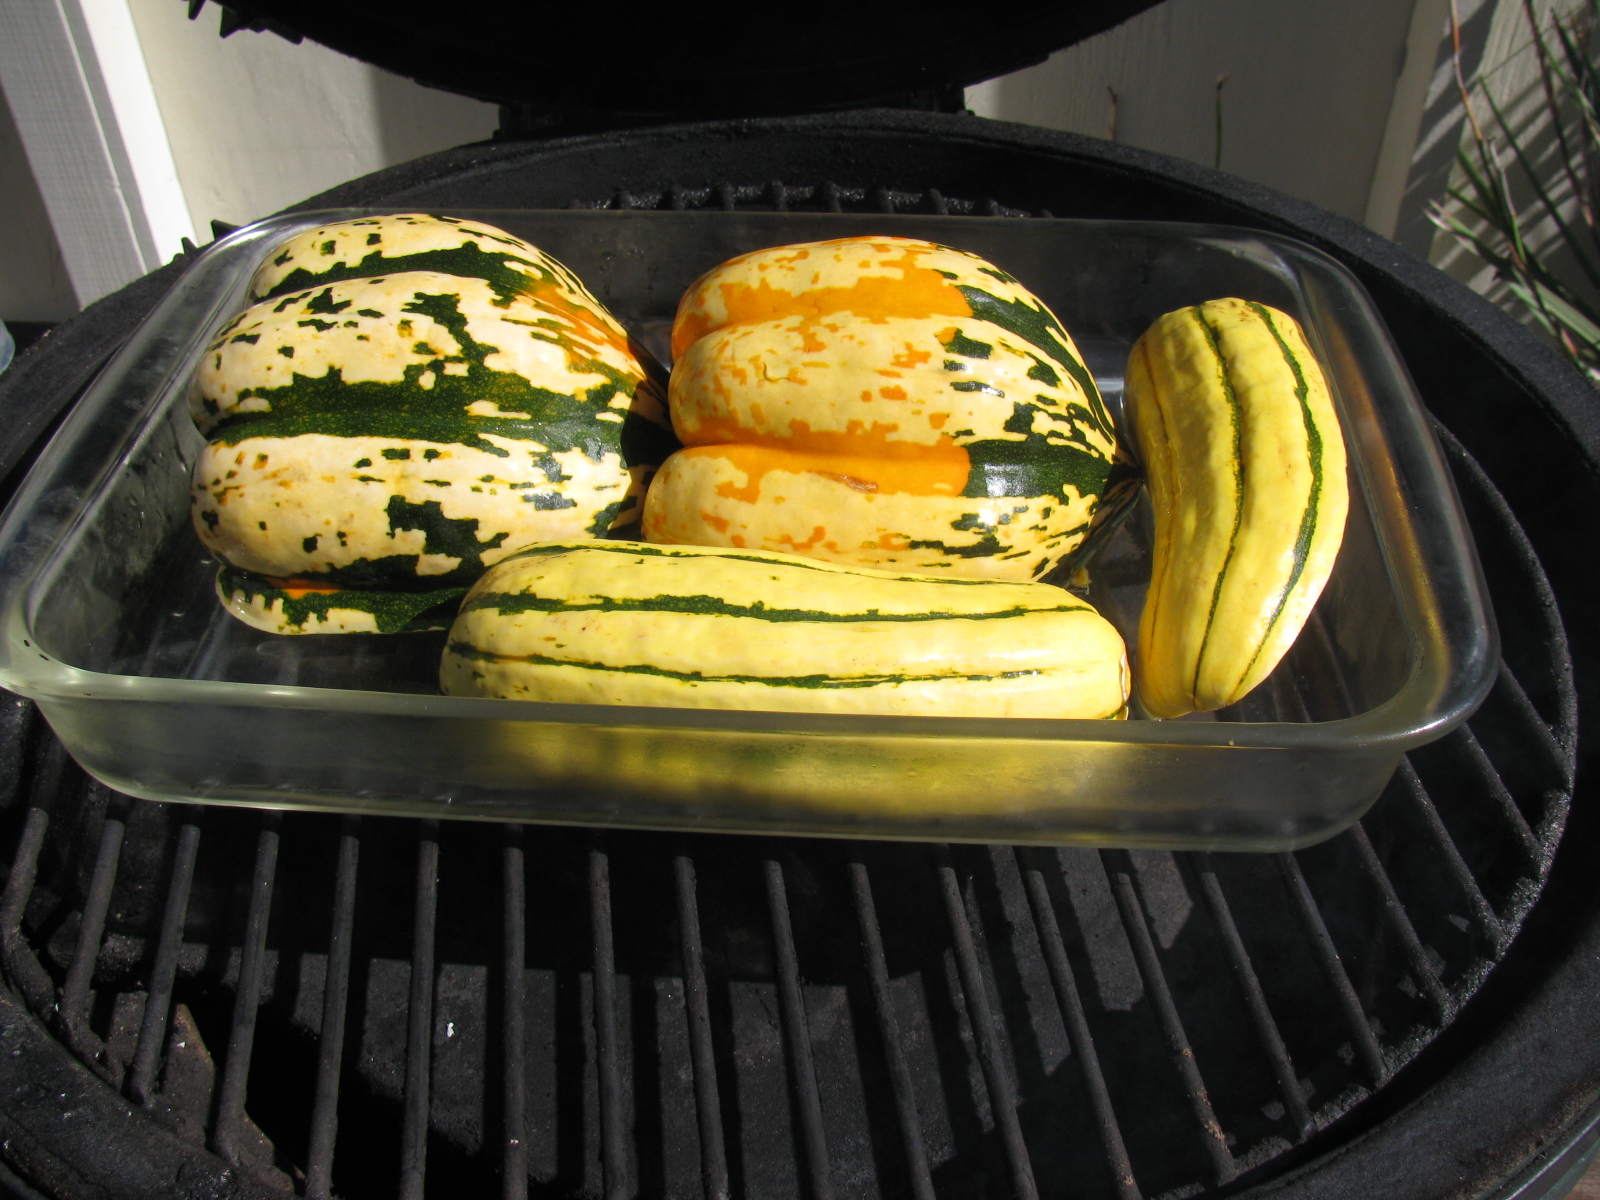
For the last several weeks I have seen a pile of colorful winter squash at the local grocery store, and wanted to roast some in my Big Green Egg. So I finally tried this, using a recipe from food.com. It is simple to make and very tasty when smoke-roasted on the BGE.
The original recipe can be found here.
Here are some pictures of how I did my Sunday dinner. . .

Two types of winter squash

Squash cut length-wise, seeds removed and placed in a Pyrex baking dish with some boiling water. Bake/roast for about 35 minutes at 350 to 375 degrees F.

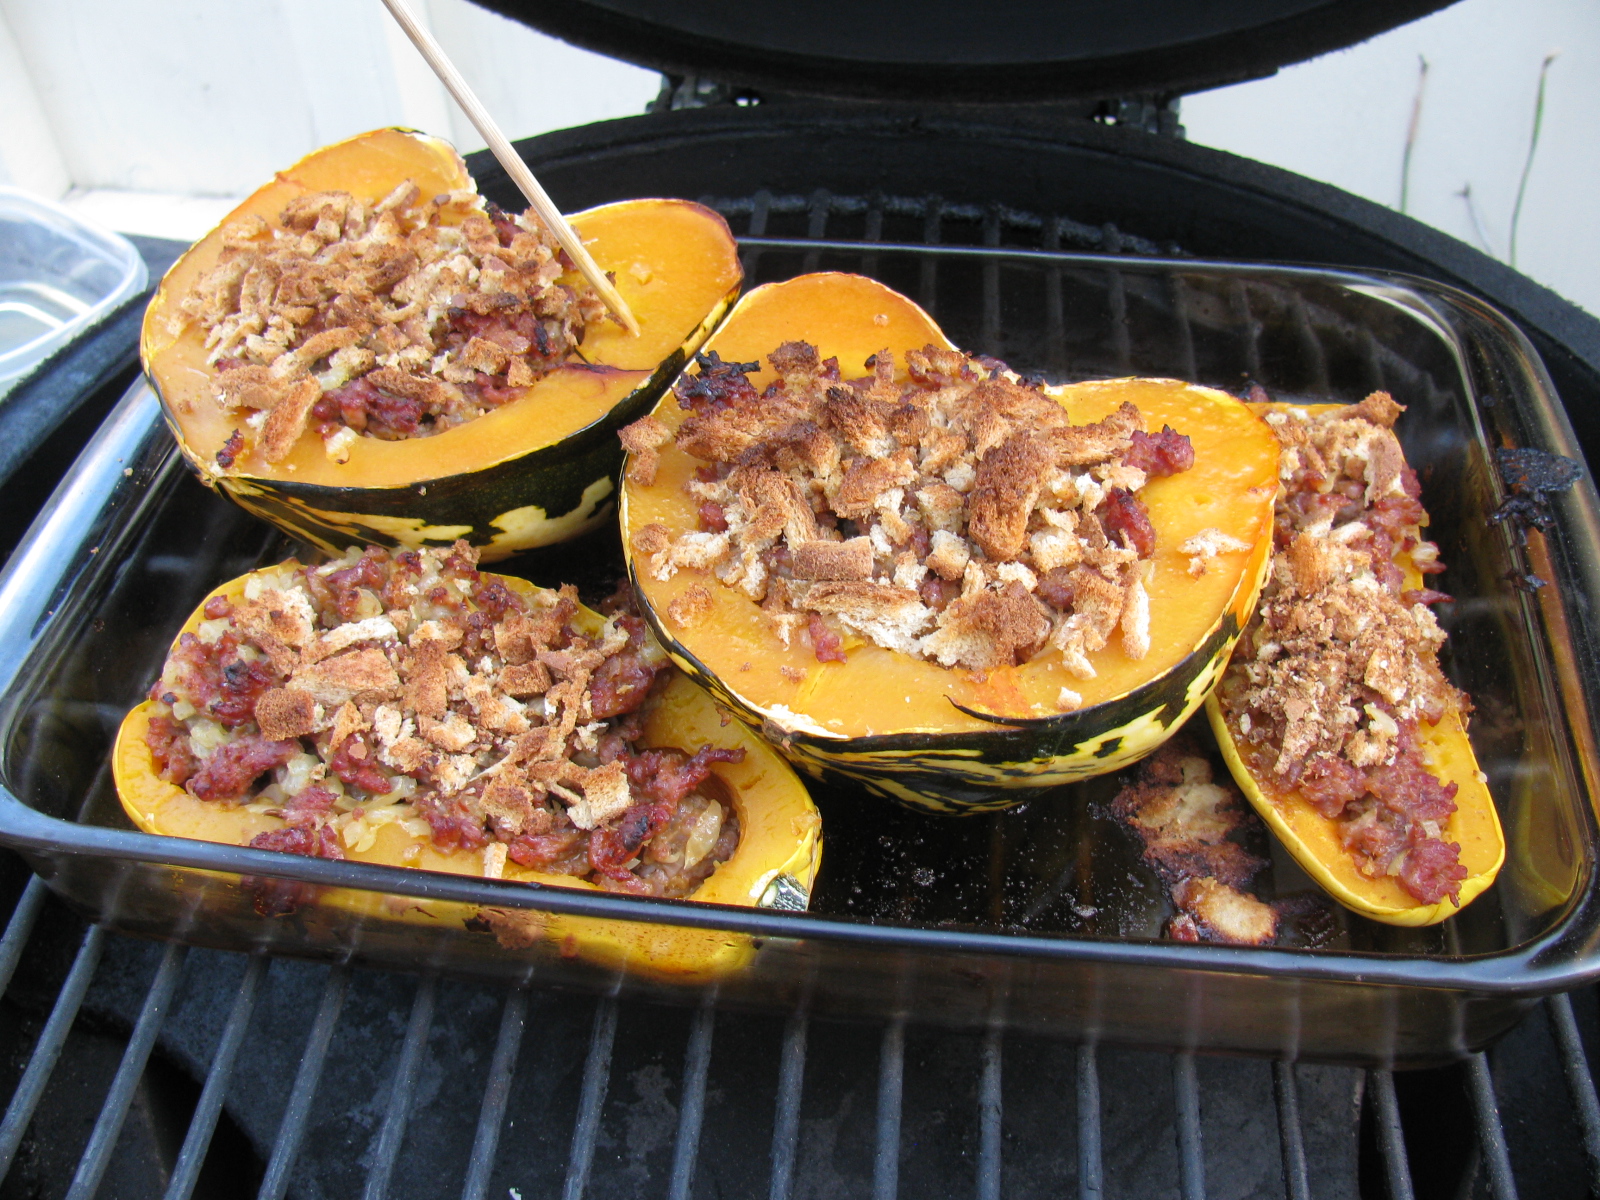
Remove the squash and stuff with (cooked) sausage, onion and bread crumb mixture. . .

Back on the grill and continue baking for another 20 minutes – or until done. Poke the squash with a skewer or fork to verify doneness.

Stuffed squash 1 – done.

Stuffed squash 2 done.
The smoke flavor, the tender squash and the pork sausage go very well together – Give this simple recipe a try, it’s mighty tasty!
Great announcement from Paper Transport in Green Bay, WI, USA. Nice mention of the Agility Fuel Systems and how their natural gas fleet is both cost-effective and clean. Click here to see the story….
Early last week, a co-worker bought a falafel plate for lunch. That made me want some all week long. Since do not like to fry foods in my kitchen (too messy) I wanted to try making some on my Big Green Egg.
I searched for a recipe and found this one on a great site called The Shiksa in the Kitchen. It is a traditional recipe, and shows some great pictures of the process, including frying them. I thought this might just work. . . . >>> Click here to see the Shiksa in the Kitchen recipe for traditional falafel.
But it did not turn out as well as I thought. I ate them anyway, but there just was not enough spice. I wanted the cumin and pepper to stand out a lot more. And it was too mushy on the inside – even after almost an hour of baking. I used my recipe for tzaziki sauce. >>> Click here for an interesting beef recipe and the yogurt-dill-cucumber sauce called tzaziki on the BGE forum.
Here are some pictures of this edible but failed attempt. . .
-

-
Traditional falafel mixture.
-

-
Falafel on the Big Green Egg Oven!
-

-
Falafel balls – about 2 tablespoons placed on a non-stick pizza pan.
-

-
Big Green Egg with Platesetter, “legs down,” and Big Green Egg Pizza Stone.
-

-
About 50 minutes at 350 degrees F. Nice and brown, but still mushy on the inside – too moist.
-

-
Falafel balls in pita bread, with tzaziki sauce.
Just a few seconds ago, I found this oven baked version for falafel on a site called Cookie and Kate: I might try this falafel recipe next time I fire up the BGE.
The past weekend was a busy one indeed. I made some time to participate in the microwave contest, dragging my rig out to the bluff overlooking the Bolsa Chica Wetlands and then to El Segundo. The 10 GHz and Up Contest is unique, since it spans over two weekends, the first part is in mid-August and the second part near the end of September. This gives participants a chance to fix broken rigs and continue to add points to their scores.
To be honest, I was not prepared for this contest. I did not have any roving plans, my Prius was not modified to supply my 7 watt 10 GHz rig with power and my mobile radio was not programmed with any of the liaison / coordination frequencies. However, I managed to have some fun testing out my homemade 10 GHz (X-band) rig.
I noticed something during the contest: I was afraid of killing the 12V battery on the Prius, so I left the car on and “ready” during the entire contest. I turned off the air conditioner and the courtesy light. As with normal operation, the gasoline engine will only run when it is needed to charge the system, including the 300V (or whatever voltage it is) traction battery.
Since the rig draws 10 amps in transmit, and transmitting a continuous signal for “beaconing” so that other stations can find me is a routine practice in microwave contesting, I was worried that something might happen to the Prius power system.
However, the car seemed to be fine, and the rig was happy to run under full DC power, producing a clean signal and no “unlock” condition. The engine did start up and ran for less than one or two minutes at a time, and the engine is so quiet, sometimes I did not notice it was on.
Using the Prius as a power system worked out so well that I will eliminate my spare battery idea and mount a power connector on the battery box lid so I can use the DC to power station equipment for the next contest. I have a 100 Ah gel cell battery in a big plastic box that I usually use for radio contesting, so it is independent from the car power system – but I discovered the battery was dead and was not holding a charge when preparing for the Disaster Expo – that is another story. . .
Since I operated from these two locations before, I don’t have too many pictures of these places, but these will give you some idea of what operating a rover station in the 10 GHz contest is like. Well, not really.
My un-official score for about 5 hours of operating time is:
1900 QSO Points + 3341 Distance Points = 5241 Final Score
Best DX is 217 km, when I worked K6NKC and KC6UQH in DM12rr (East San Diego County) from El Segundo, DM03tw
The most fun and challenging contact happened to be my last contact. It was a two-way CW contact with WA6JBD in DM14go (not sure where), from the El Segundo water tower location.
Of the 29 total contacts made, 19 were unique callsigns
Here are some pictures . . .
-

-
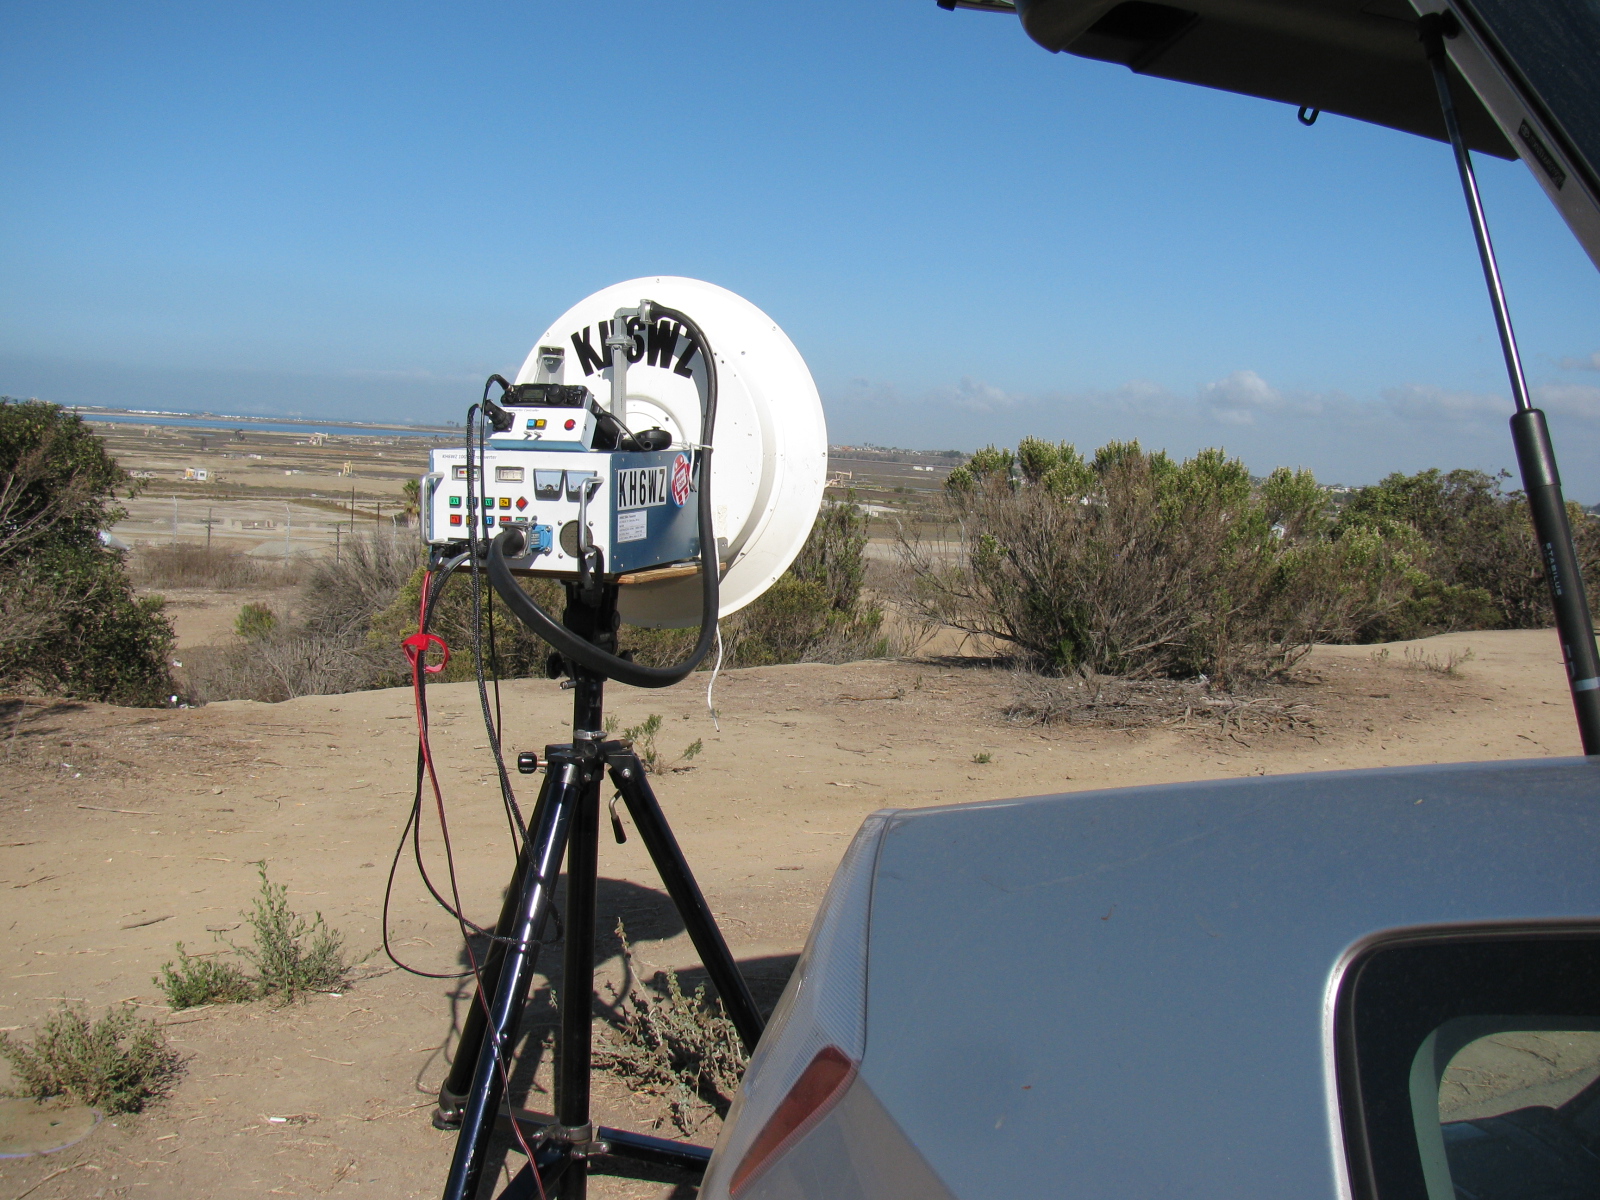
The first stop – KH6WZ in DM03xq – Huntington Beach, CA
-

-
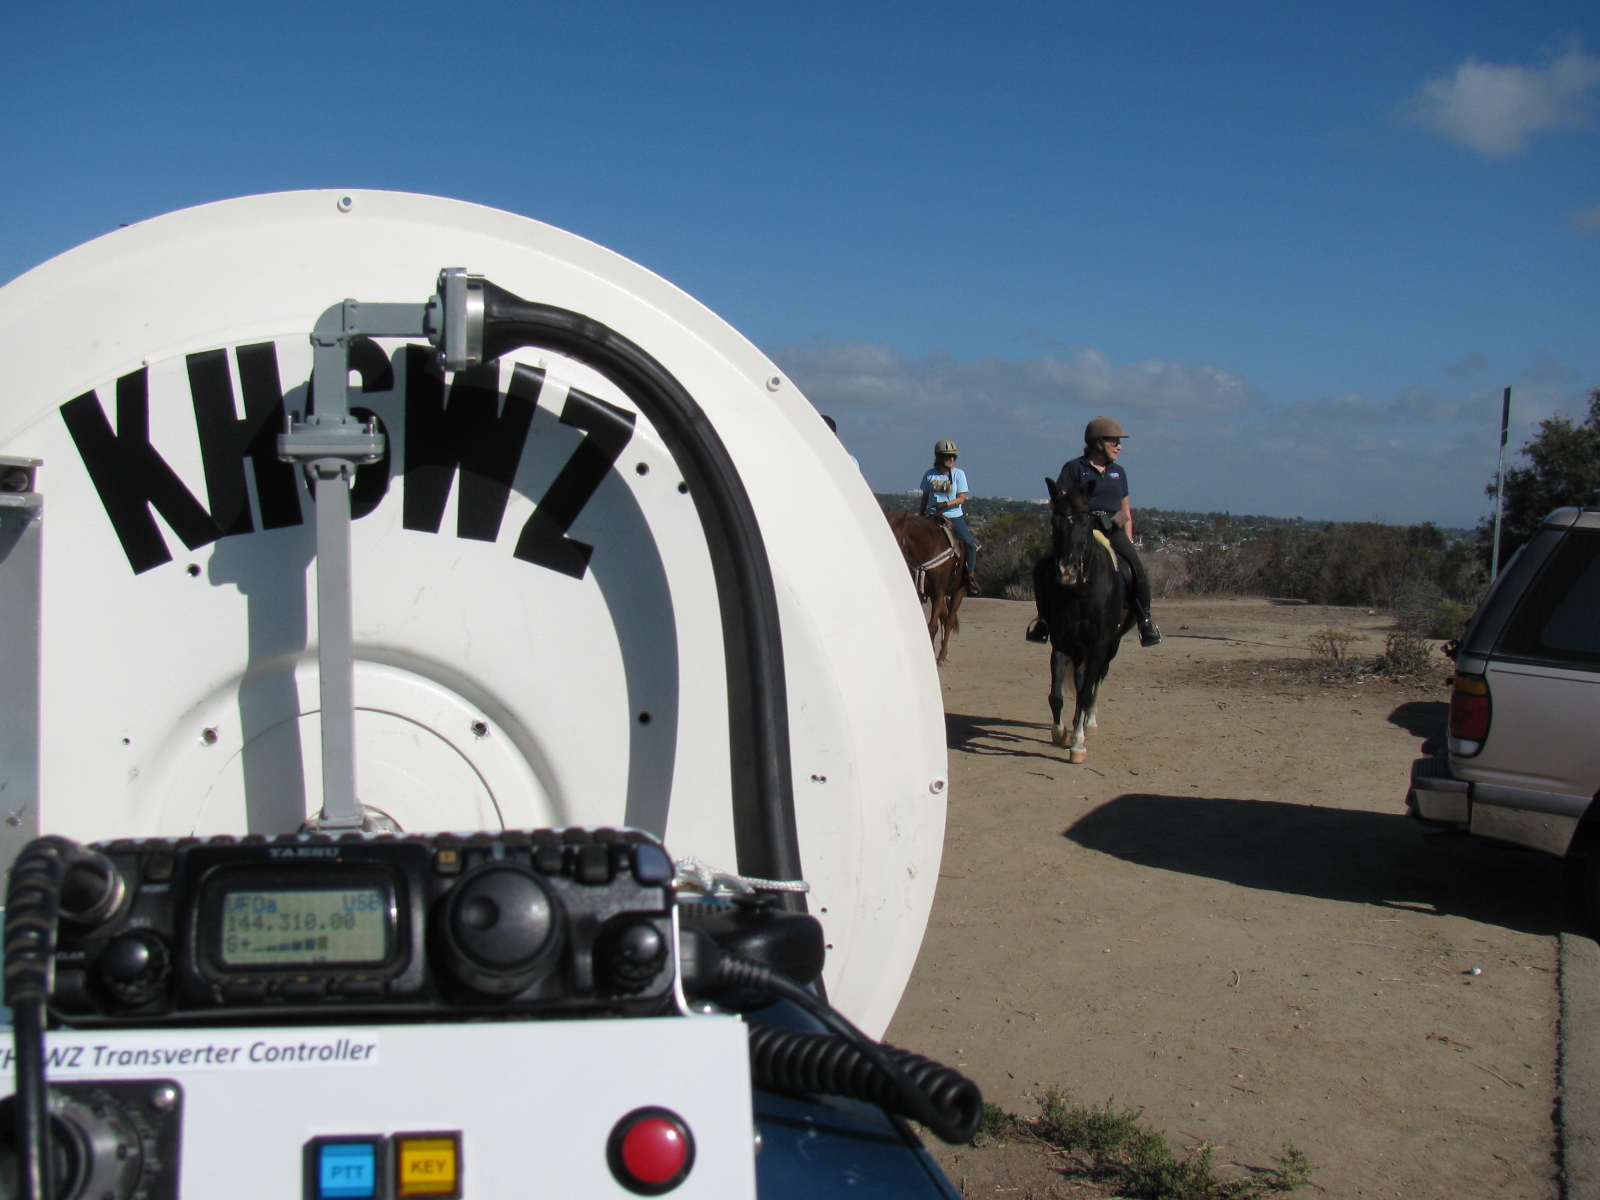
Some human as well as four-legged visitors to the Huntington Beach location. Take a look at the FT-817 S-meter and notice how the N6CA beacon (Frazier Mt., DM04ms) is booming in.
-

-
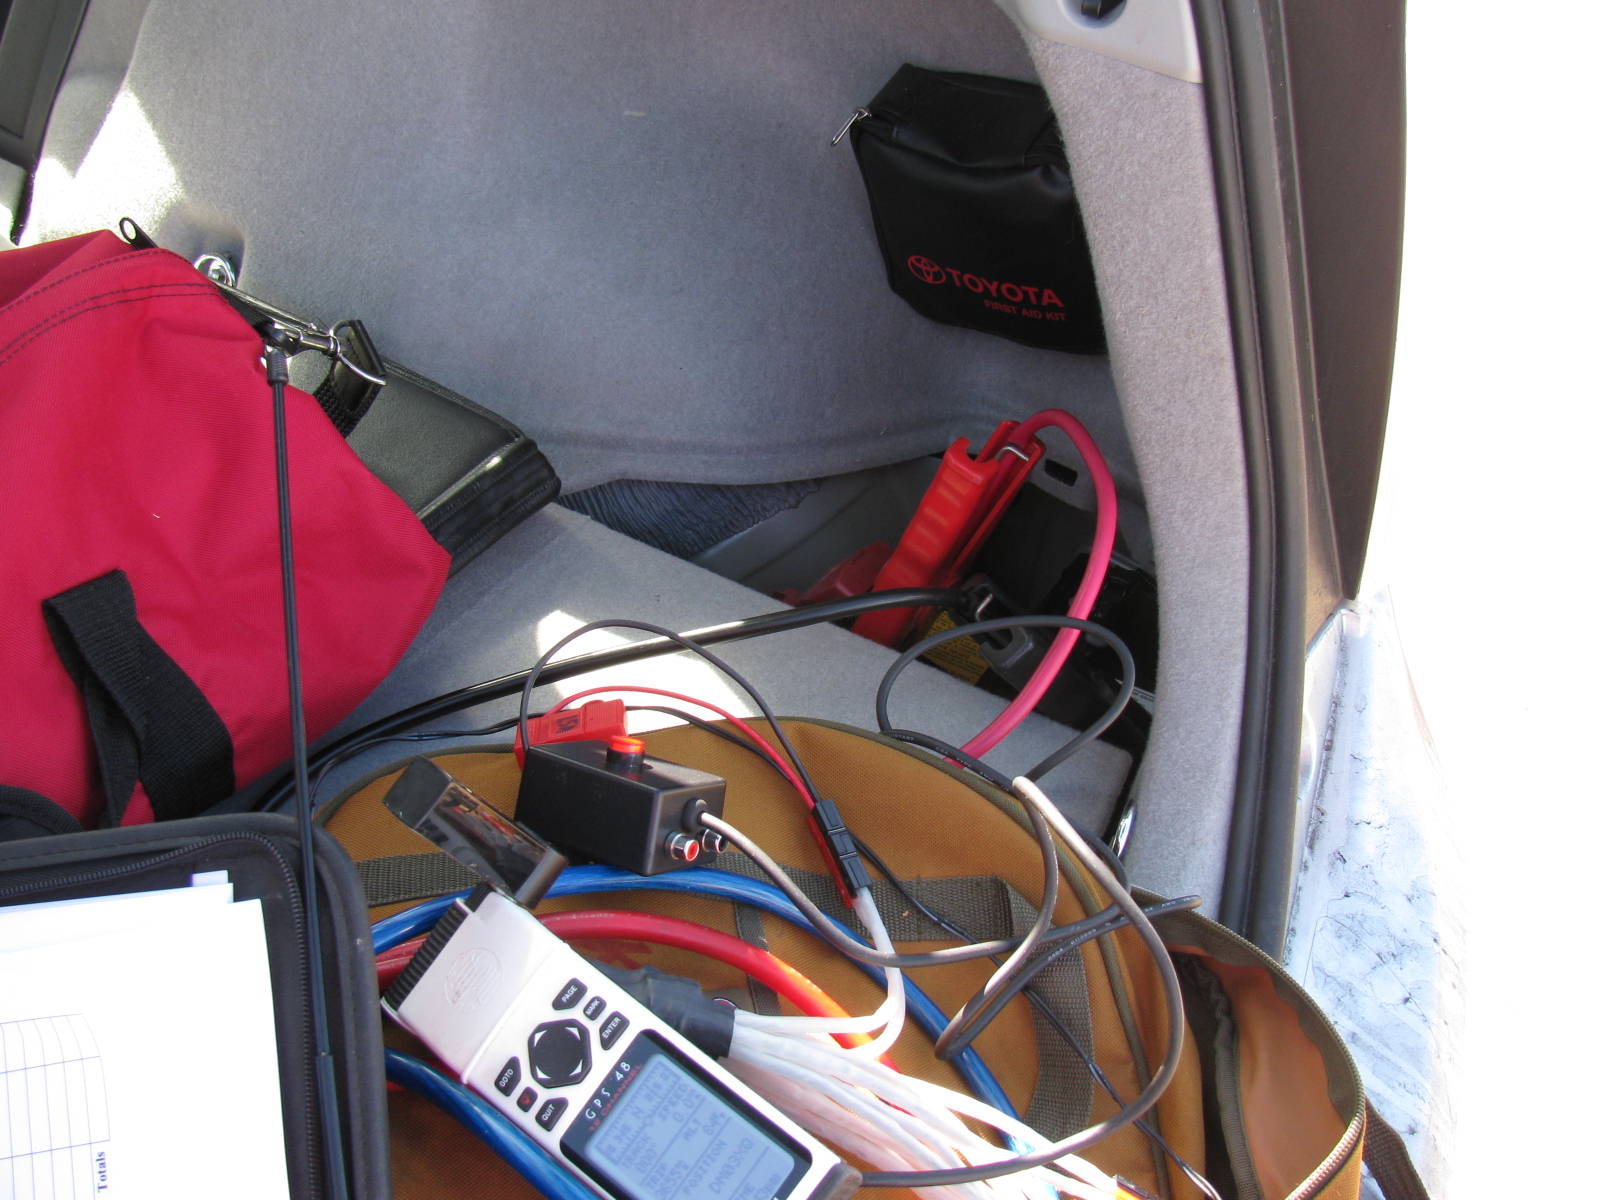
Battery jumper cables clipped onto the little 12V gel-cell in the back of the Prius supplied power to the station, which draws about 10 amps on transmit.
-
-
I really need to do something about the operating position inside the Prius. Yaesu FT-60, old Garmin GPS and the log sheets thrown in the back of the car.
-

-
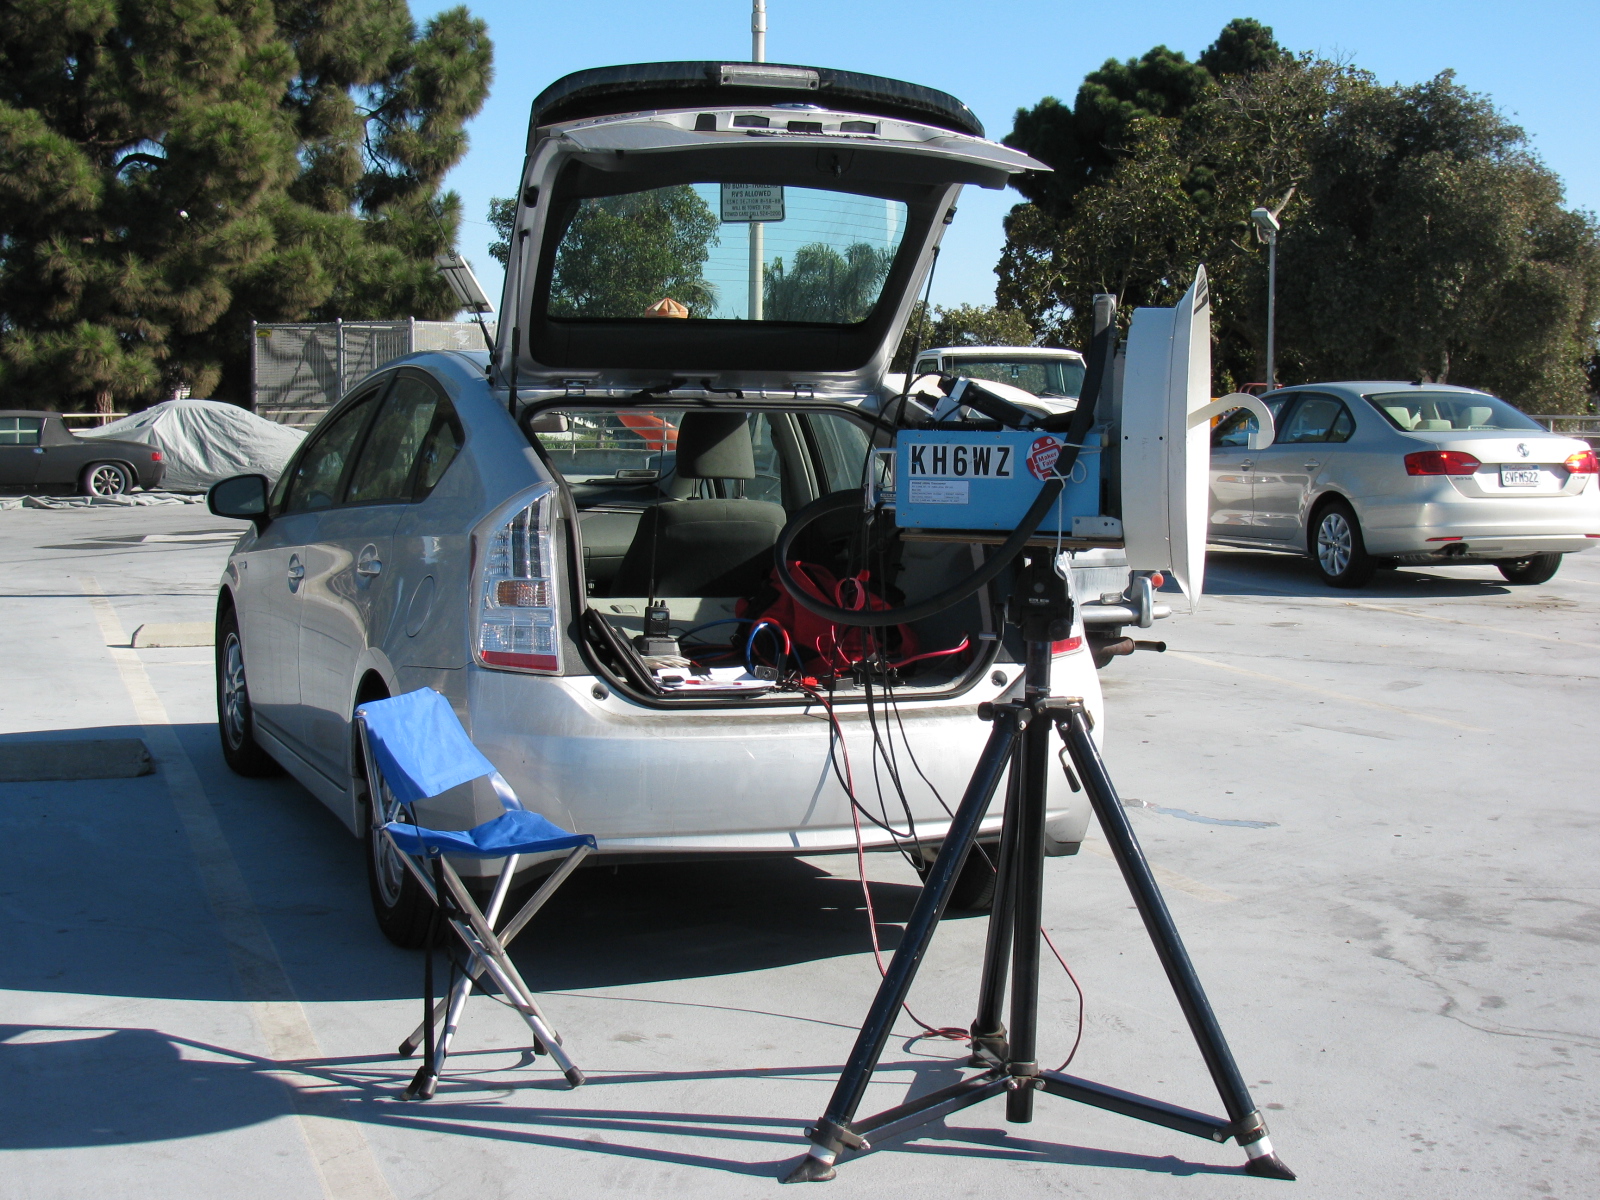
This is the second of two stops on contest Sunday. El Segundo, DM03tw. This is the top of a parking structure for a park, for some reason I never took note of the name. It is easy to find, just look for the water tower.
-

-
The KH6WZ station at DM03tw. The camping chair is more comfortable than it looks.

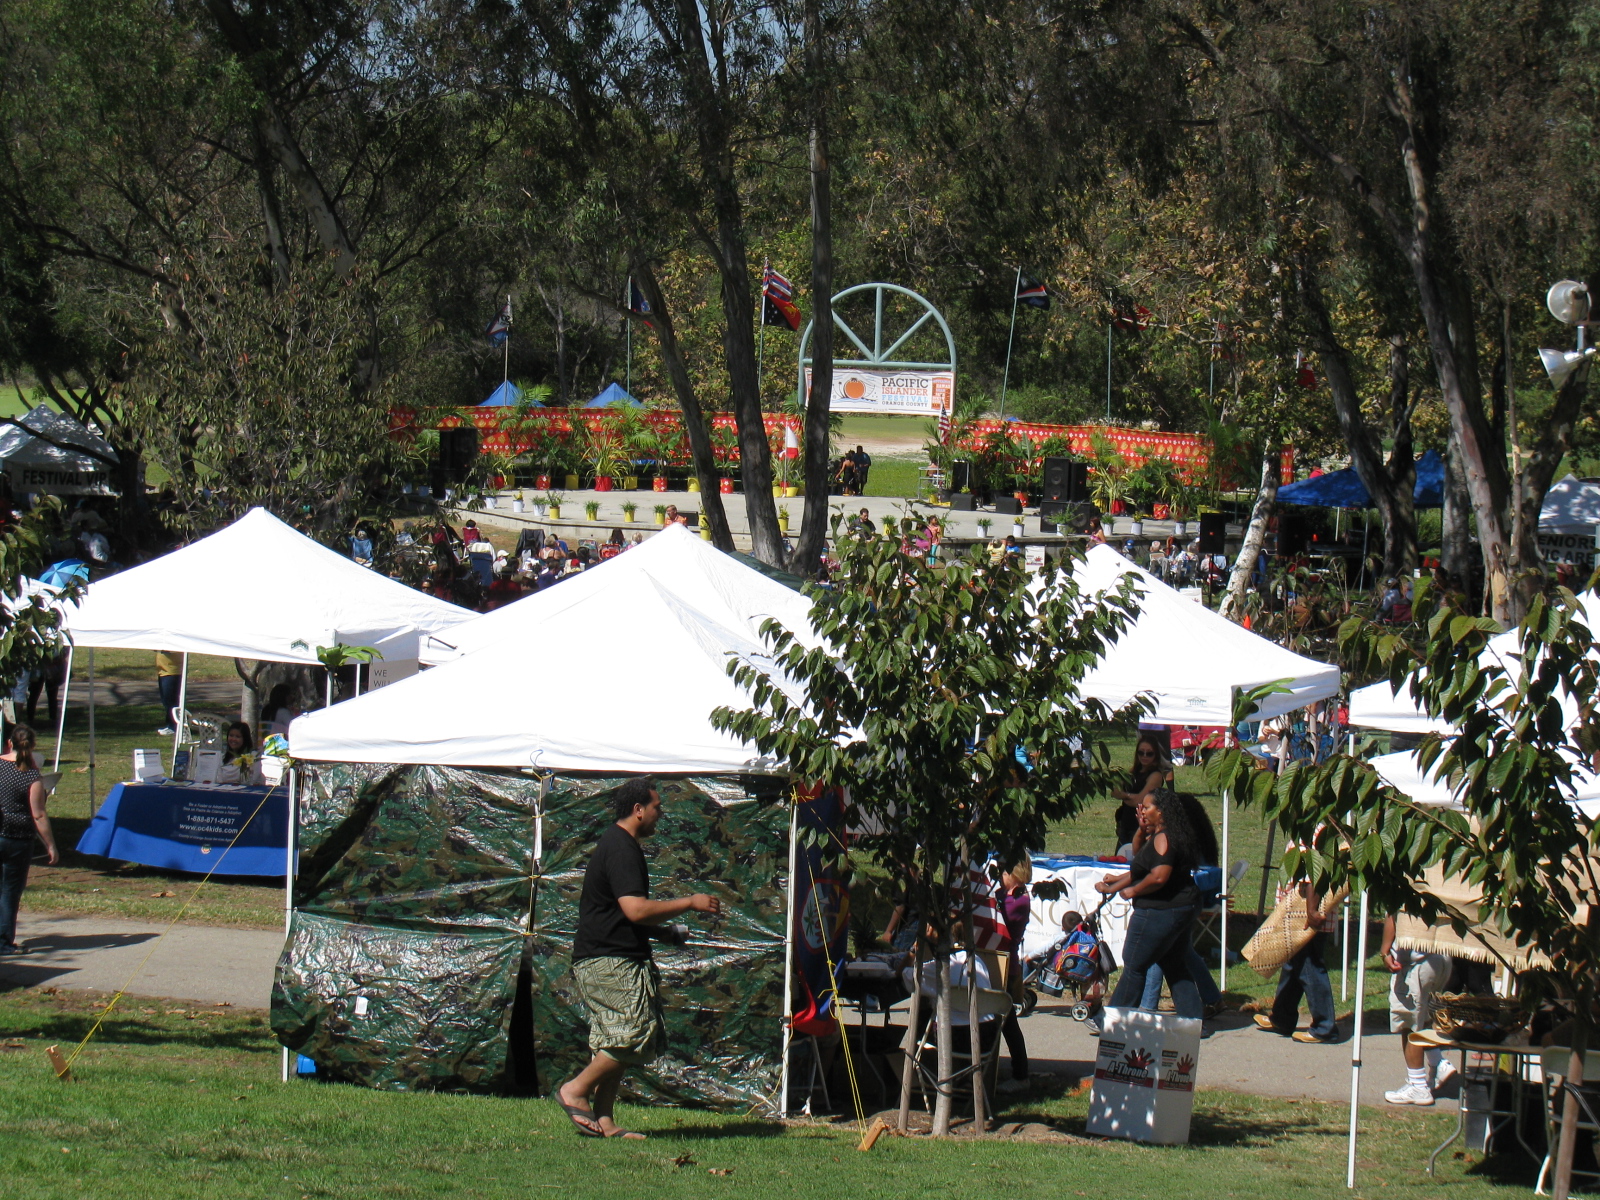
The disaster Preparedness Expo at the Huntington Beach Central Library on September 21 coincided with the Pacific Islander Festival Orange County. It was the 6th annual event…. I stopped to take some pictures and bought a t-shirt, but didn’t stay to watch the programs. There was plenty of exotic foods and displays.
The Huntington Beach events website said, “This fantastic event is meant to be spent among “friends”. The hospitality of the California’s island people originating from Polynesia, Guam, Hawaii, Samoa, Tonga, Tahiti, Aotearoa, Northern Marianas, Belau, Marshall Islands, Micronesia, and Fiji, is undeniably alluring and enchanting, as you’ll see when you come to the free Polynesian fest. . . . ”


Looks like I should visit this event next year. Aloha.